|
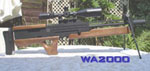
Candymans WA2000 build |
|||||||||||||||||||||||||||||||||||||||||||||||||||||||||||||||||||||||||||||||||||||||||||||||||||||||||||||||||||||||||||||||||||||||||||||||||||||||||||||||||||||||||||||||||||||||||||||||||||||||||||||||||||||||||||||||||||||||||||||||||||||||||||||||||||||||||||||||||||||||||||||||||||||||||||||||||||||||||||||
|
|
|||||||||||||||||||||||||||||||||||||||||||||||||||||||||||||||||||||||||||||||||||||||||||||||||||||||||||||||||||||||||||||||||||||||||||||||||||||||||||||||||||||||||||||||||||||||||||||||||||||||||||||||||||||||||||||||||||||||||||||||||||||||||||||||||||||||||||||||||||||||||||||||||||||||||||||||||||||||||||||
|
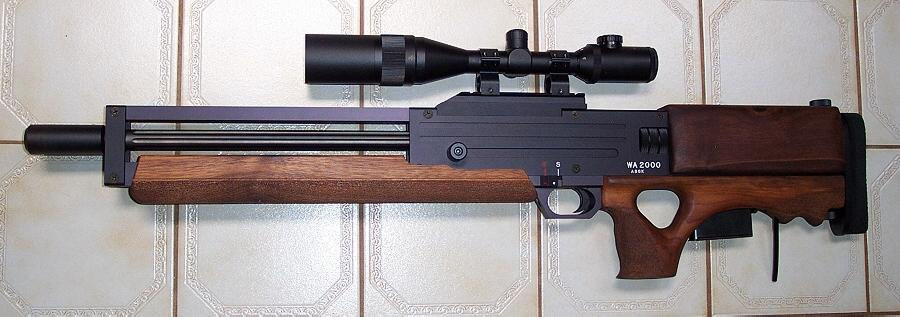
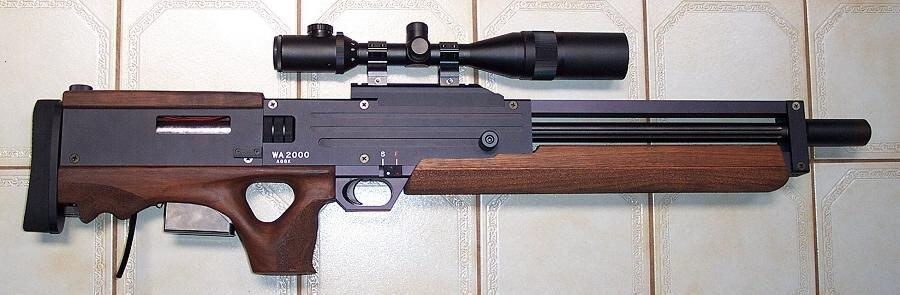
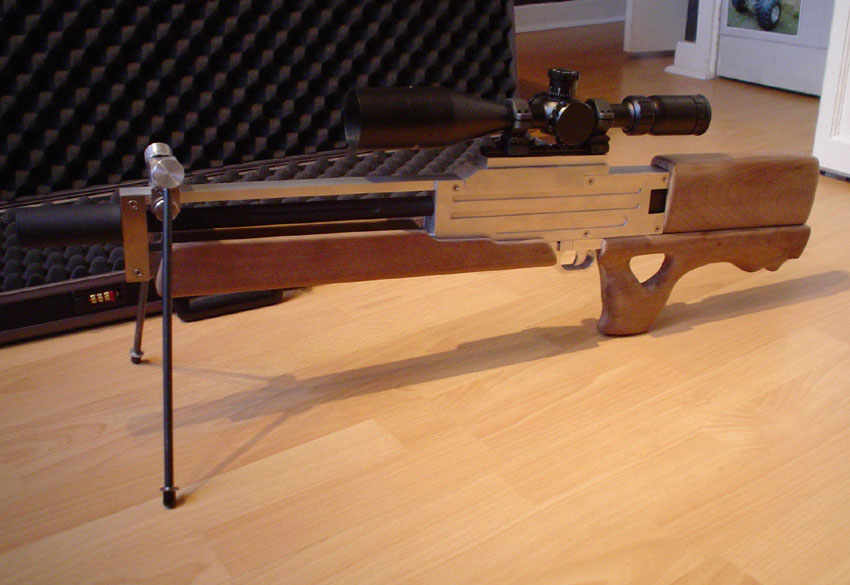
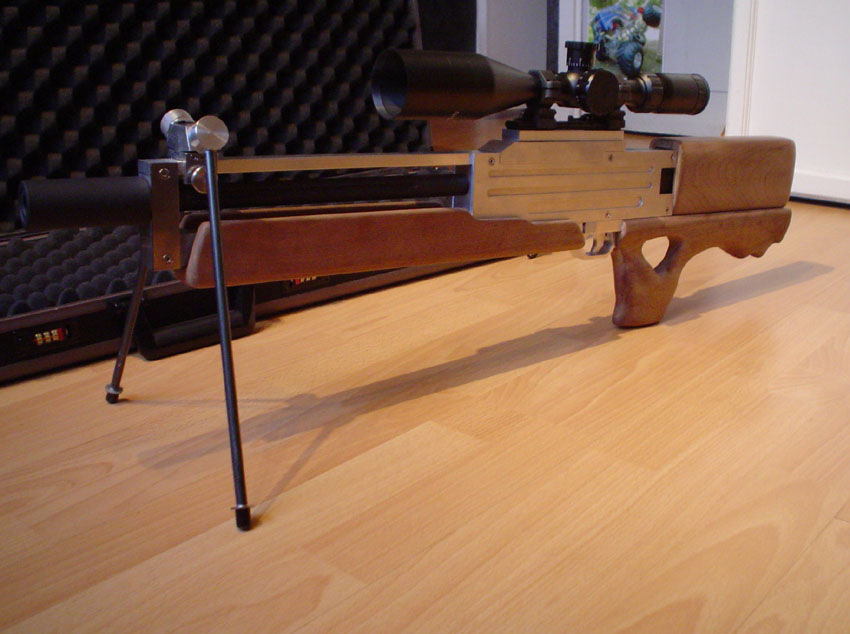
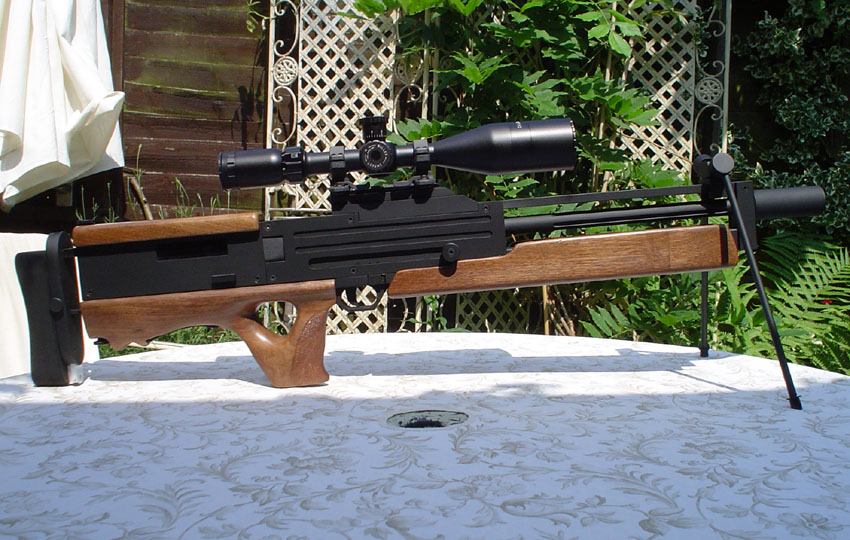
The plan This is an Asahi WA2000 airsoft replica, they are pretty rare, I had an opportunity to buy one a for £2000 but after much deliberation I decided this was just too much money. So after hunting through the internet I came across xgeox's site, he had built a replica from scratch and it looked pretty good. I had considered building one before this but thought the task was a bit big. I have been making radio controlled monster truck chassis for a couple of years, but I think its now time for a new project! This all stems from playing Hitman on the PC where this gun is the sniper rifle of choice. Needless to say the hitman version is called a W2000 and is yet another "hybrid" with subtle differences from the original. I think the Geneth version (spring cocking, cheaper made, based on ASP2 internals) has V/A 2000 on the side of it, looks likea dodgy number plate, I guess Walther wouldnt allow the licence to them either.
|
||||||||||||||||||||||||||||||||||||||||||||||||||||||||||||||||||||||||||||||||||||||||||||||||||||||||||||||||||||||||||||||||||||||||||||||||||||||||||||||||||||||||||||||||||||||||||||||||||||||||||||||||||||||||||||||||||||||||||||||||||||||||||||||||||||||||||||||||||||||||||||||||||||||||||||||||||||||||||||
|
|
|
||||||||||||||||||||||||||||||||||||||||||||||||||||||||||||||||||||||||||||||||||||||||||||||||||||||||||||||||||||||||||||||||||||||||||||||||||||||||||||||||||||||||||||||||||||||||||||||||||||||||||||||||||||||||||||||||||||||||||||||||||||||||||||||||||||||||||||||||||||||||||||||||||||||||||||||||||||||||||||
|
Progress
|
||||||||||||||||||||||||||||||||||||||||||||||||||||||||||||||||||||||||||||||||||||||||||||||||||||||||||||||||||||||||||||||||||||||||||||||||||||||||||||||||||||||||||||||||||||||||||||||||||||||||||||||||||||||||||||||||||||||||||||||||||||||||||||||||||||||||||||||||||||||||||||||||||||||||||||||||||||||||||||
|
In
my head
|
|||||||||||||||||||||||||||||||||||||||||||||||||||||||||||||||||||||||||||||||||||||||||||||||||||||||||||||||||||||||||||||||||||||||||||||||||||||||||||||||||||||||||||||||||||||||||||||||||||||||||||||||||||||||||||||||||||||||||||||||||||||||||||||||||||||||||||||||||||||||||||||||||||||||||||||||||||||||||||||
| It seems to me that if your going to make something then you should pull out all the stops and do a bloody good job. The last thing you want at the end of a project thats taken months is to have people say "mmm yeh.... thats nice", be much better to spend twice as long on it and get a "WOW!" reaction. Dont be fooled into thinking you need a machine shop to build something like this, with complex machinery you also need the skills to use it. A lot of jobs can be done without specific machines, its just gonna take 2 or 3 times as long. Patience is essential, ive always had these ideas in my head but until very recently I havn't had the patience to implement it...... maybe im getting old now?!? aaagghhhh! | |||||||||||||||||||||||||||||||||||||||||||||||||||||||||||||||||||||||||||||||||||||||||||||||||||||||||||||||||||||||||||||||||||||||||||||||||||||||||||||||||||||||||||||||||||||||||||||||||||||||||||||||||||||||||||||||||||||||||||||||||||||||||||||||||||||||||||||||||||||||||||||||||||||||||||||||||||||||||||||
|
How
to
|
|||||||||||||||||||||||||||||||||||||||||||||||||||||||||||||||||||||||||||||||||||||||||||||||||||||||||||||||||||||||||||||||||||||||||||||||||||||||||||||||||||||||||||||||||||||||||||||||||||||||||||||||||||||||||||||||||||||||||||||||||||||||||||||||||||||||||||||||||||||||||||||||||||||||||||||||||||||||||||||
|
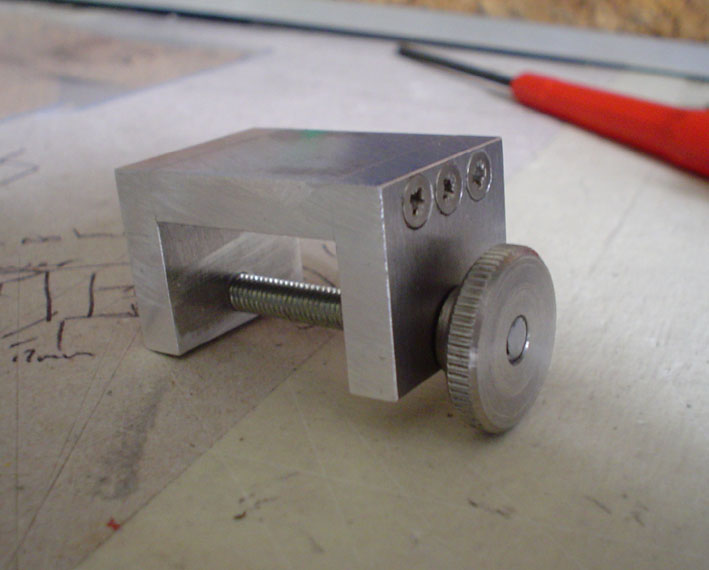
Tools being used are first and foremost a pillar drill, this is essential, not just for drilling straight holes at 90 degrees but also for drilling to consistent depths. A good strong vice, files (big and needle), a hacksaw and some wood work tools for the wood such as a saw, chisel and sandpaper. This are all the basics, I also have certain other tools that make the job so much easier. These are a dremel (actually mines made by JCB and seems pretty good) M3, M4 and M5 taps for cutting threads into the metal. A scroll saw, again not essential but handy, they are a little electric saw with a vibrating blade, you can cut 2,3mm ally with it so long as you lube it with WD40 and a few other odds and ends, cordless drill, etc. Given this limited arsenal I pick and choose my projects, try to plan how your going to build it, how you will make each piece. This took about 2 weeks of planning in my head, it seemed I could make about 90% ok, 5% with a question mark around it and the last 5% we'll work it out when we get there. |
|||||||||||||||||||||||||||||||||||||||||||||||||||||||||||||||||||||||||||||||||||||||||||||||||||||||||||||||||||||||||||||||||||||||||||||||||||||||||||||||||||||||||||||||||||||||||||||||||||||||||||||||||||||||||||||||||||||||||||||||||||||||||||||||||||||||||||||||||||||||||||||||||||||||||||||||||||||||||||||
|
The
build
|
|||||||||||||||||||||||||||||||||||||||||||||||||||||||||||||||||||||||||||||||||||||||||||||||||||||||||||||||||||||||||||||||||||||||||||||||||||||||||||||||||||||||||||||||||||||||||||||||||||||||||||||||||||||||||||||||||||||||||||||||||||||||||||||||||||||||||||||||||||||||||||||||||||||||||||||||||||||||||||||
|
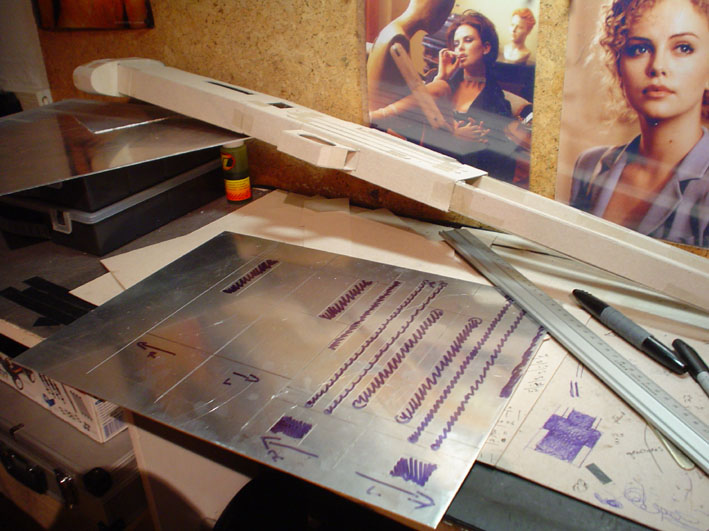
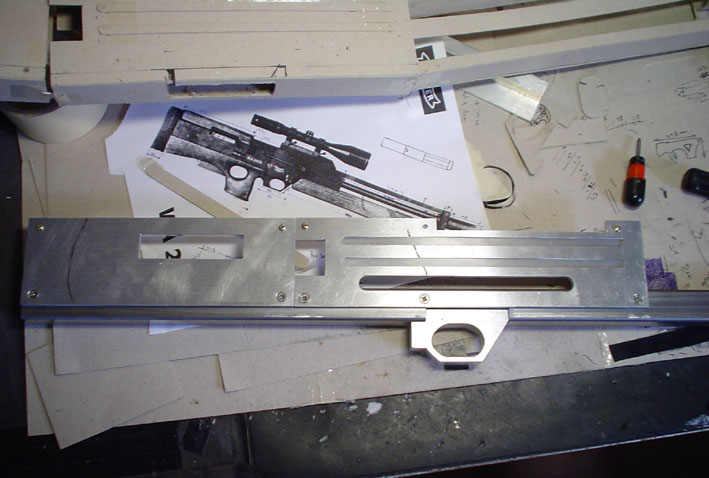
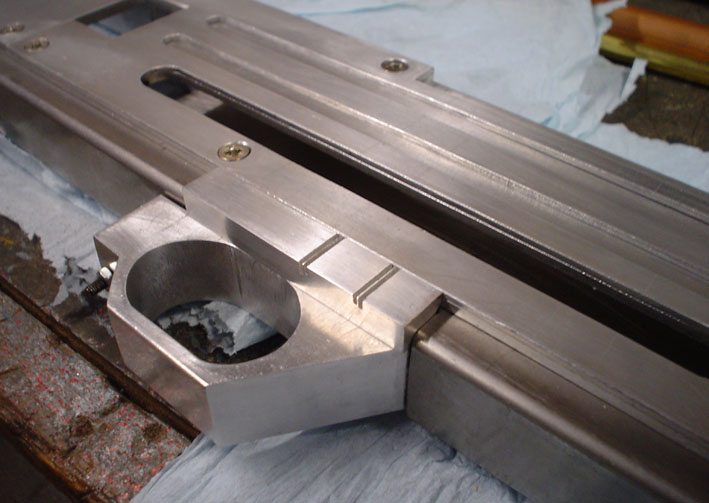
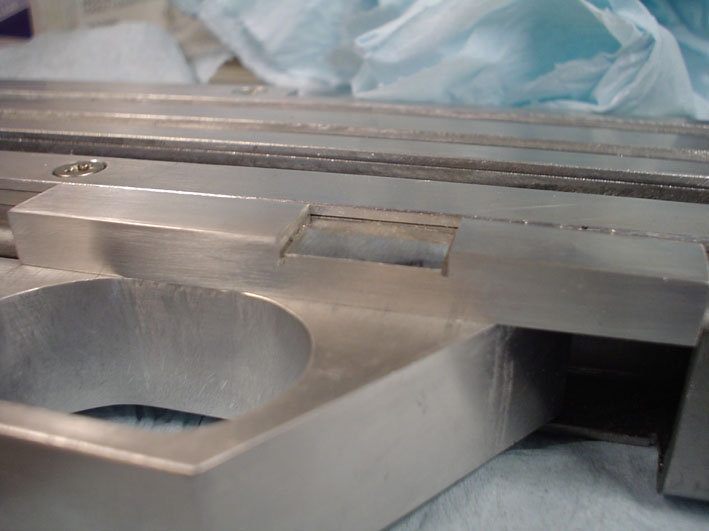
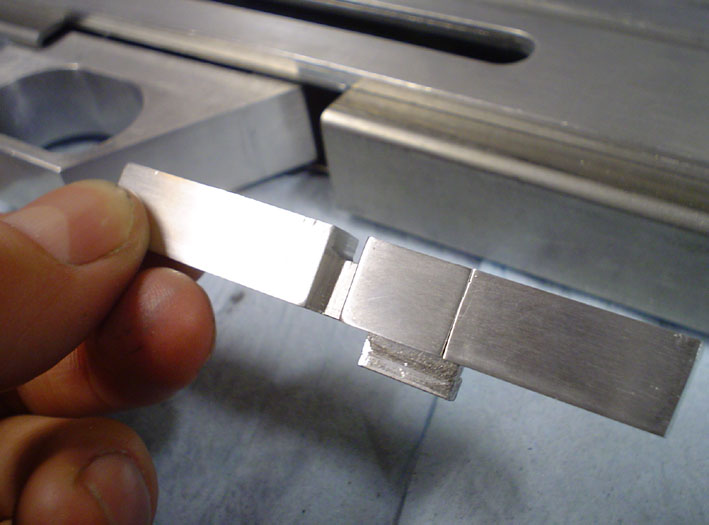
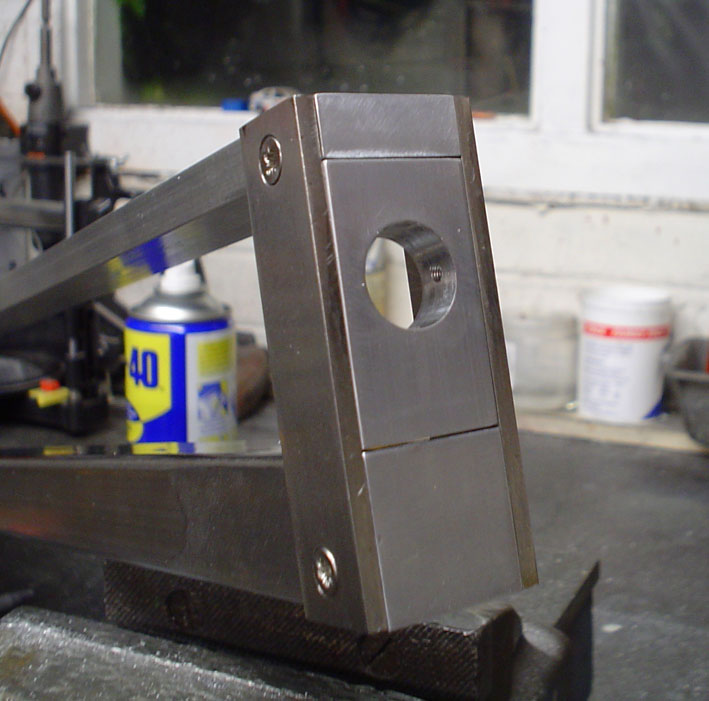
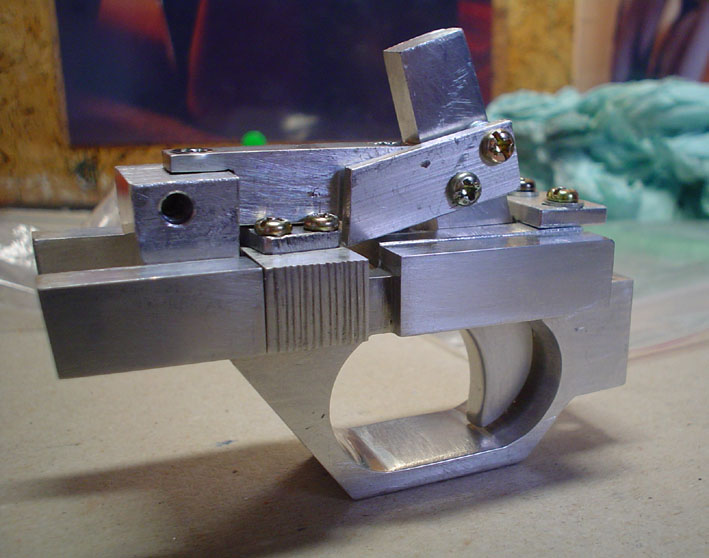
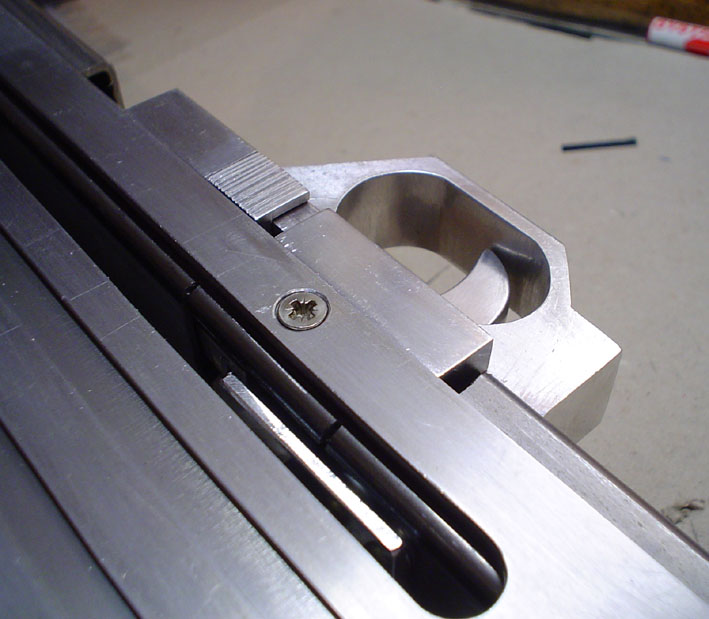
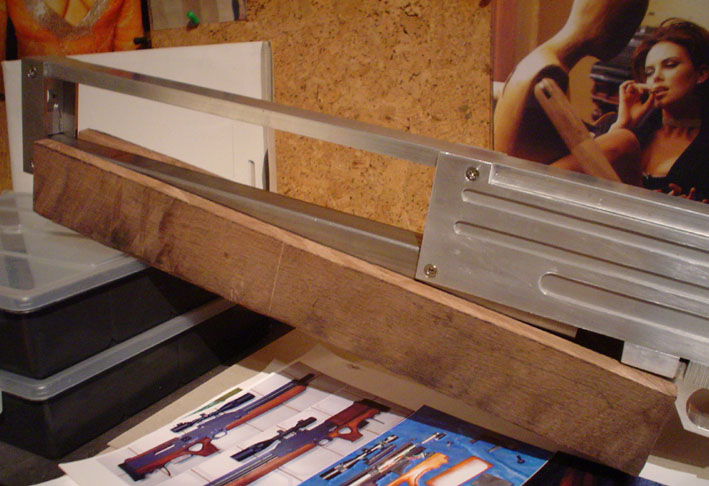
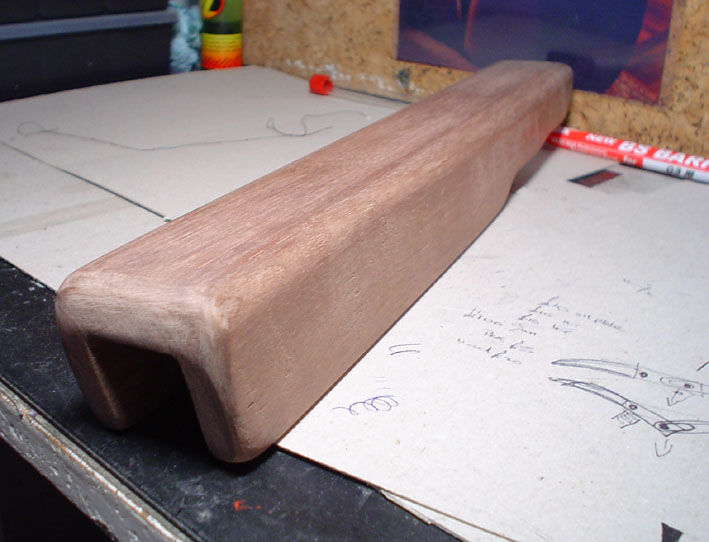
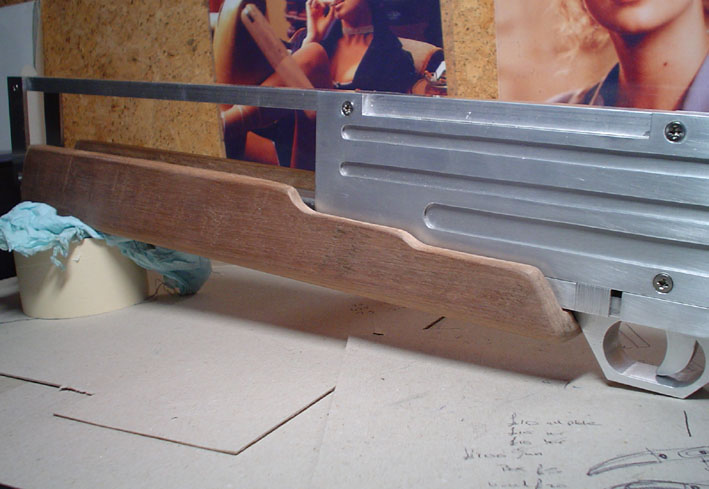
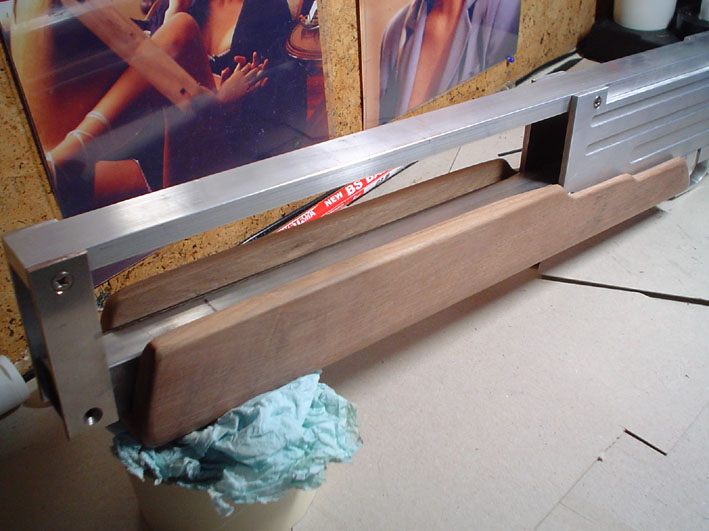
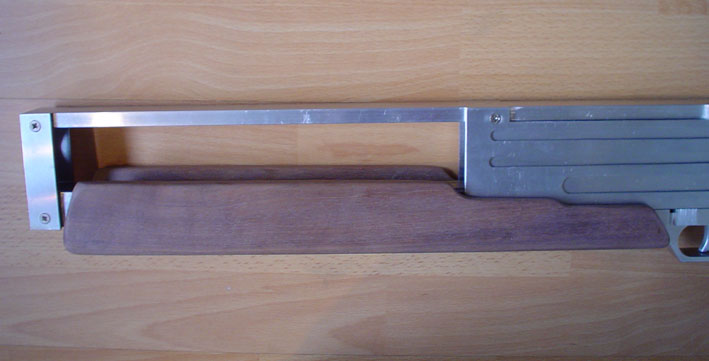
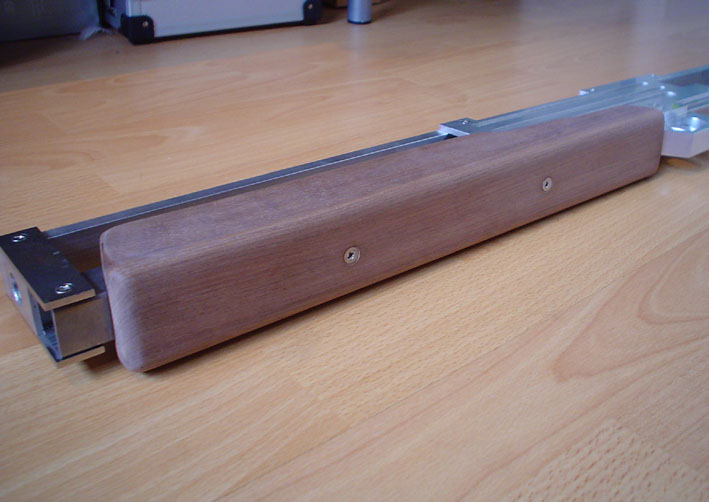
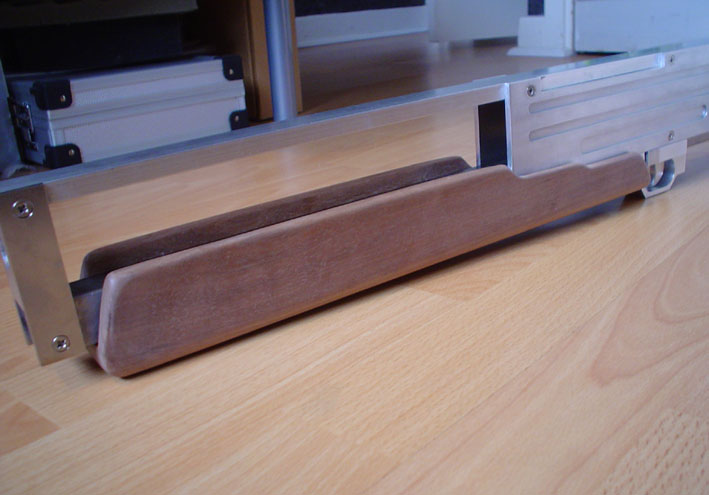
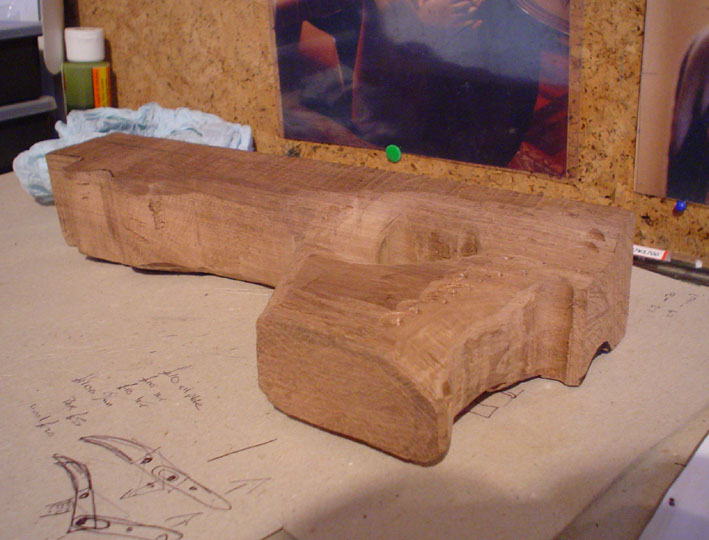
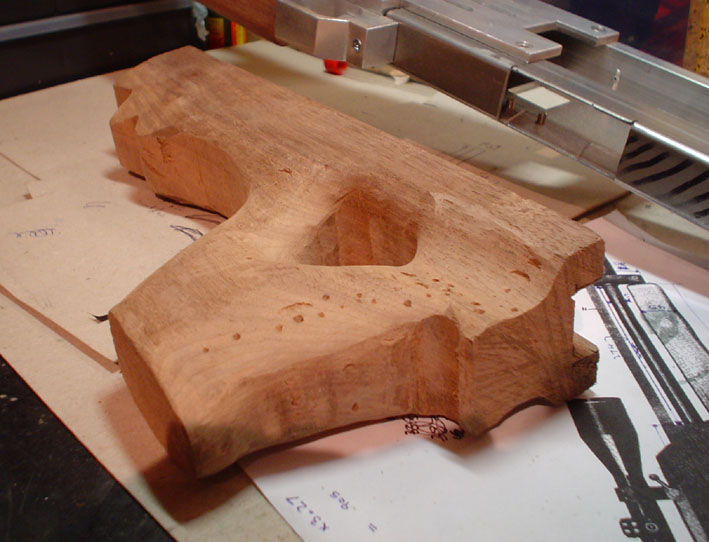
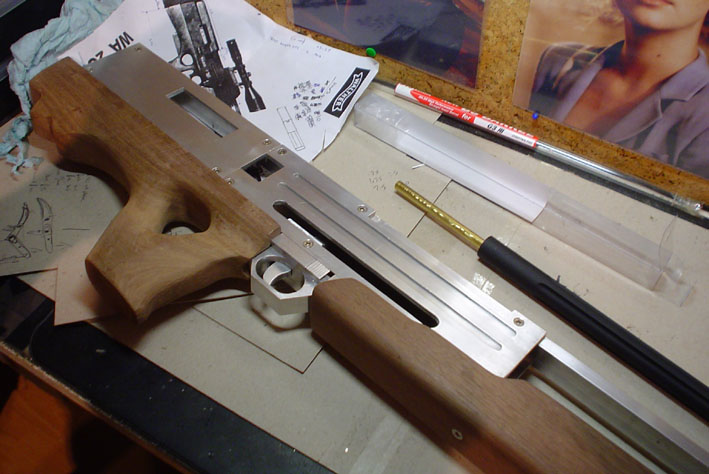
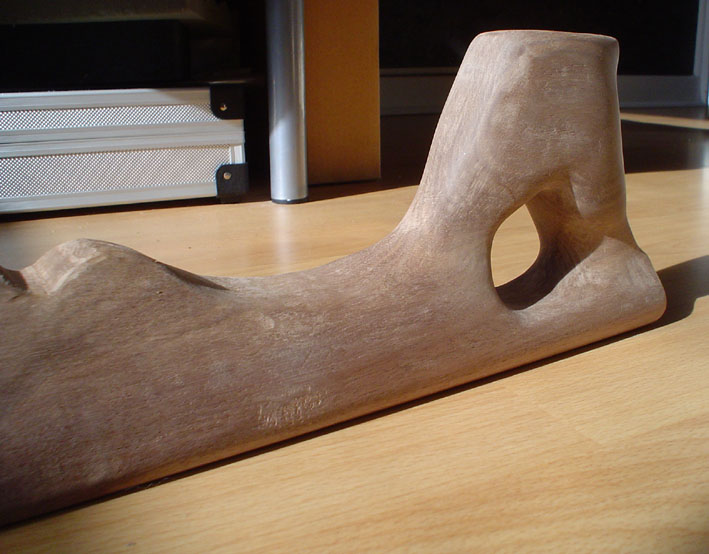
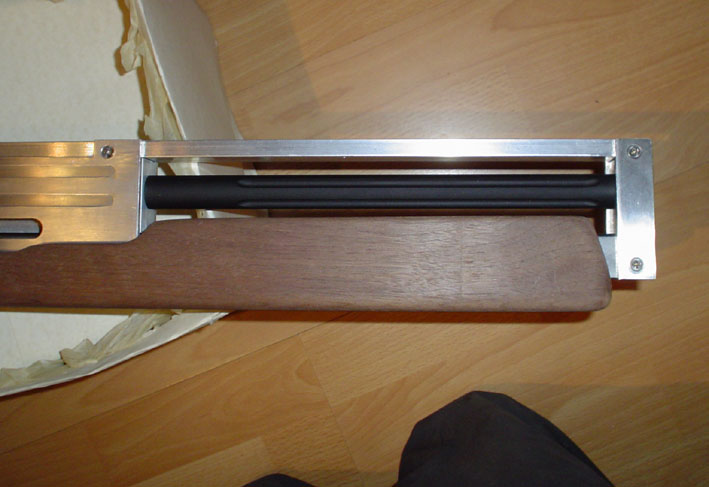
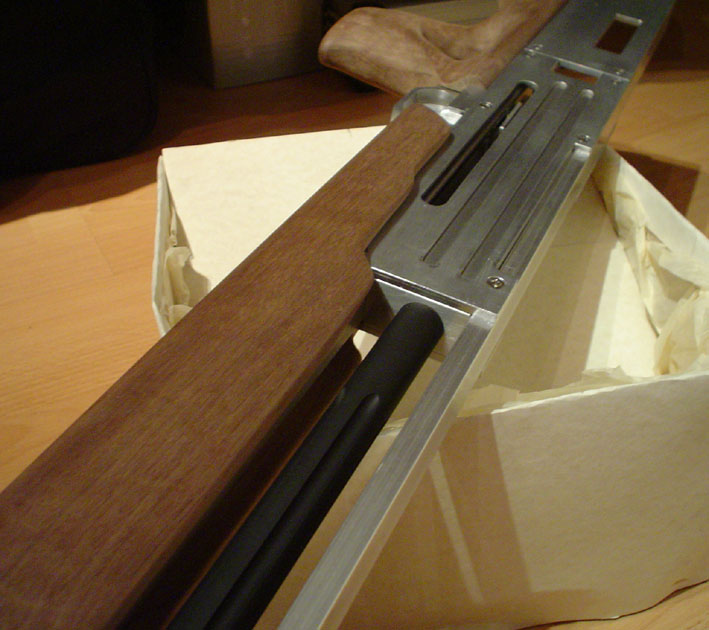
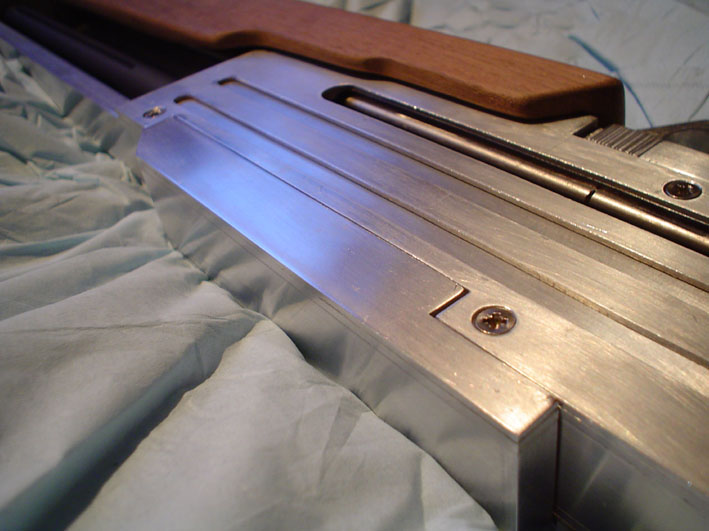
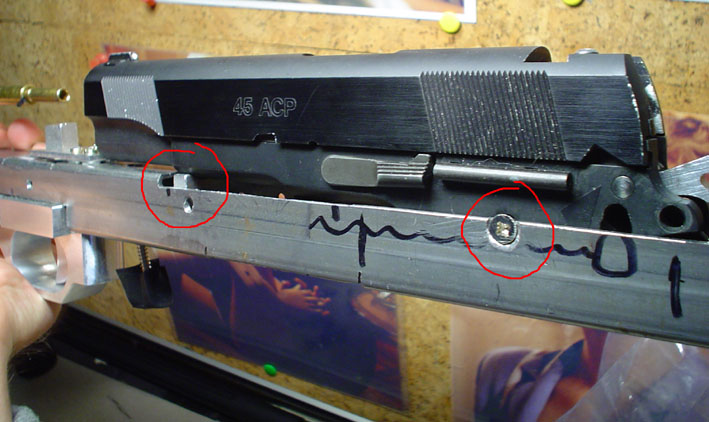
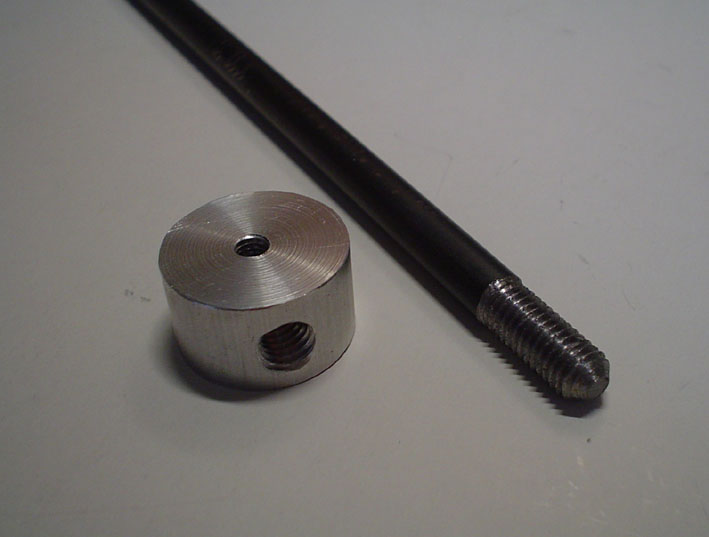
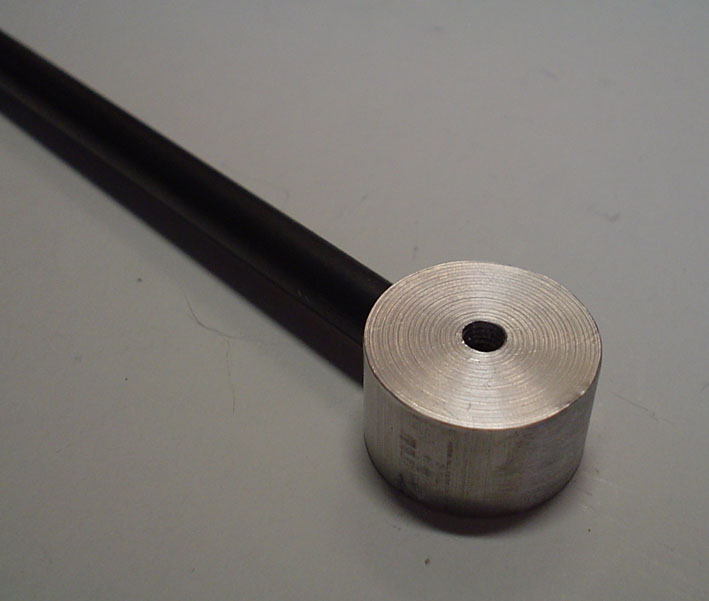
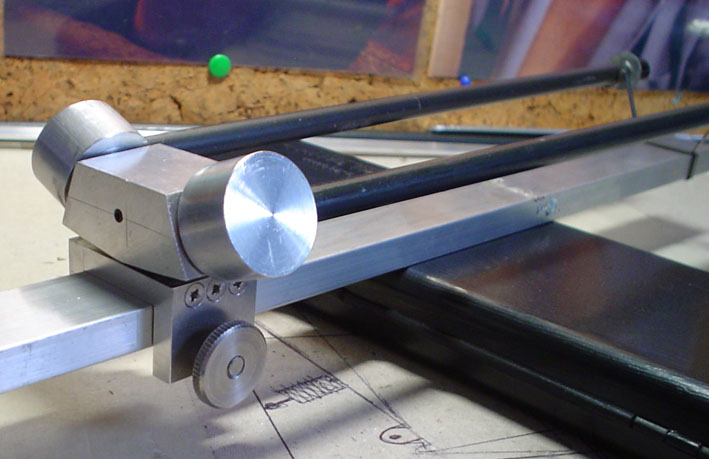
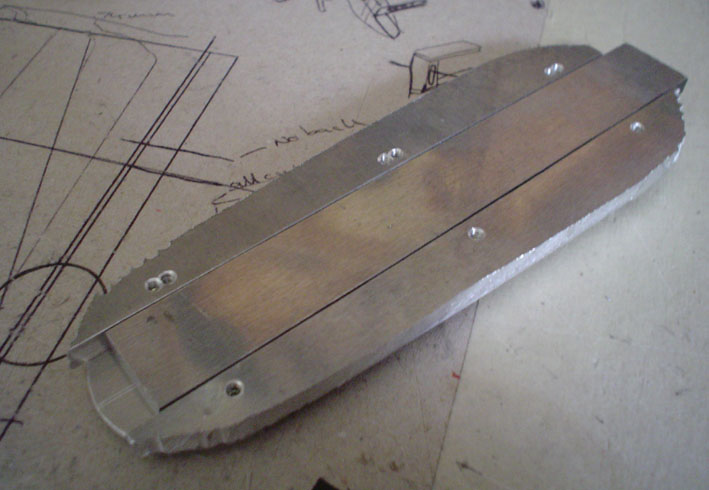
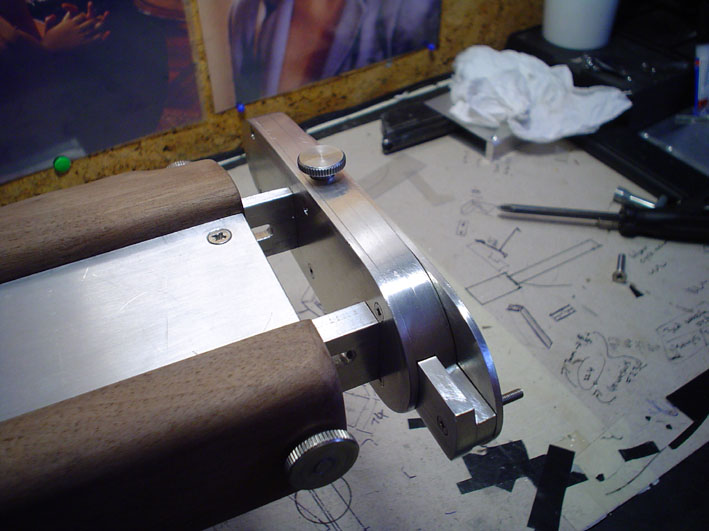
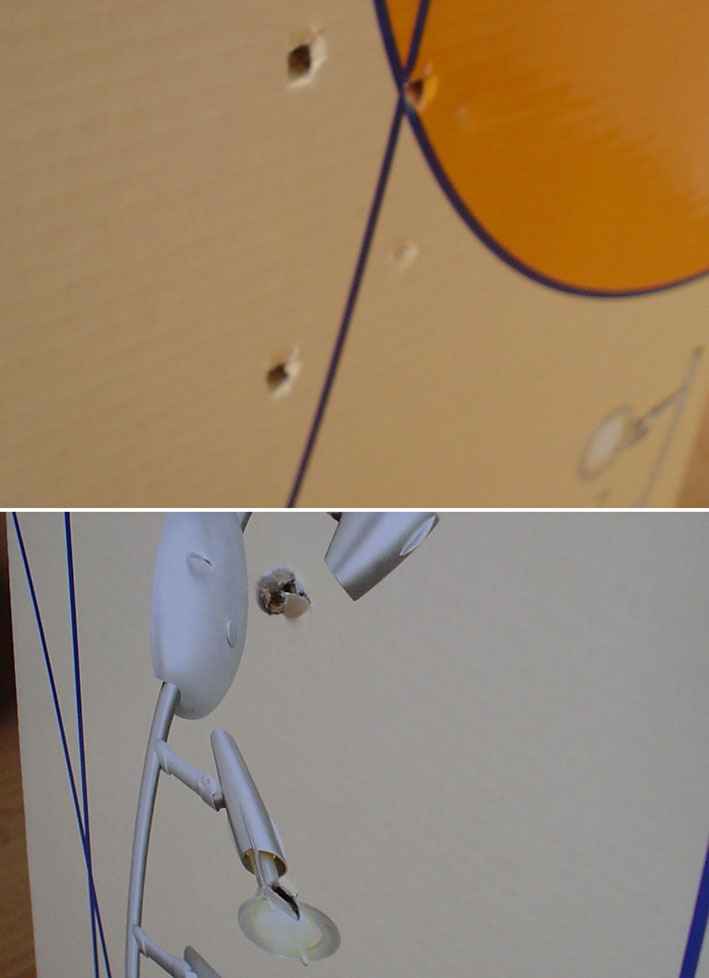
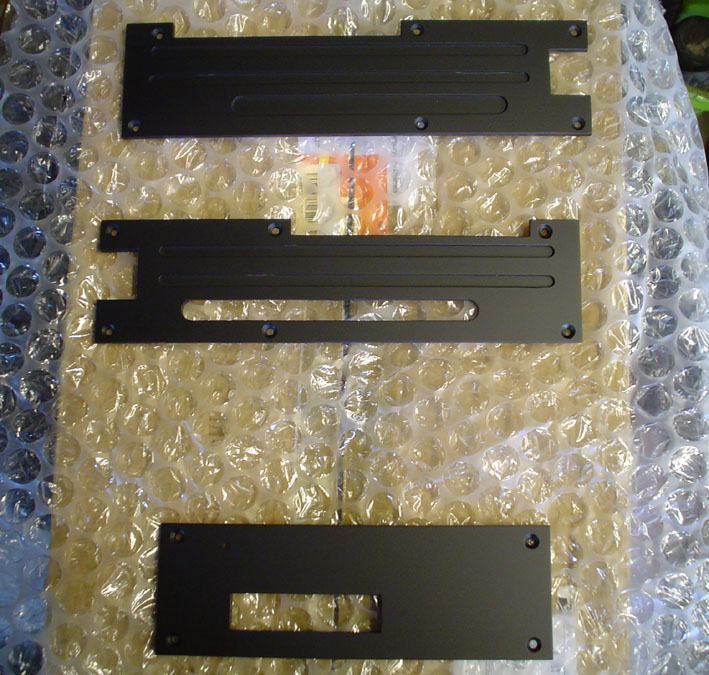
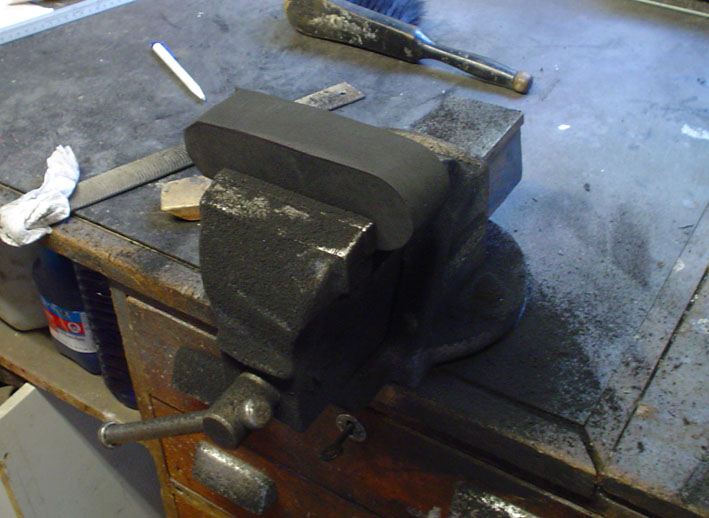
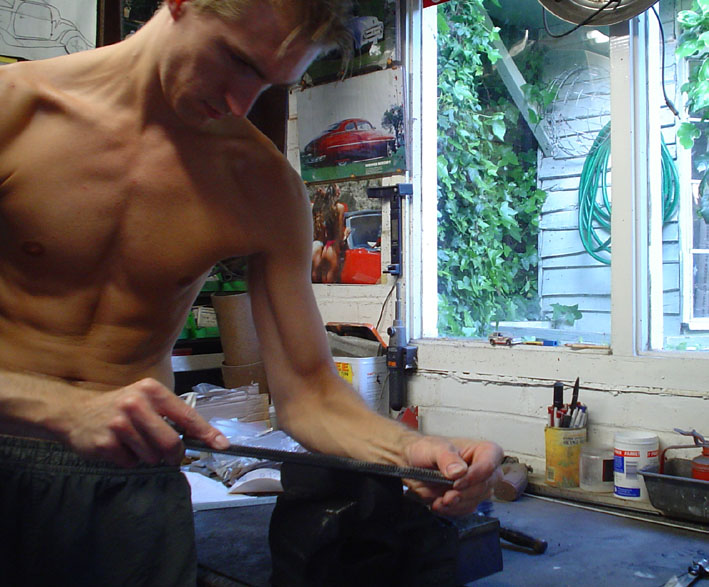
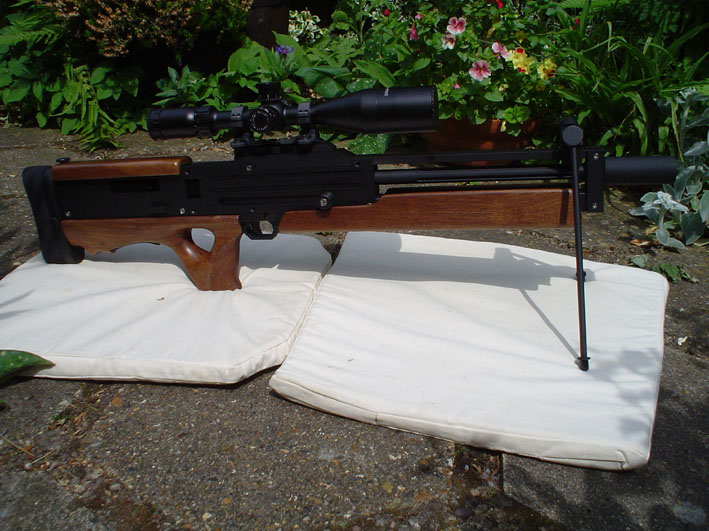
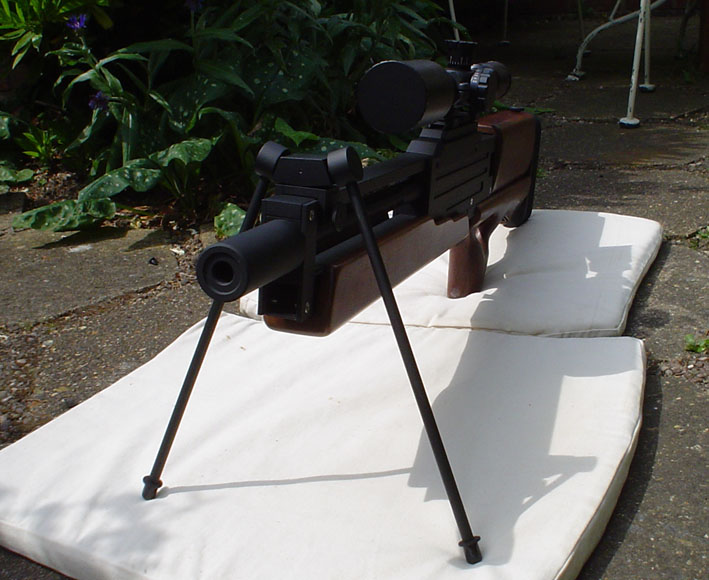
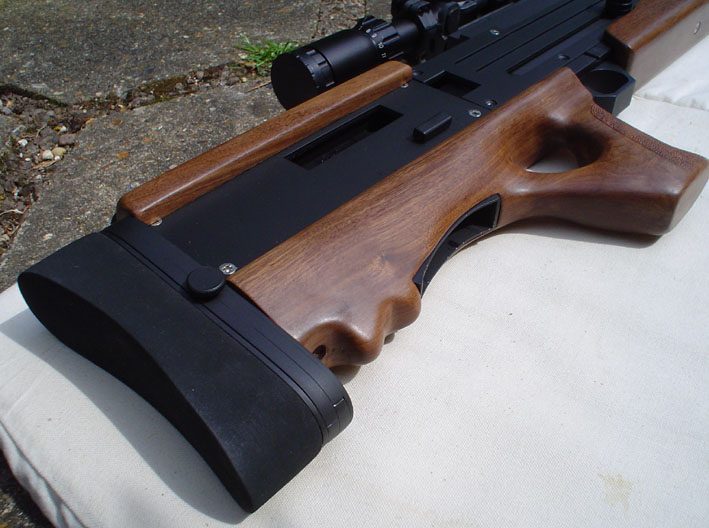
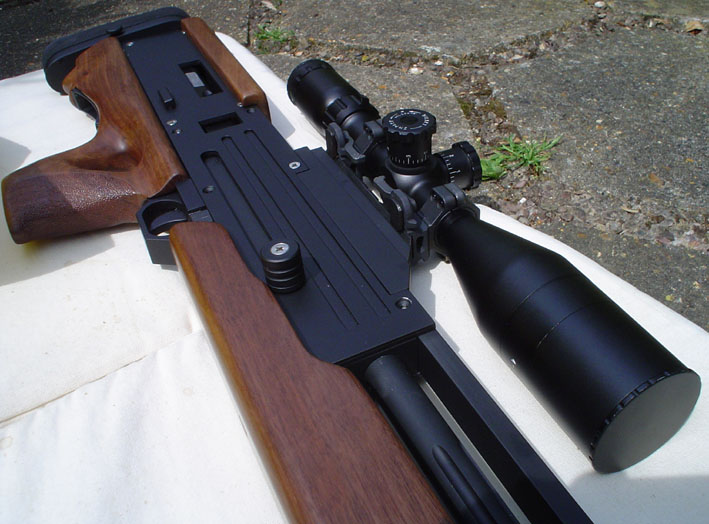
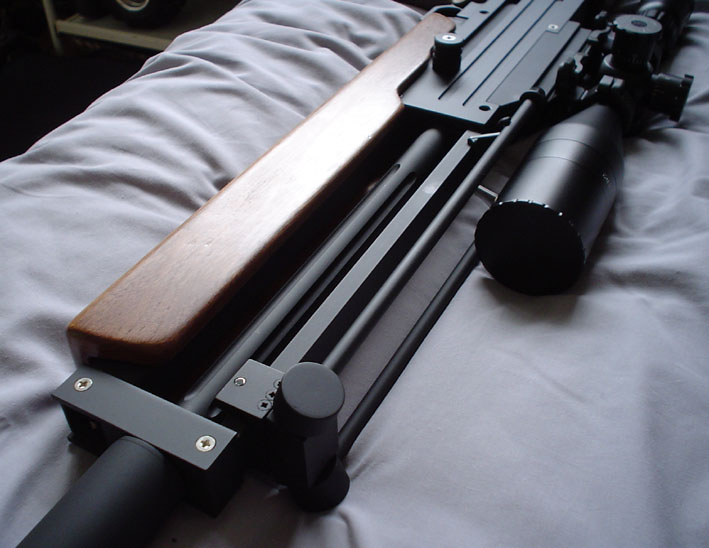
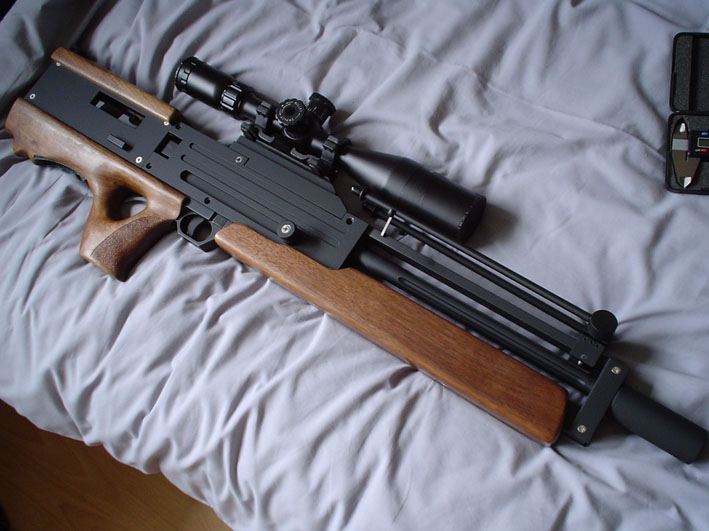
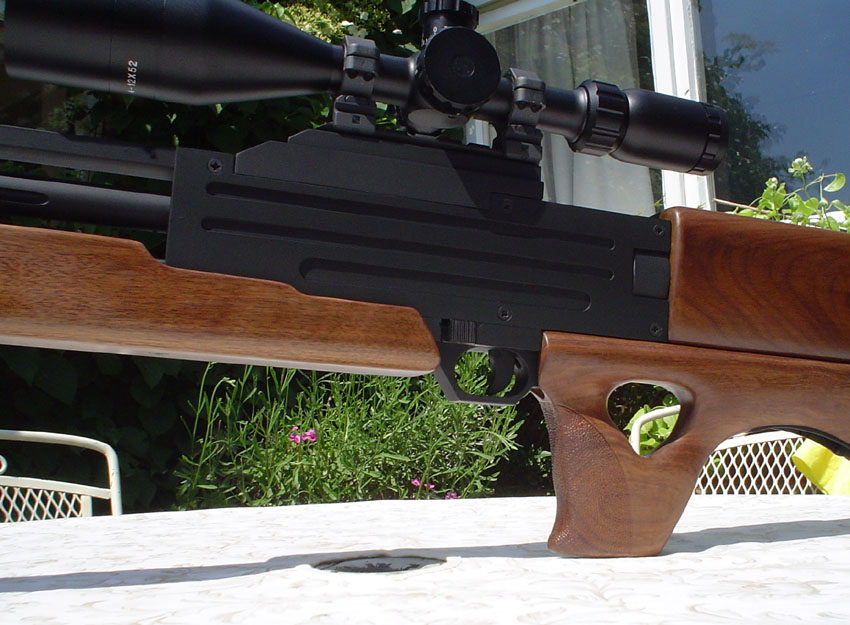
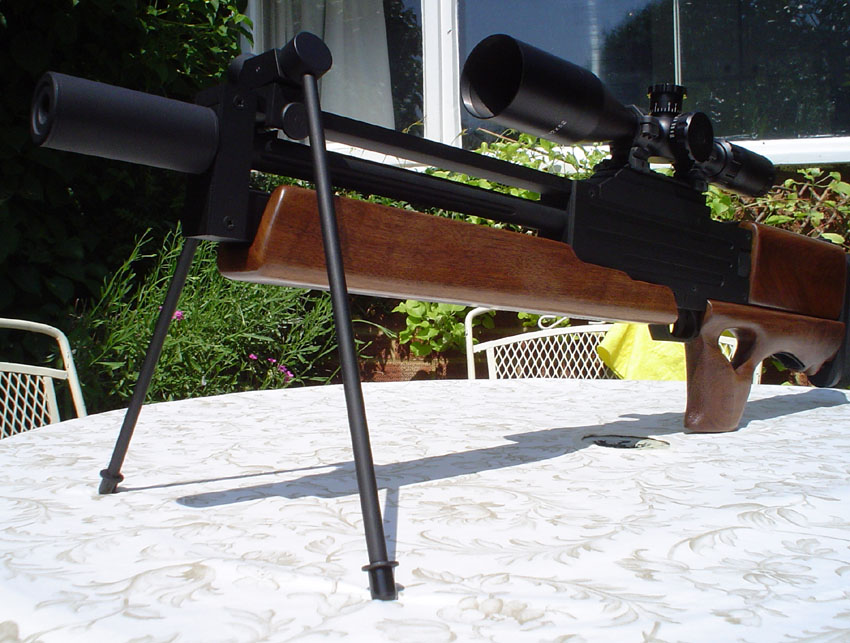
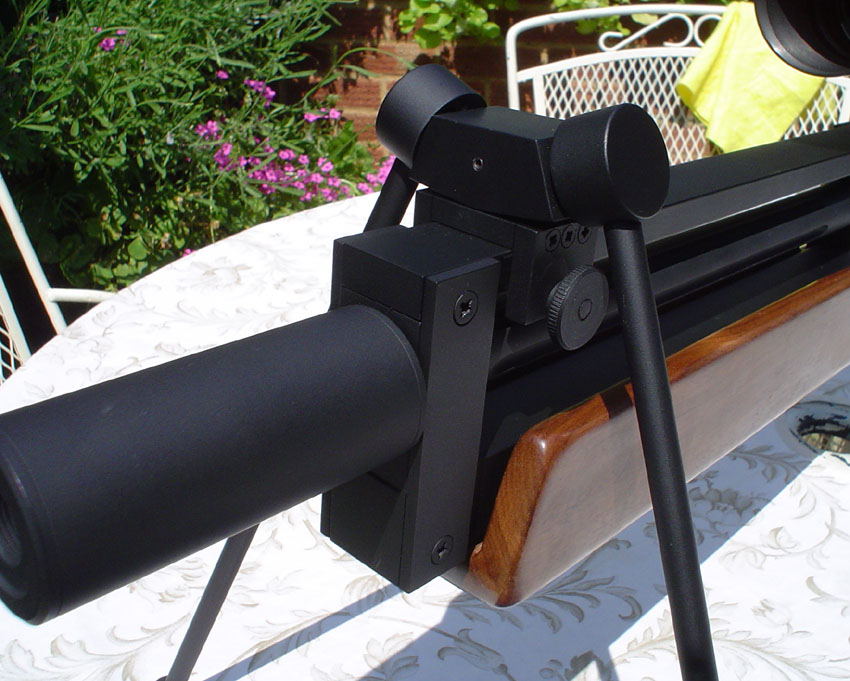
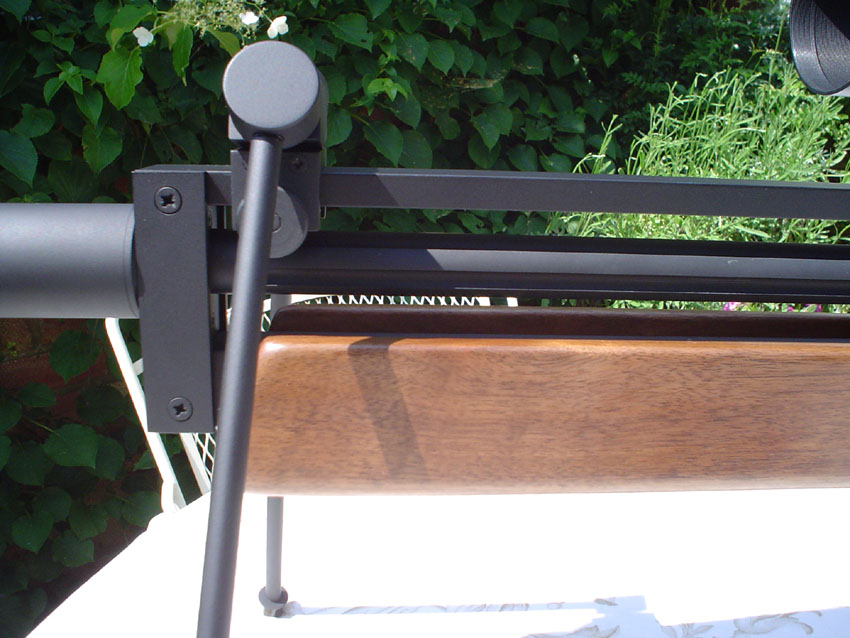
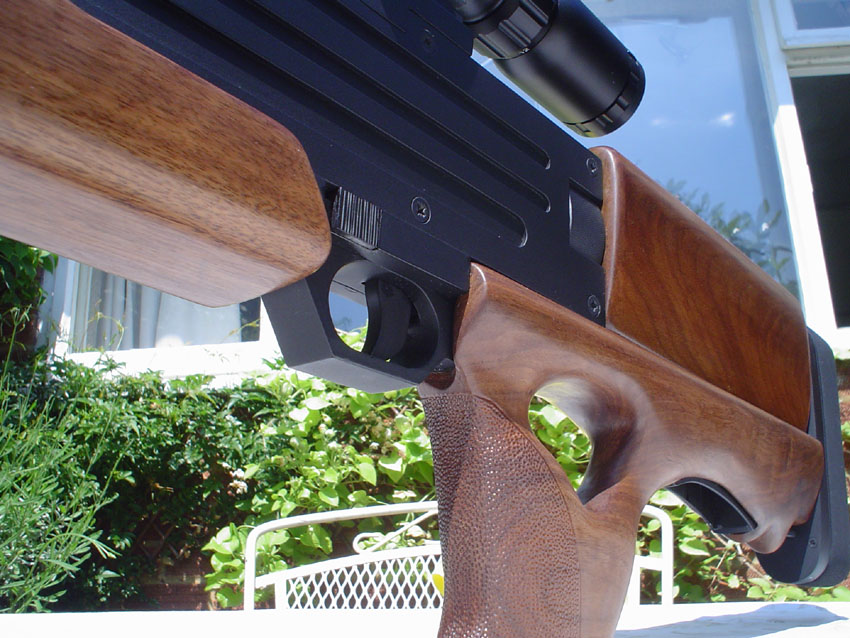
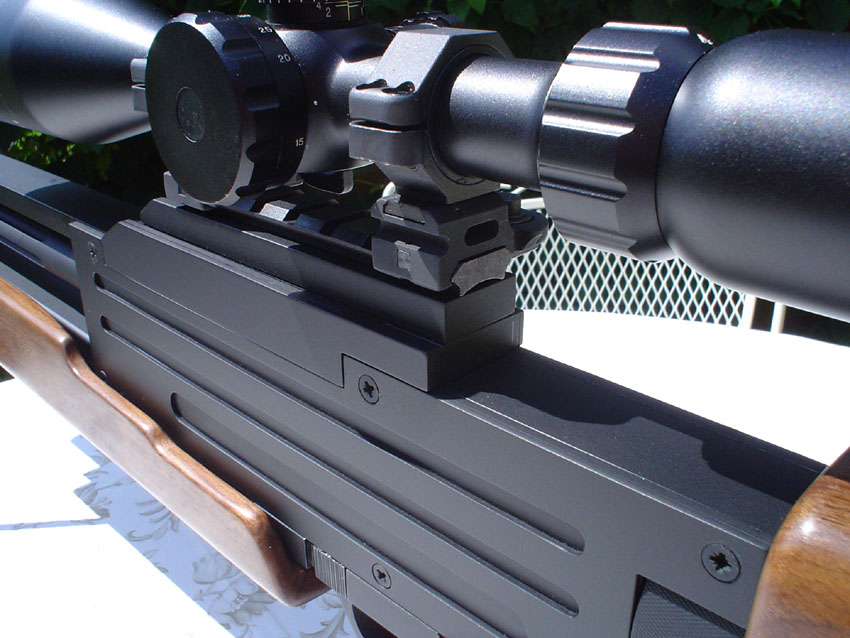
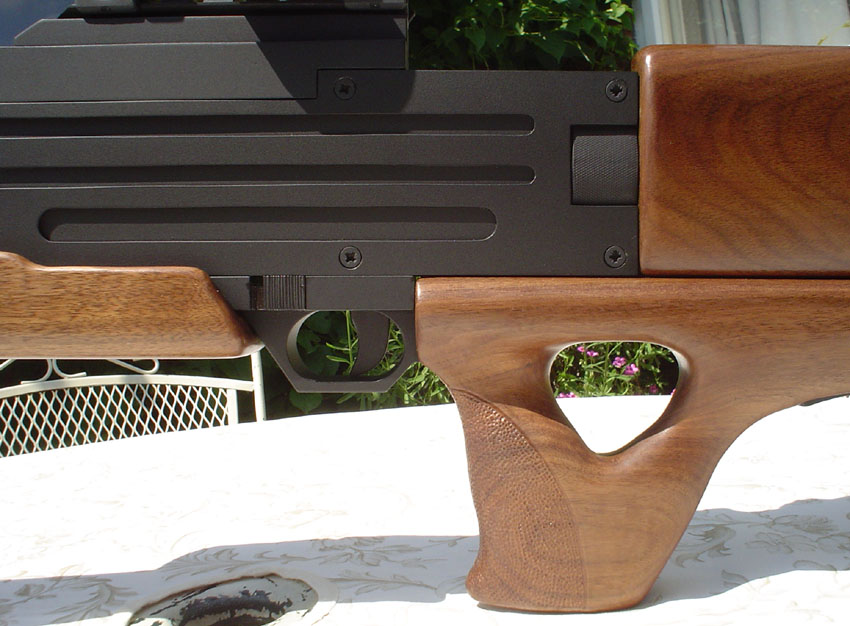
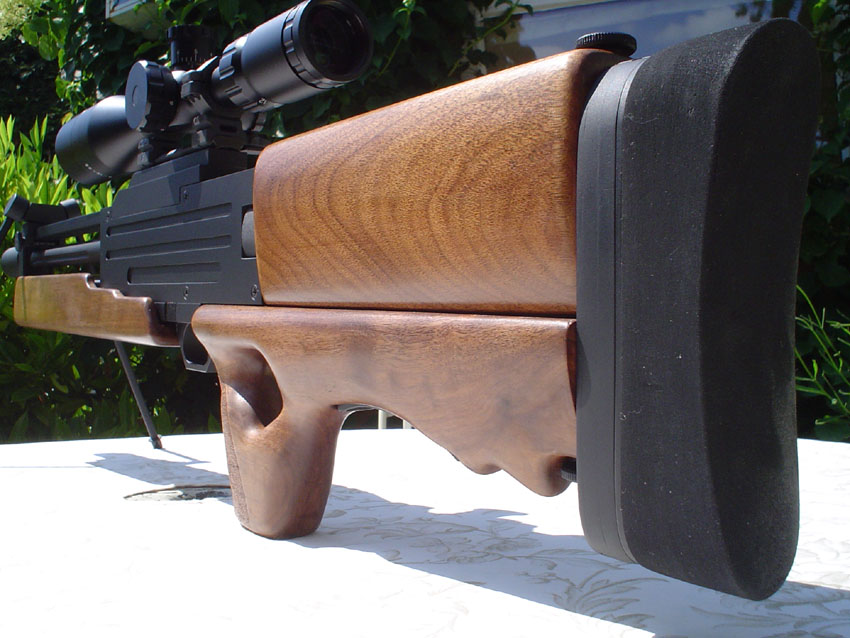
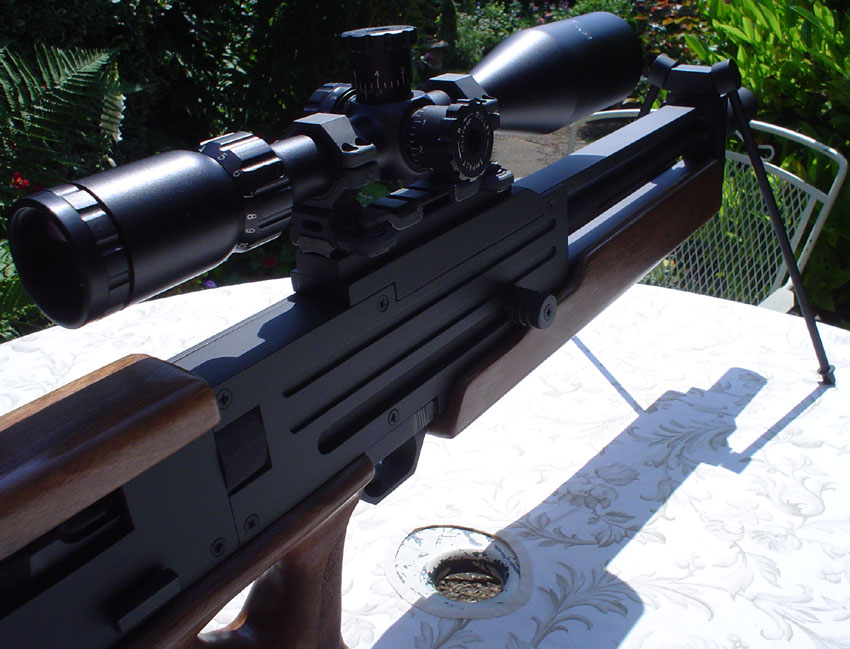
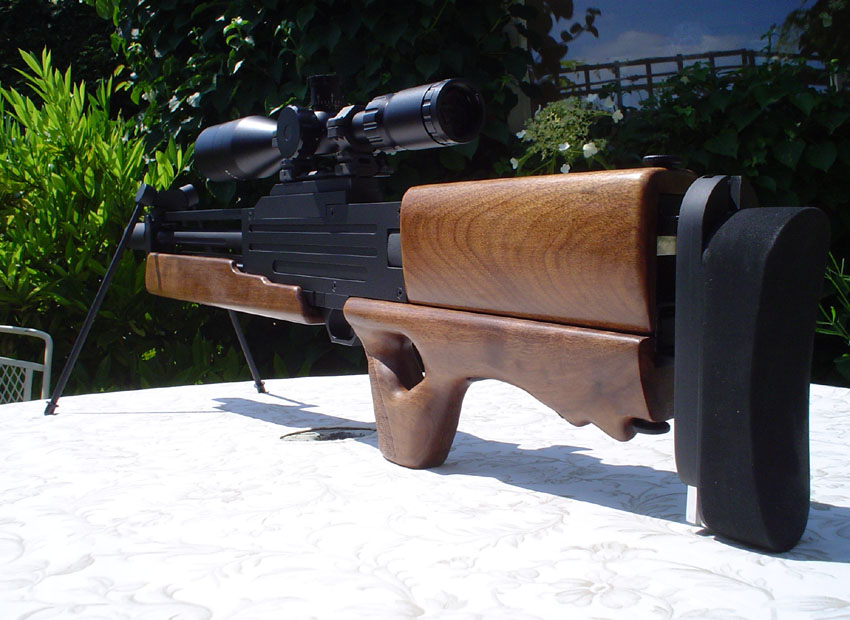
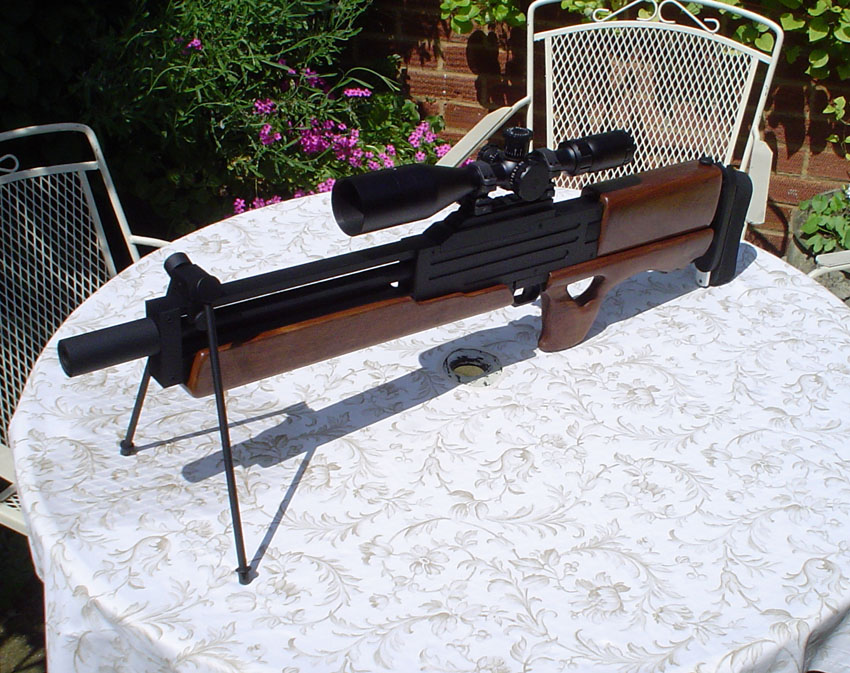
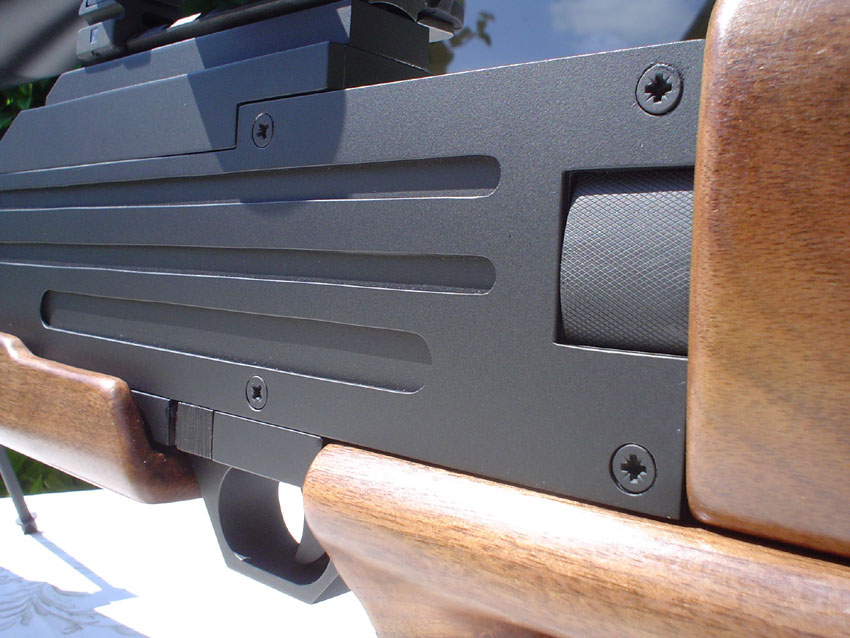
For those of you not following my project over at the airsoft community forum, this is a brief outline of what I did and how. First thing was research, I trawled through the internet to find as many pictures of the gun as possible I have about 30 now, most are of the version 1, like the asahi, and some the version 2 which im not so fond of. Some of the pics, like this one below are almost a cross between the two, this is from a pdf file from walther, not a users manual as such more a brief guide. Anyway on the front cover is the only proper side on picture of the gun that I have found, note the stock is smooth, no bumps near the back.... odd.
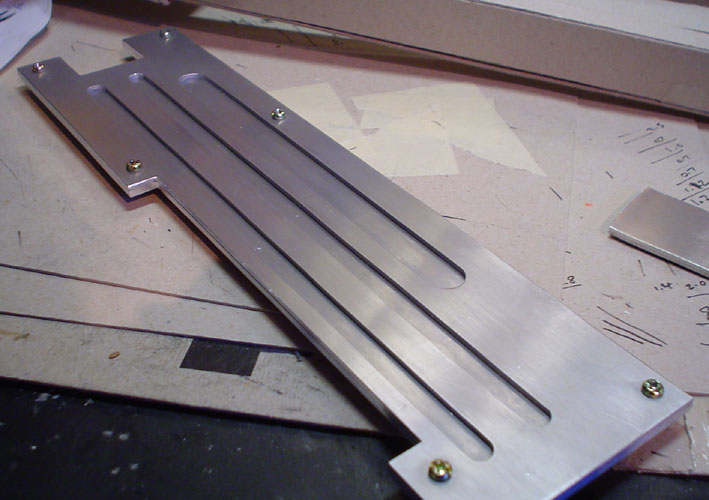
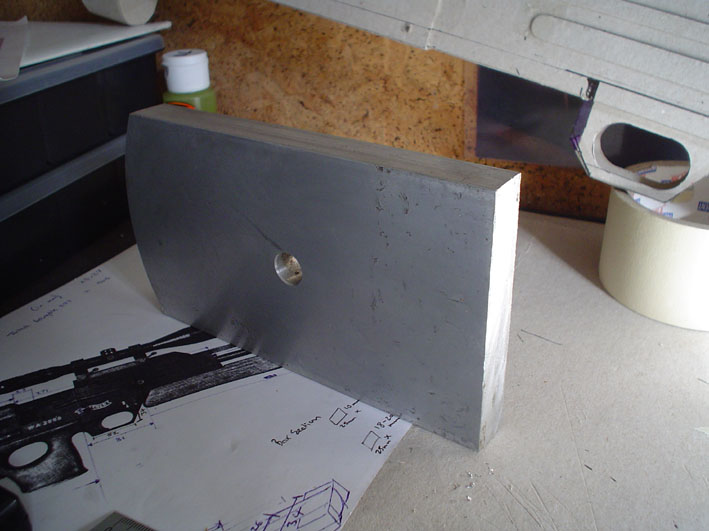
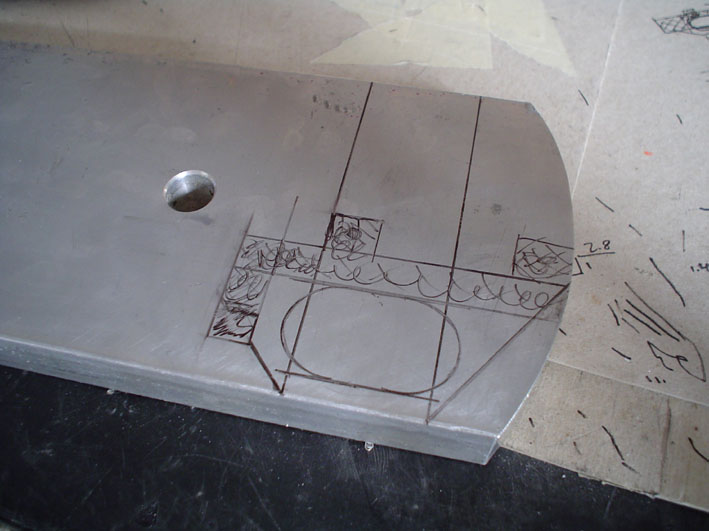
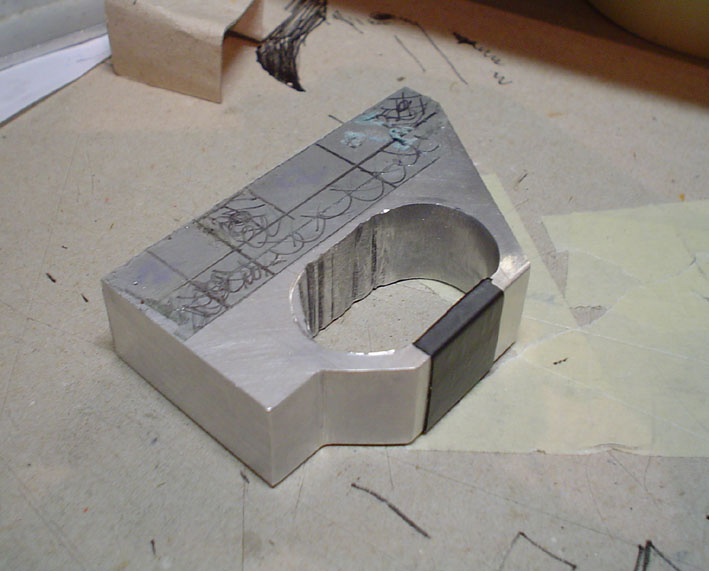
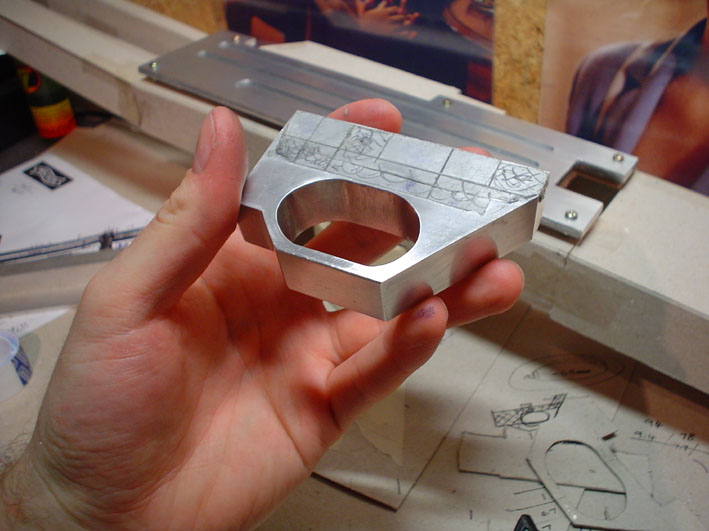
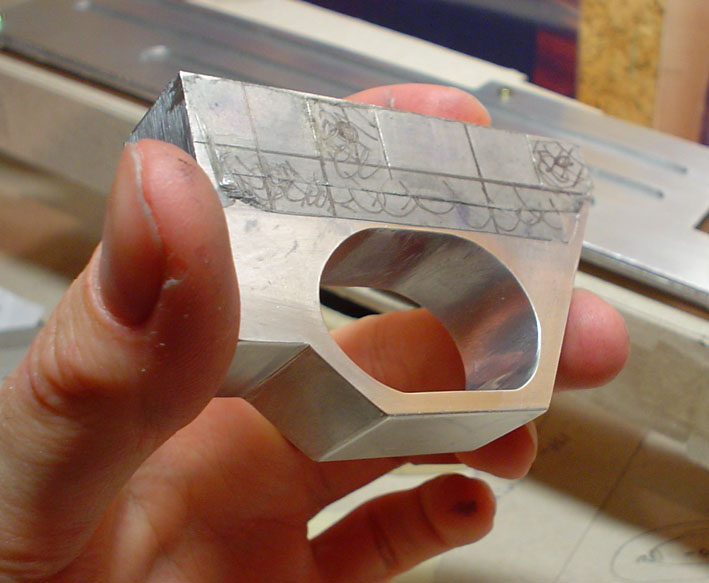
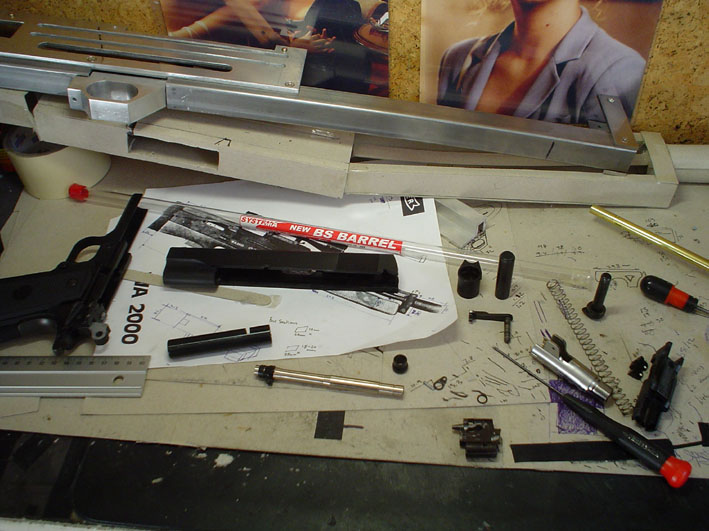
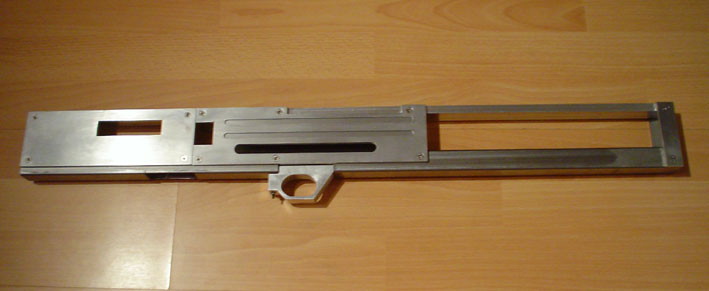
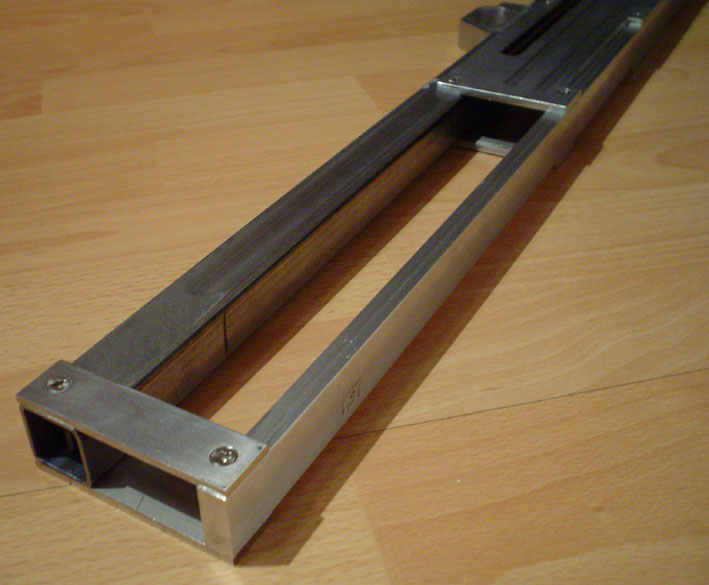
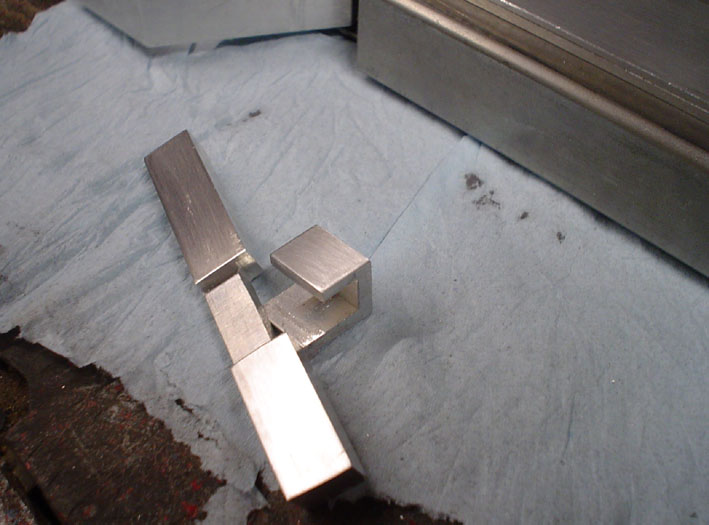
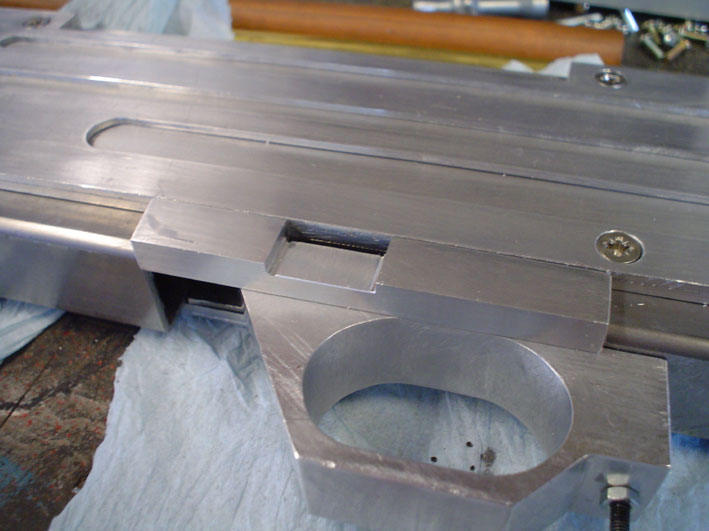
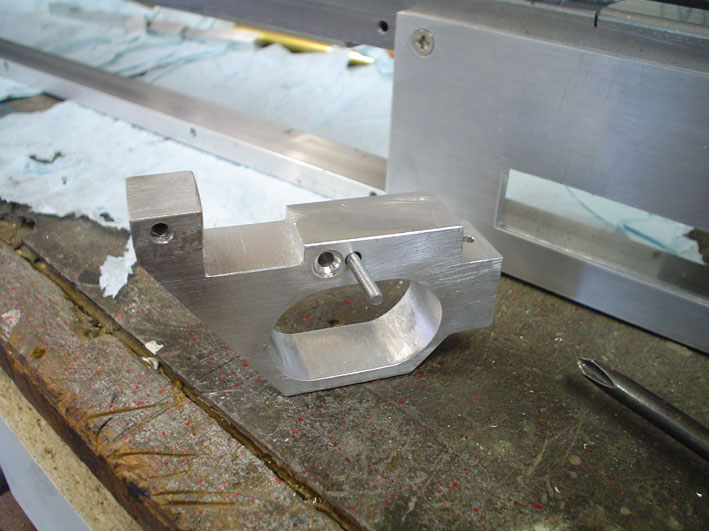
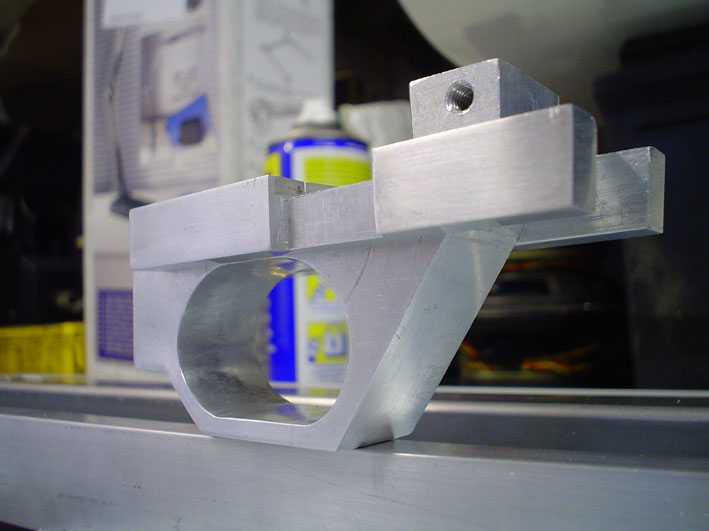
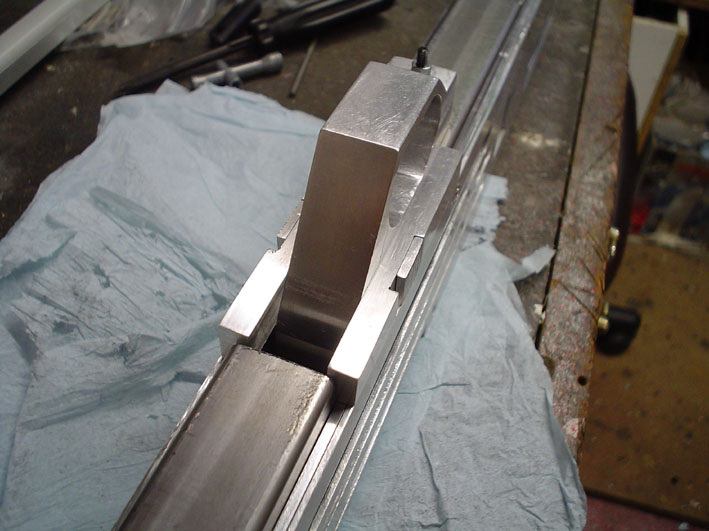
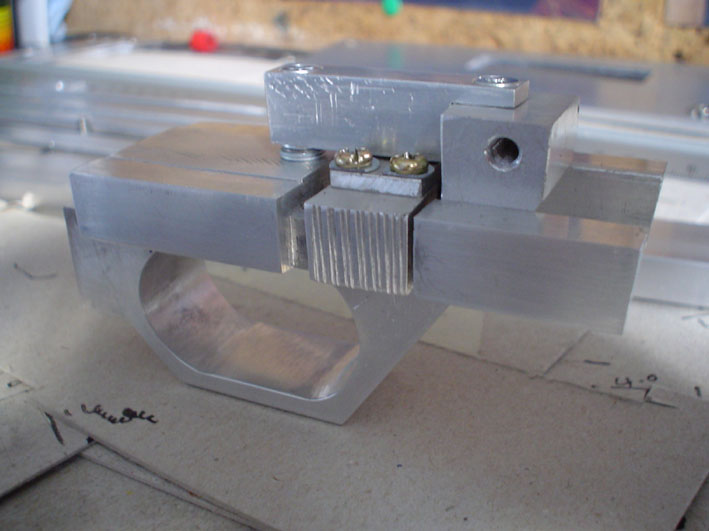
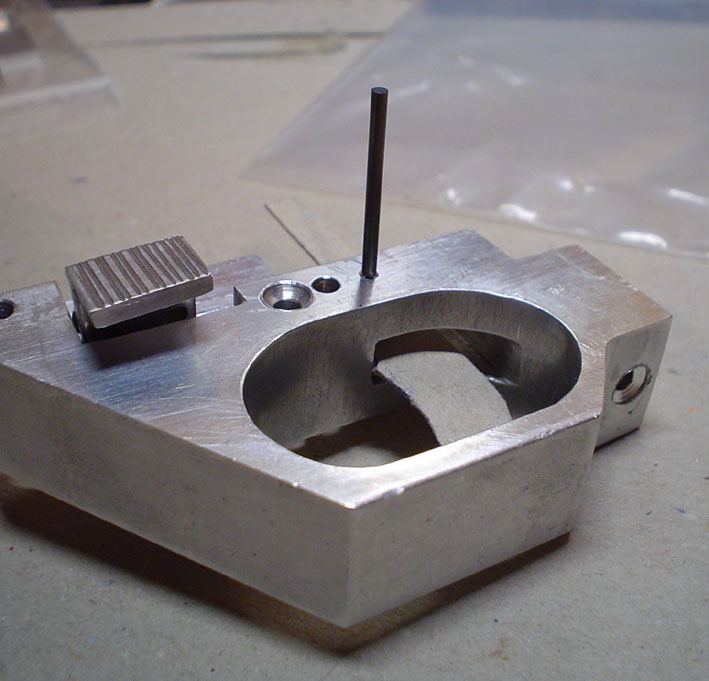
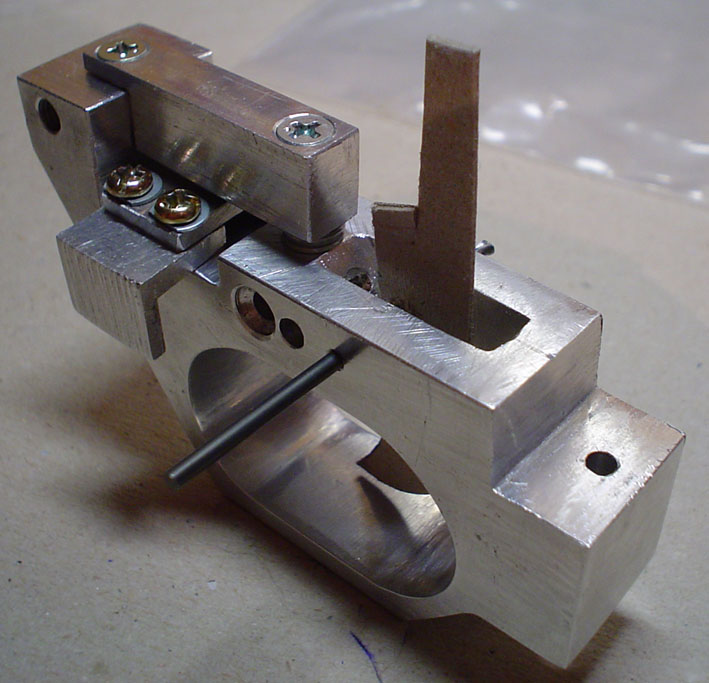
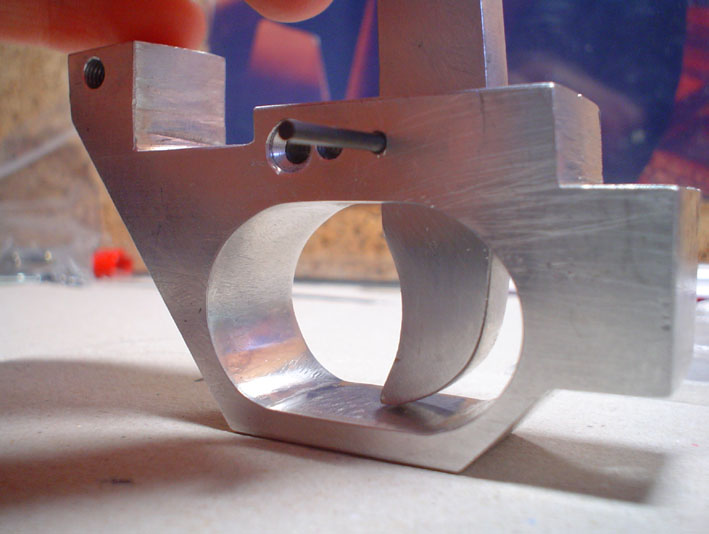
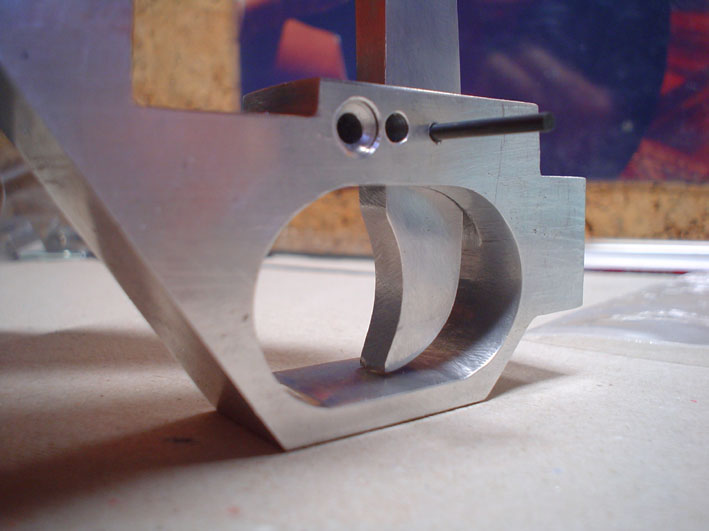
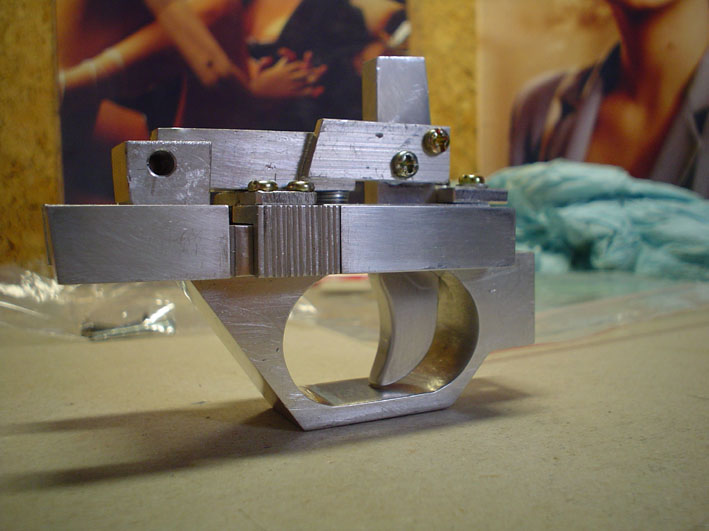
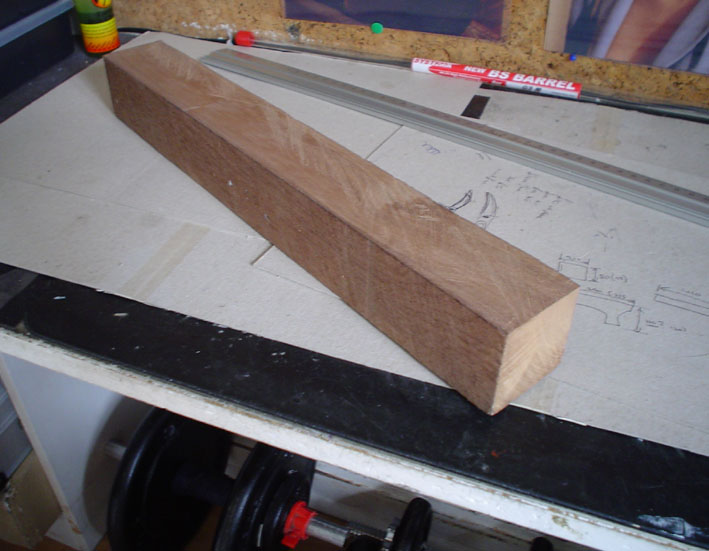
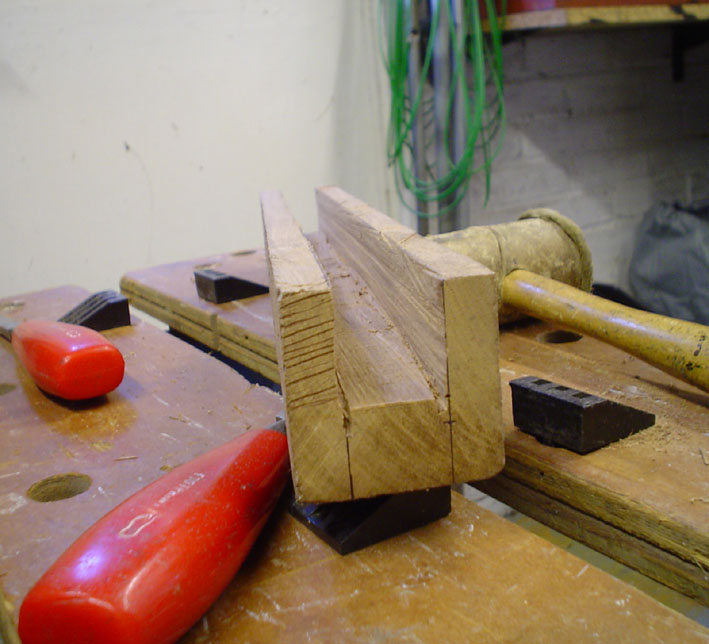
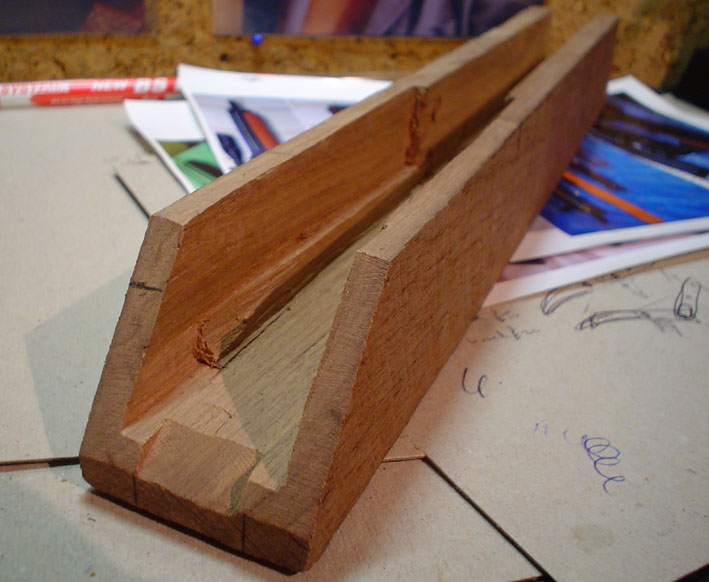
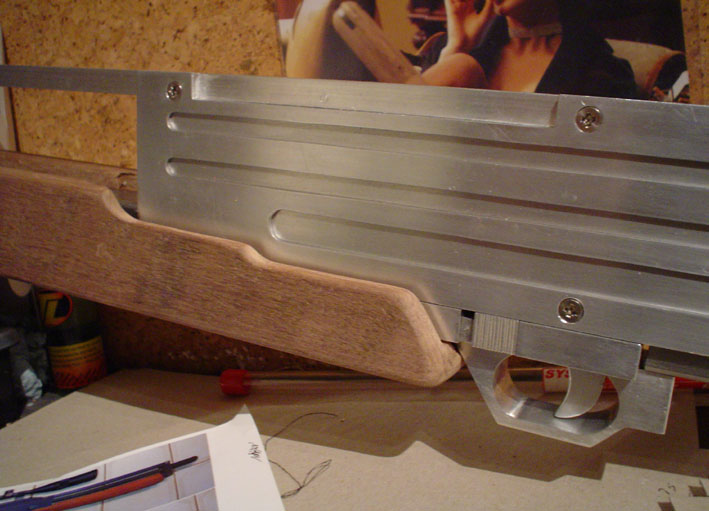
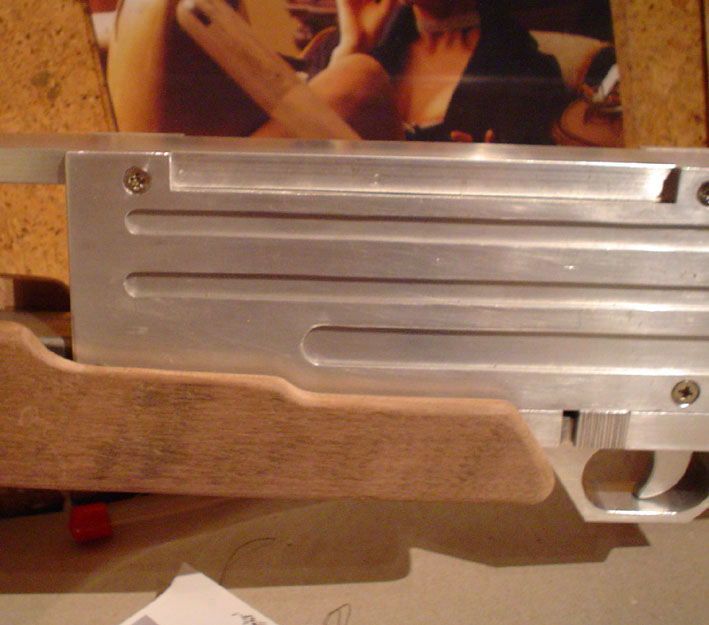
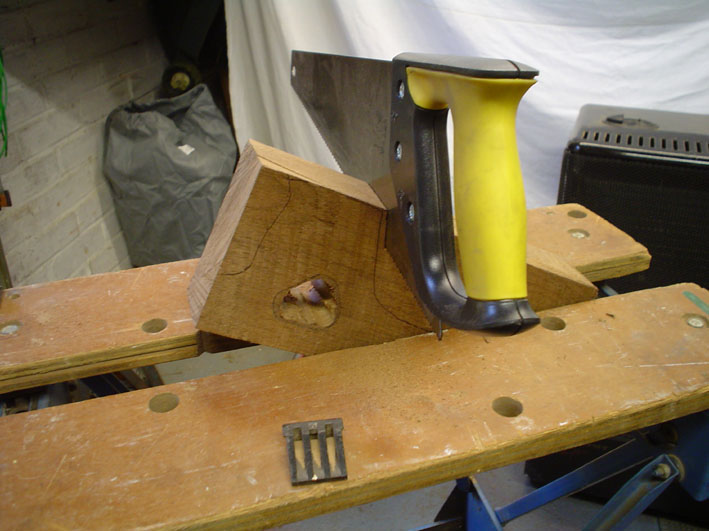
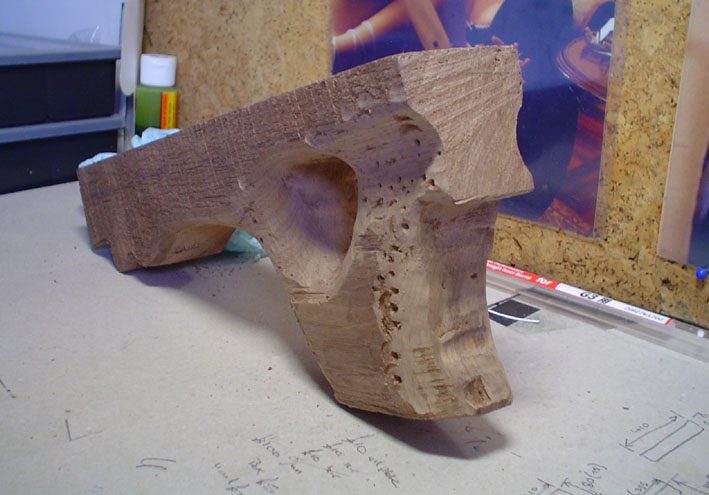
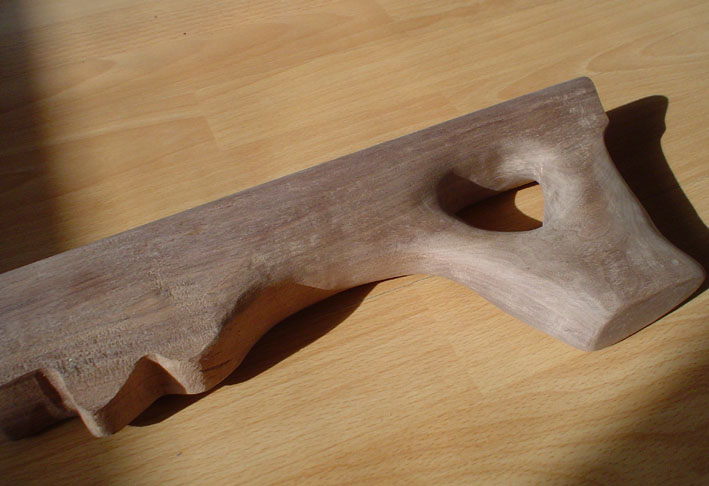
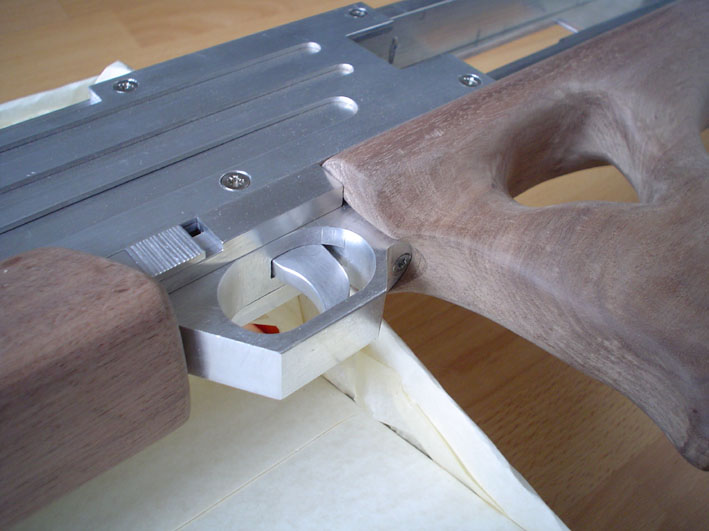
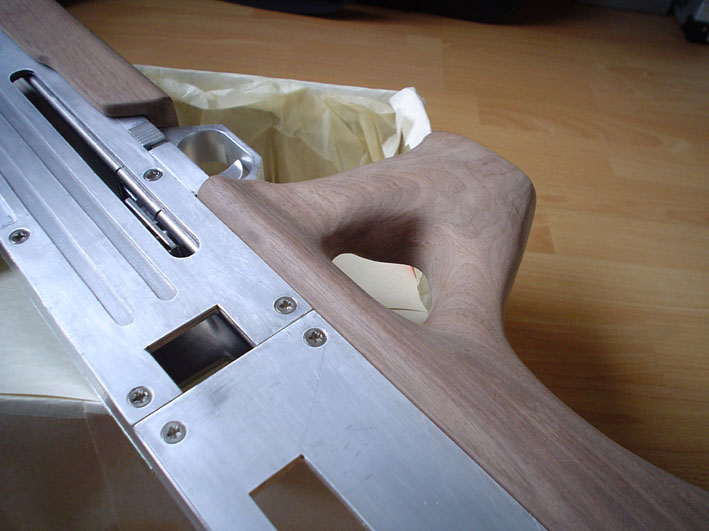
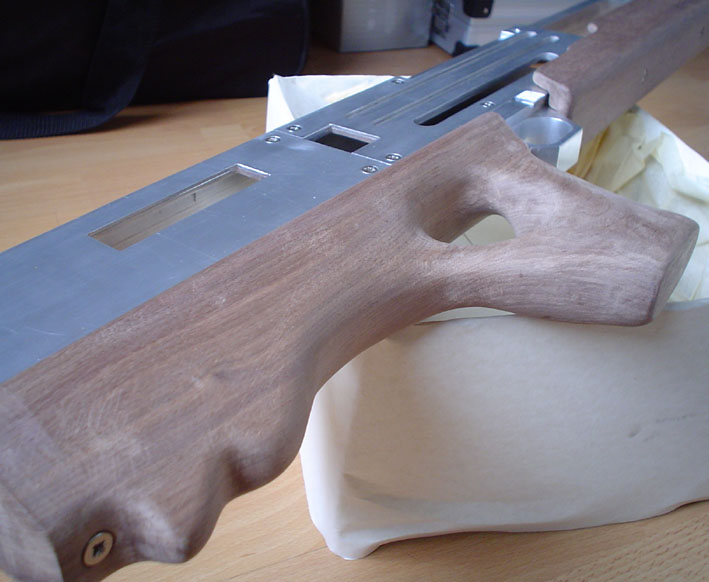
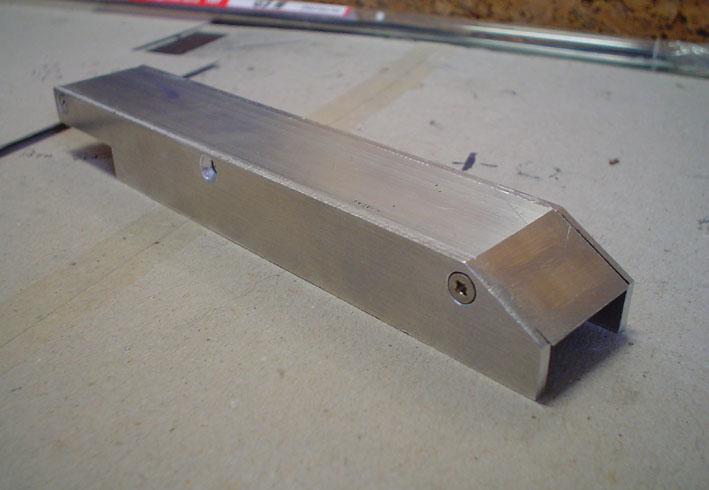
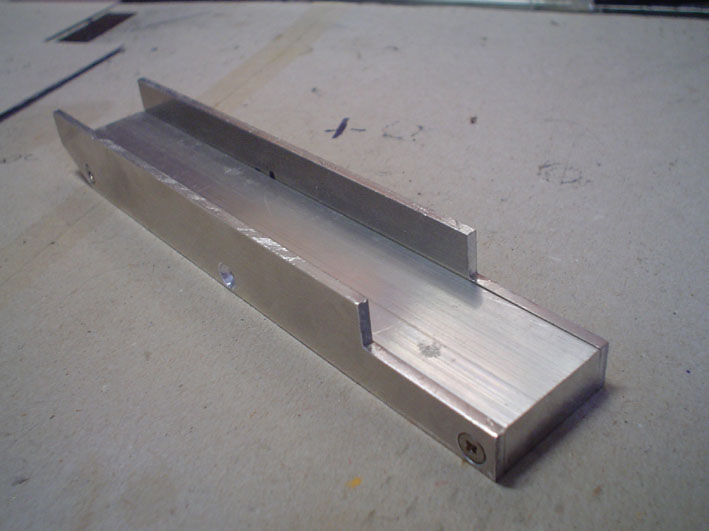
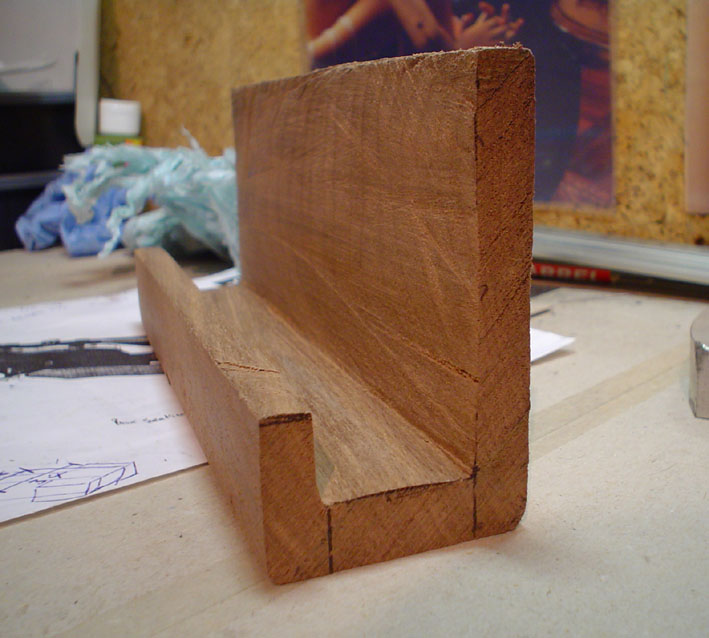
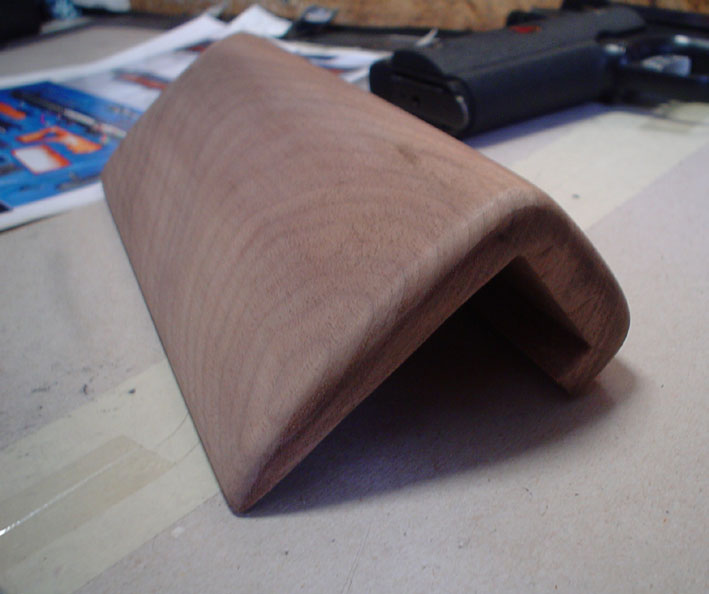
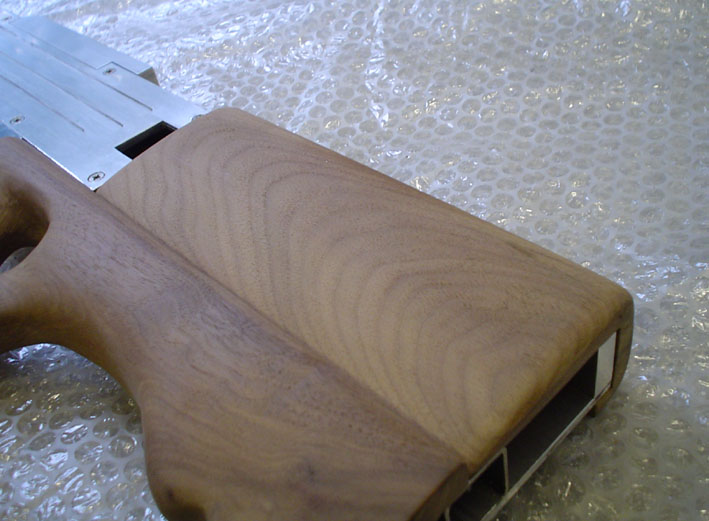
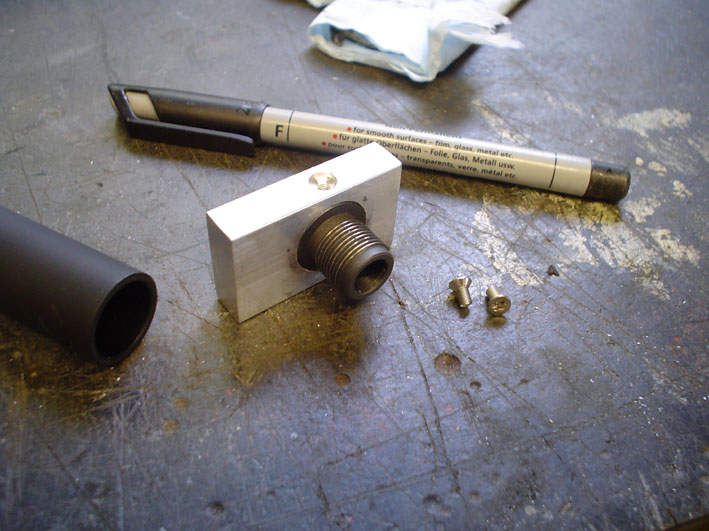
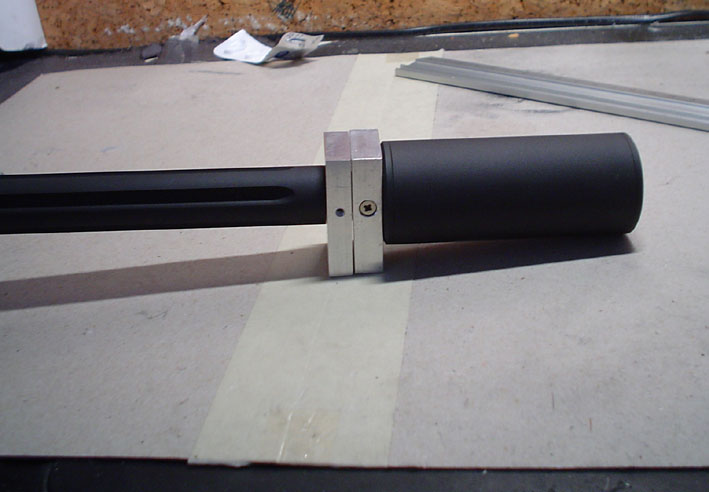
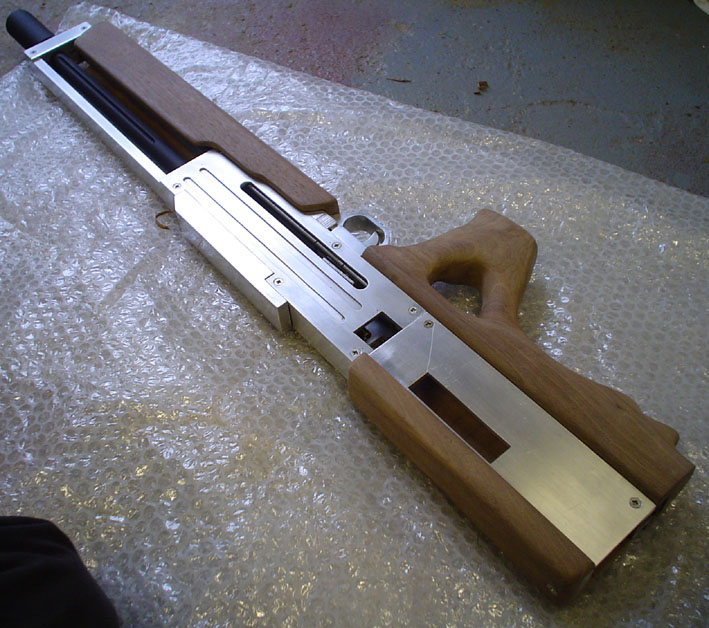
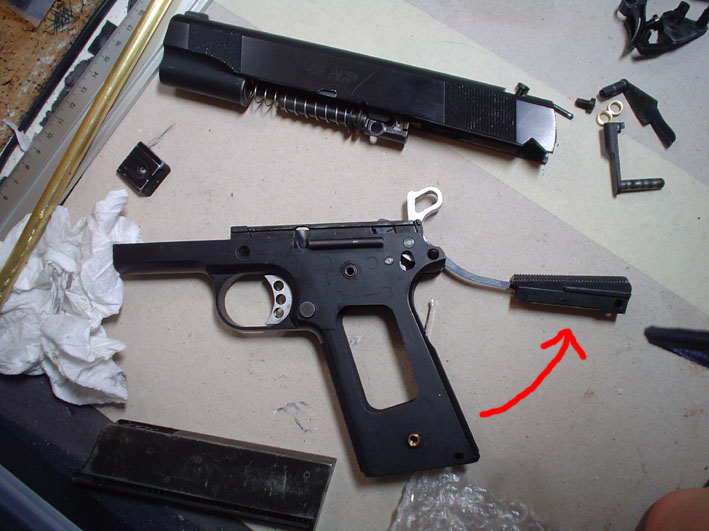
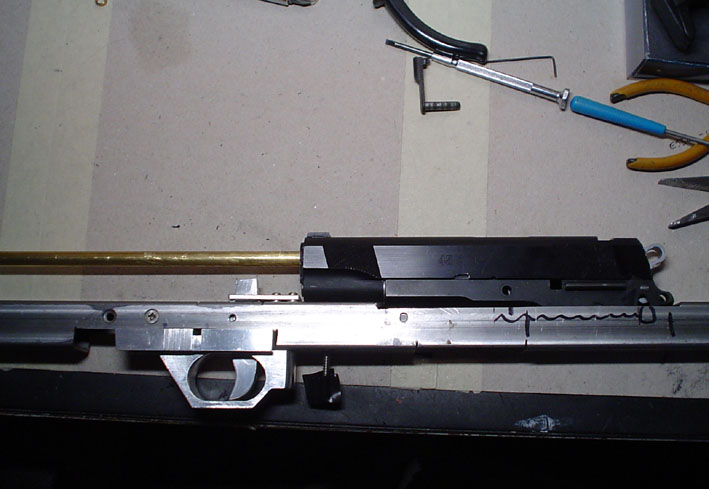
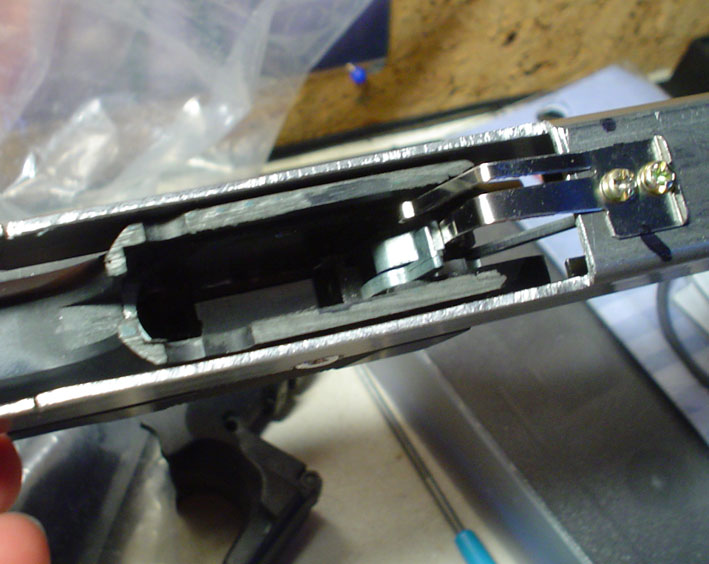
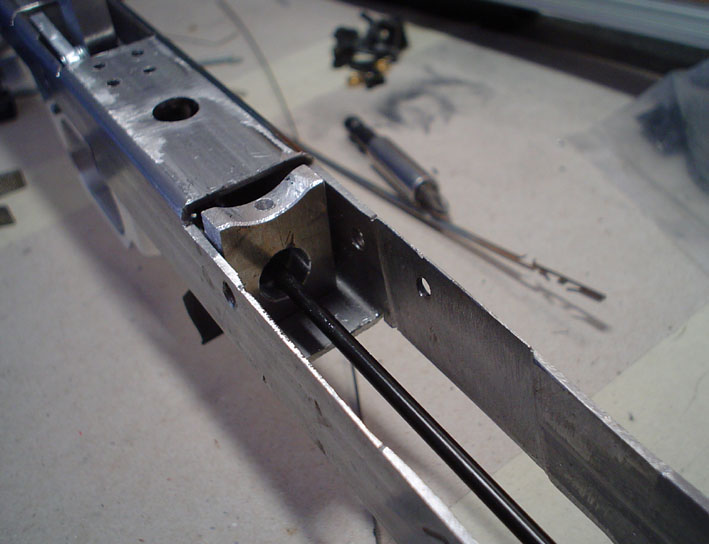
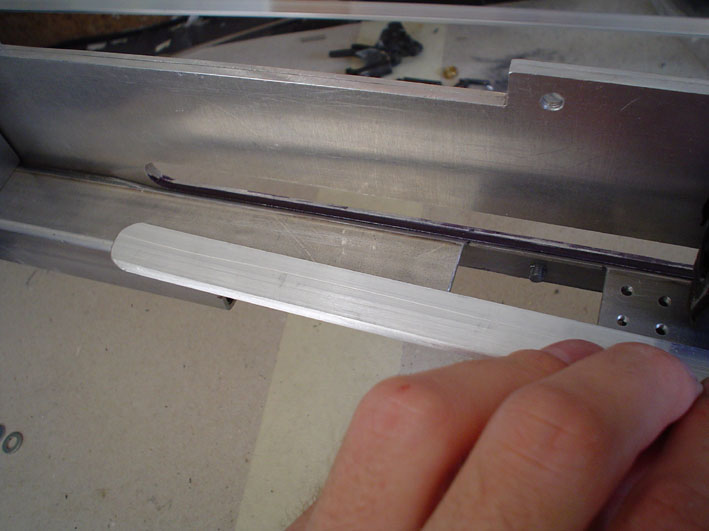
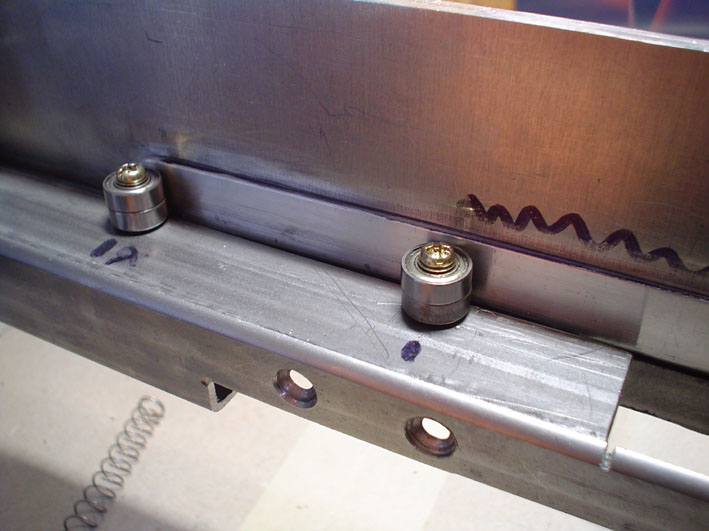
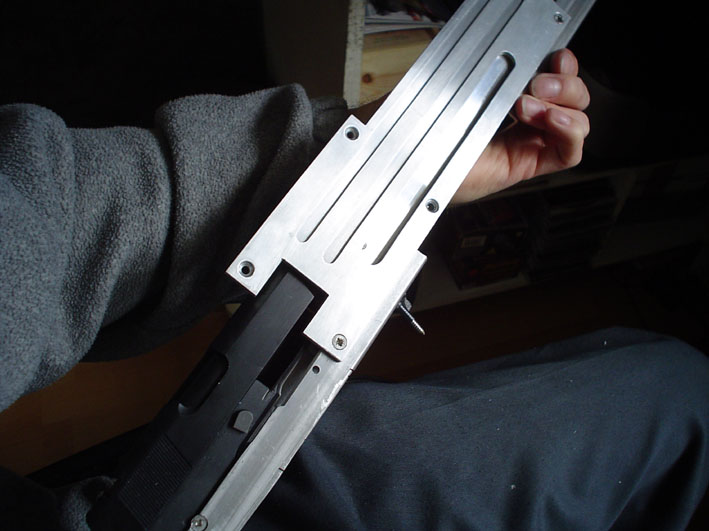
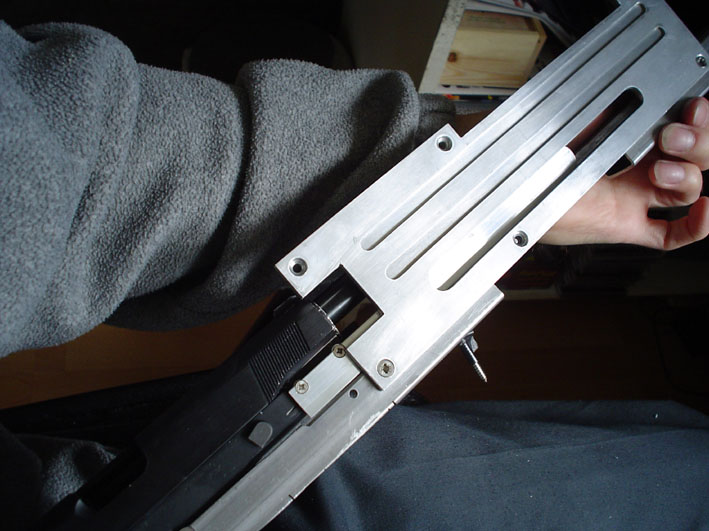
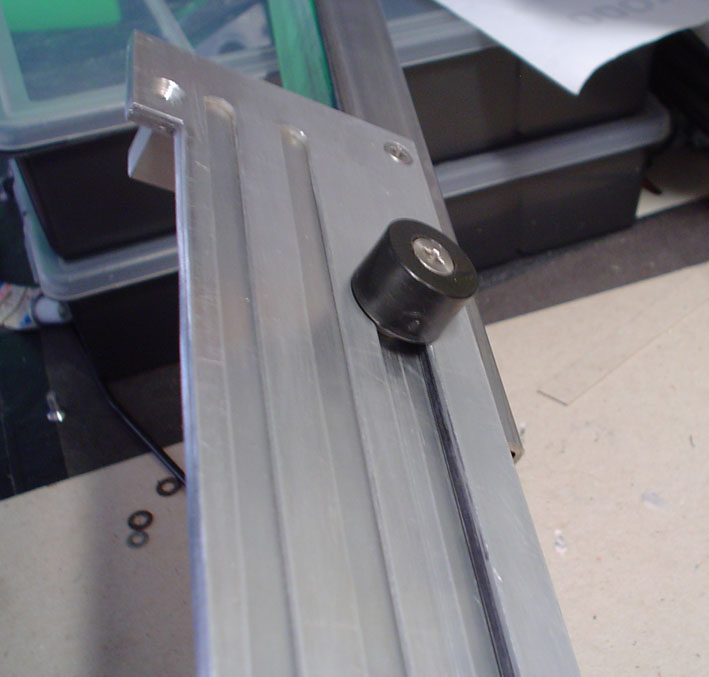
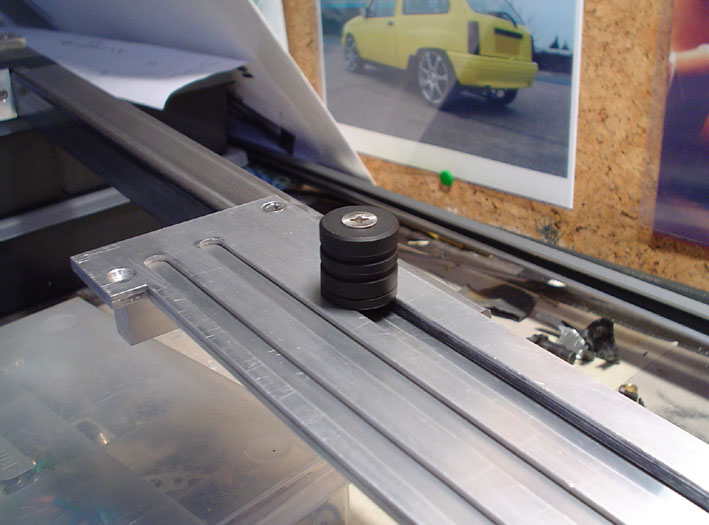
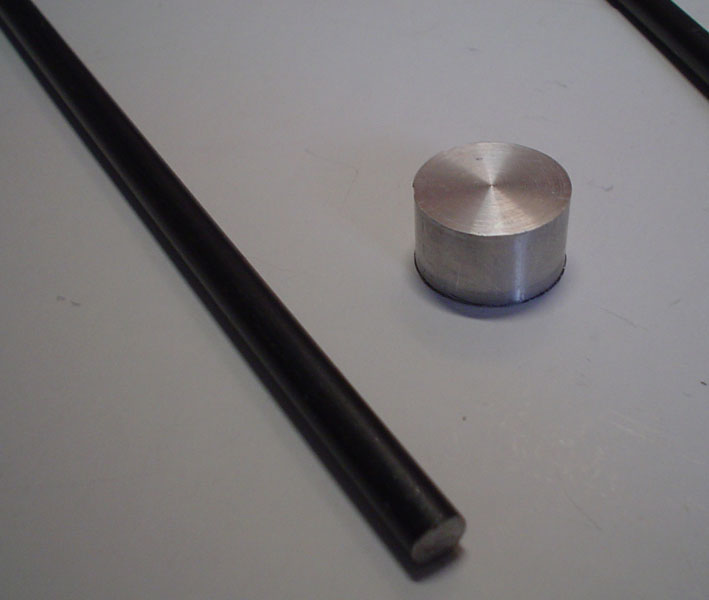
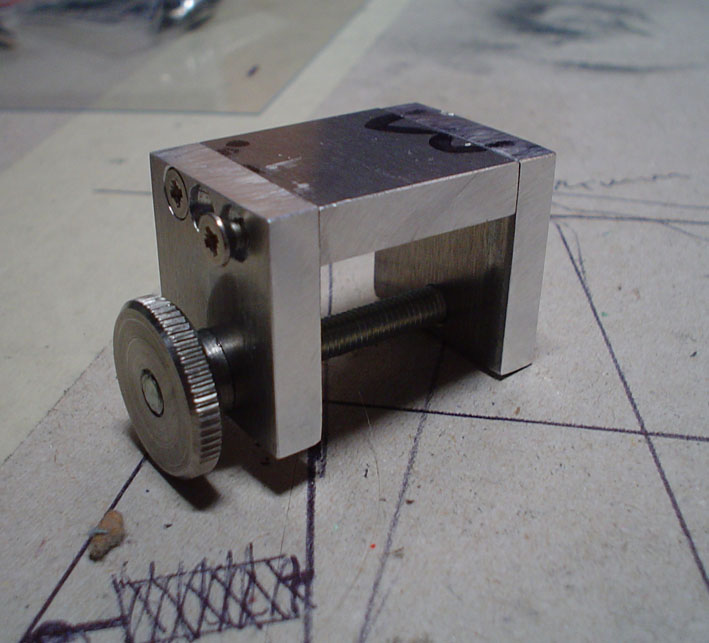
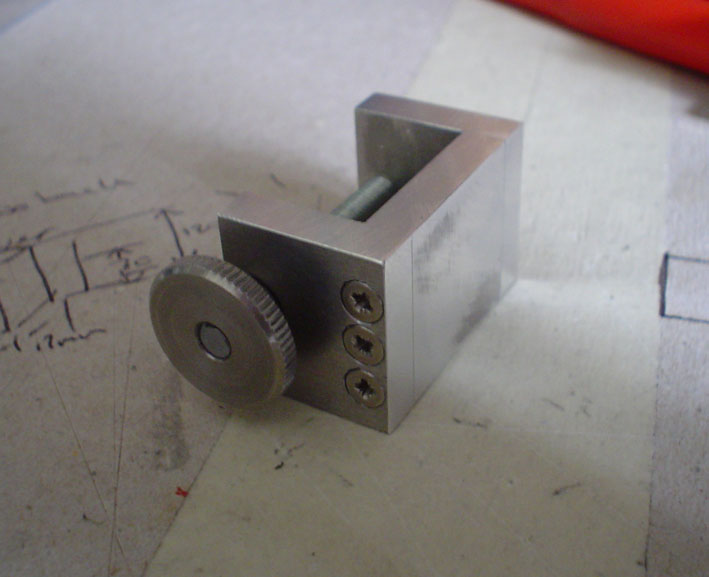
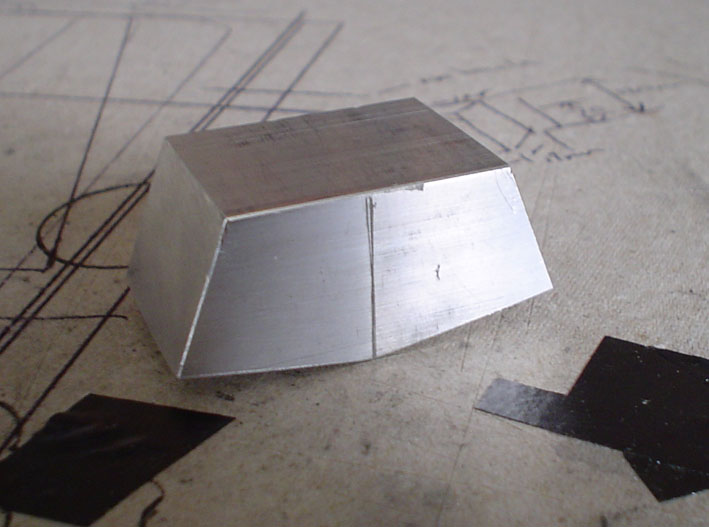
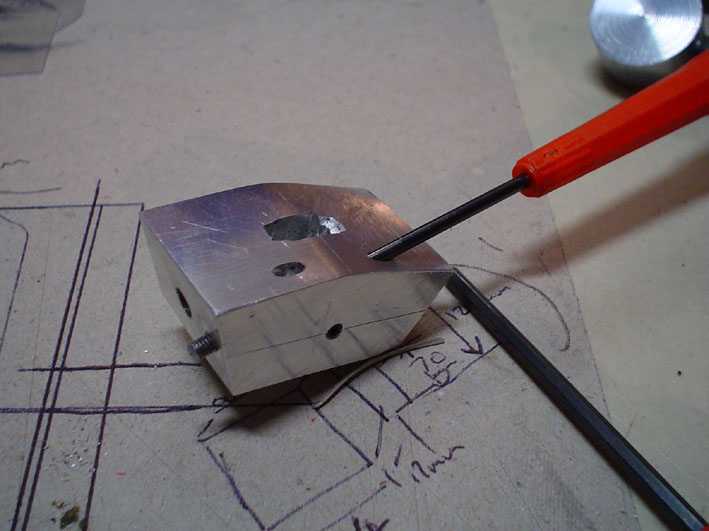
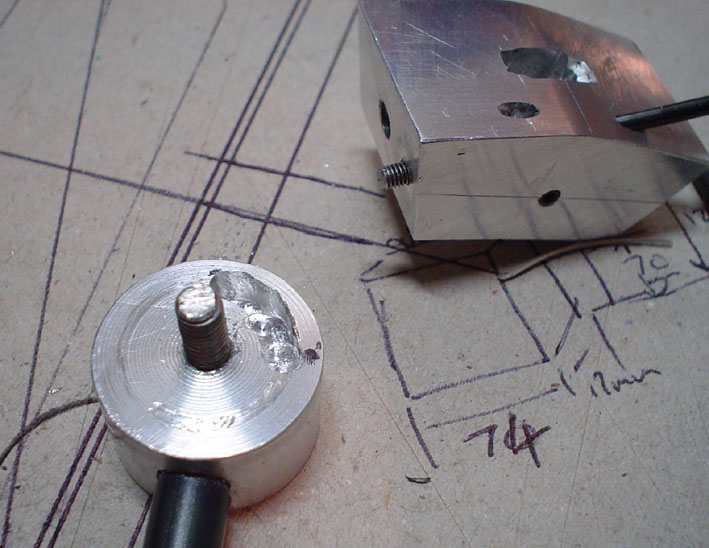
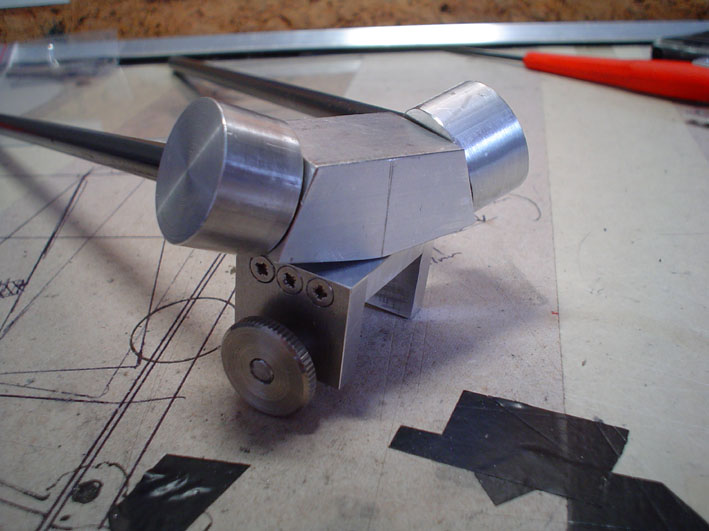
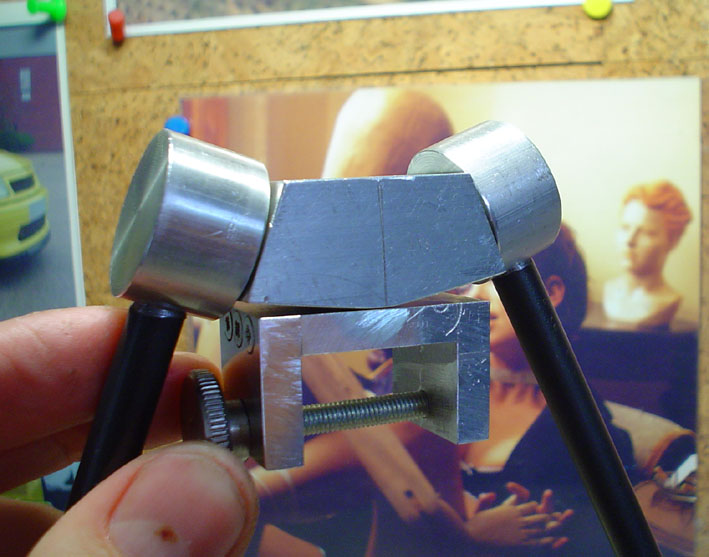
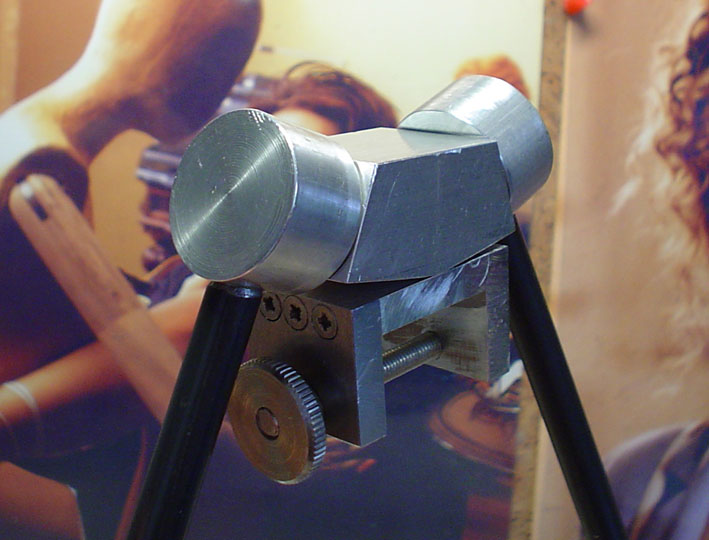
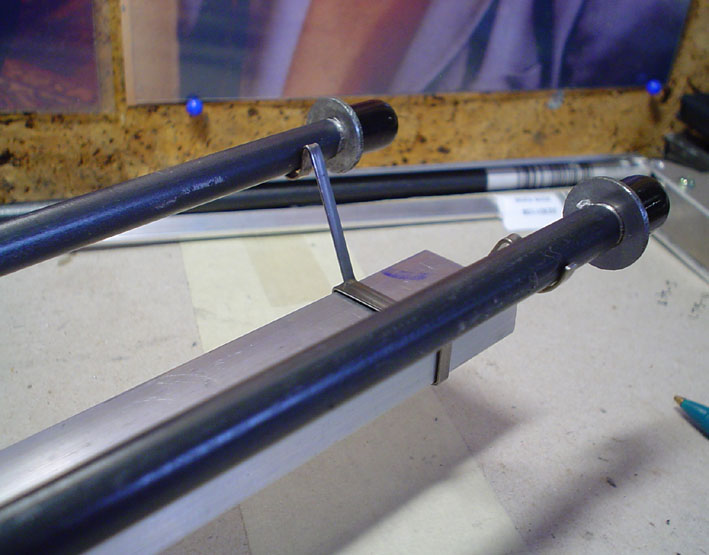
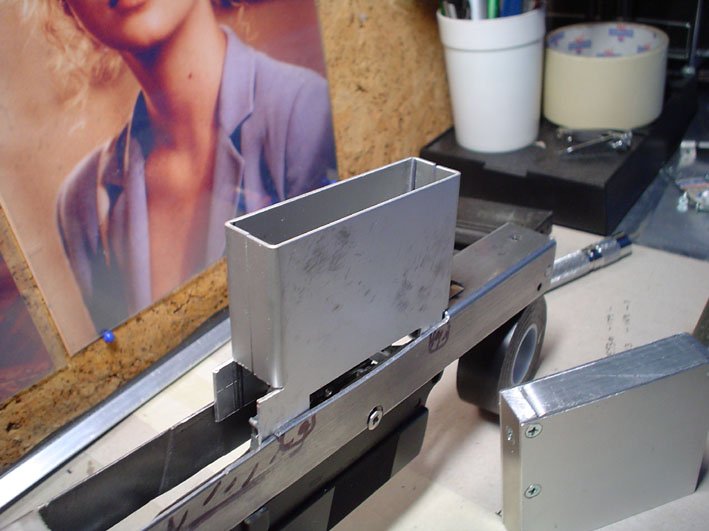
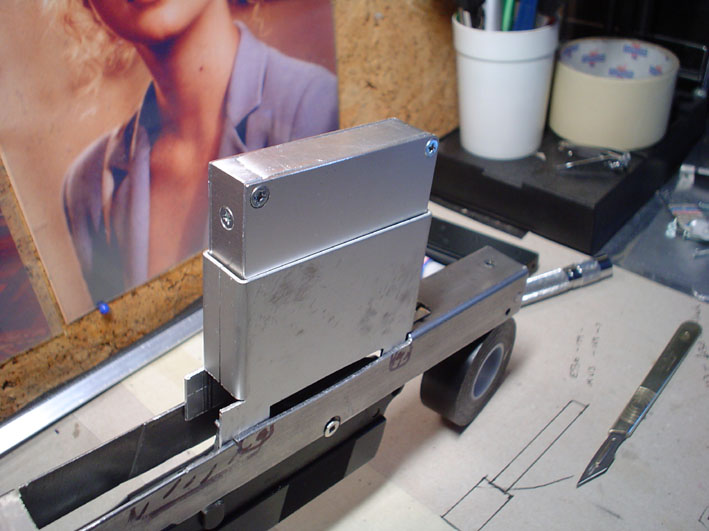
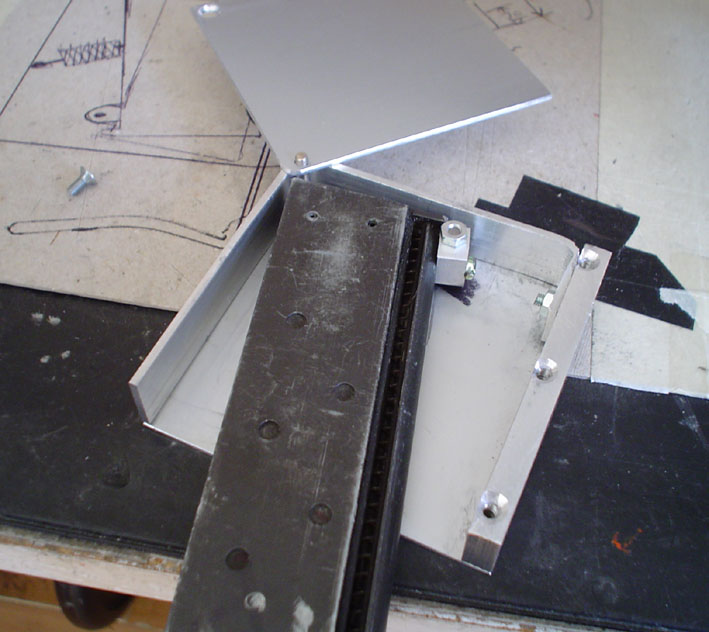
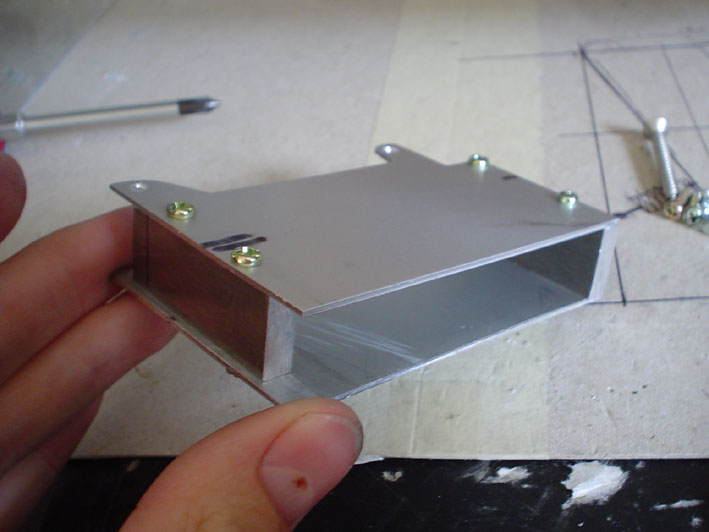
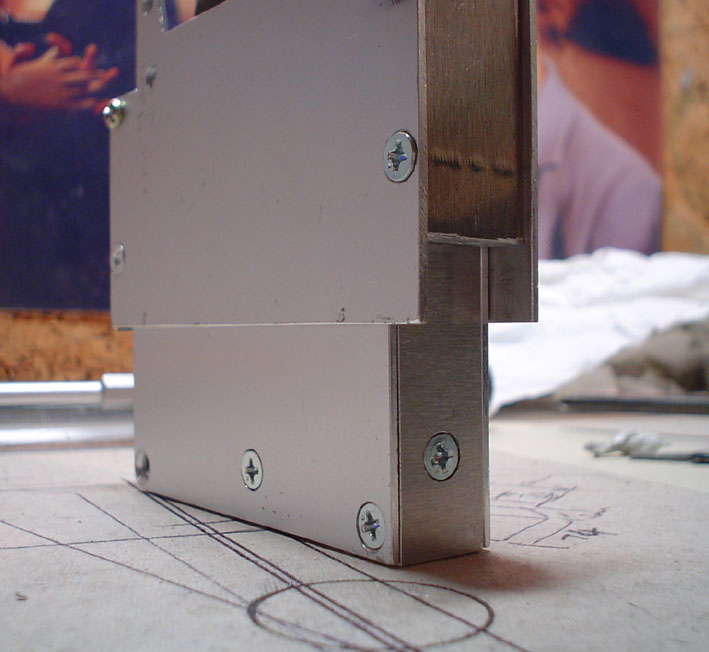
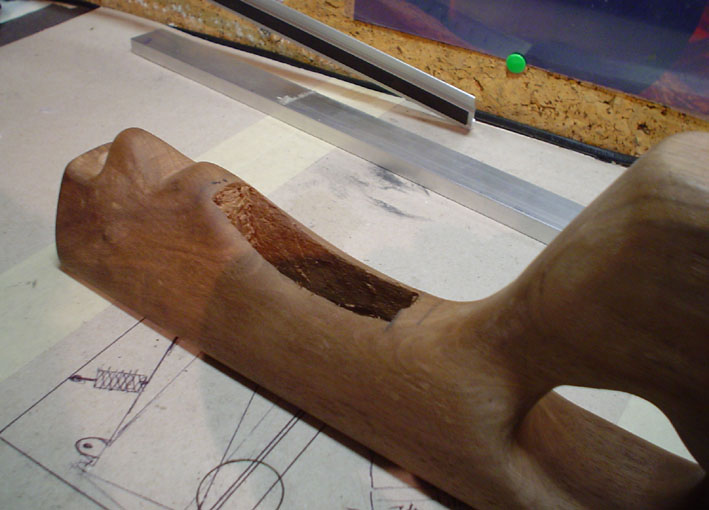
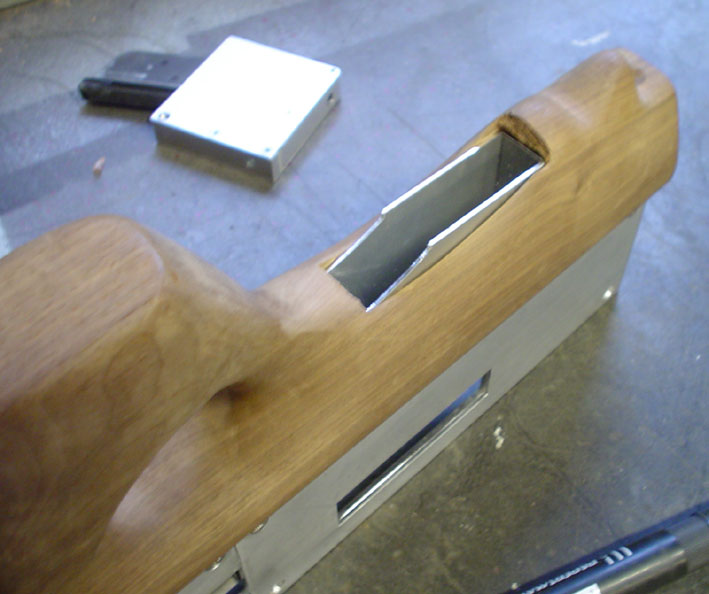
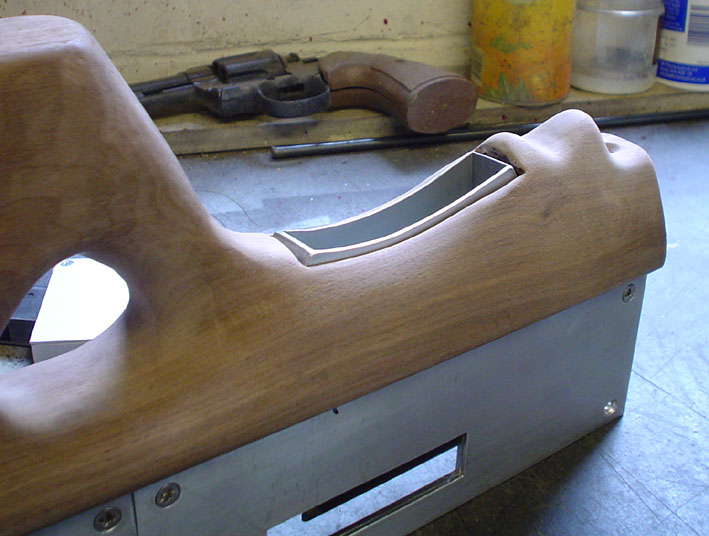
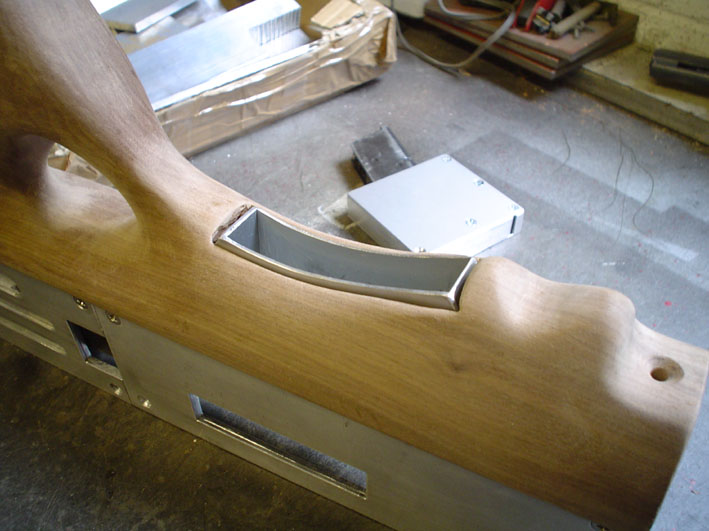
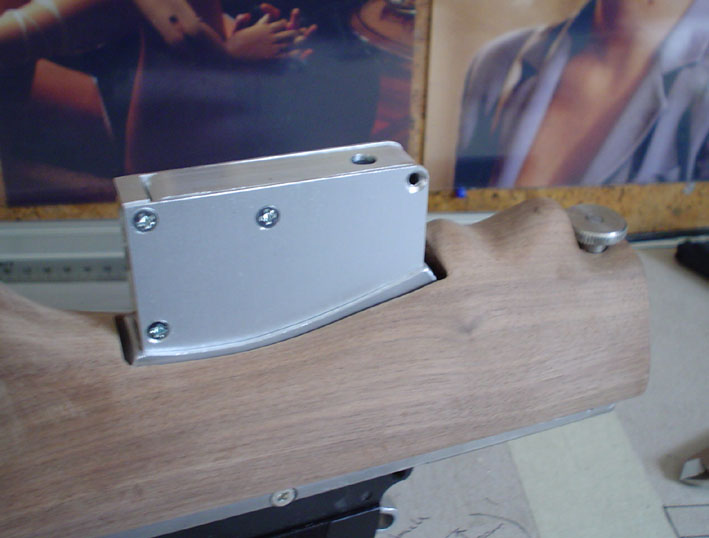
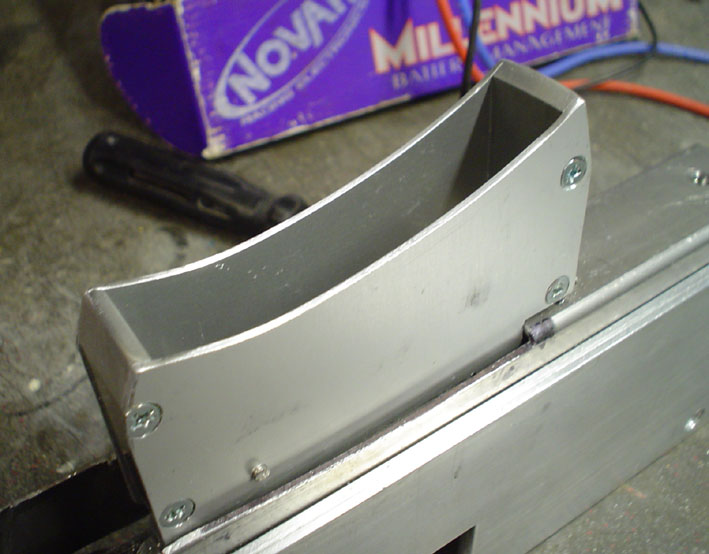
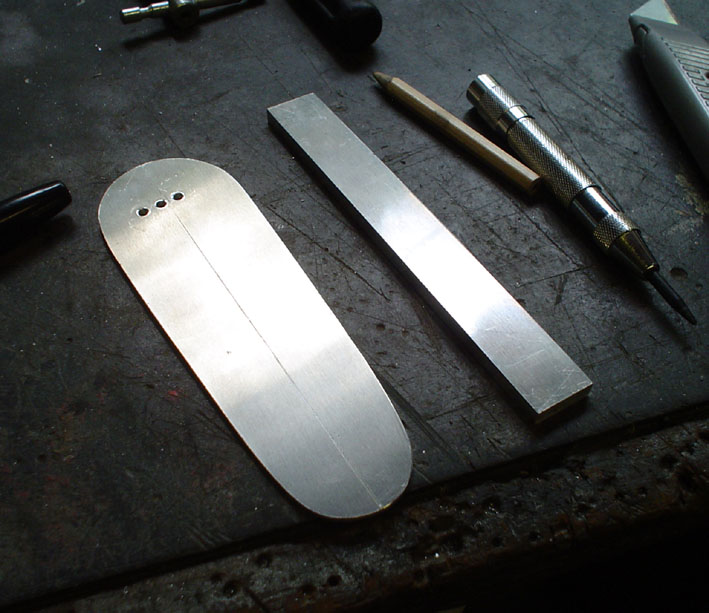
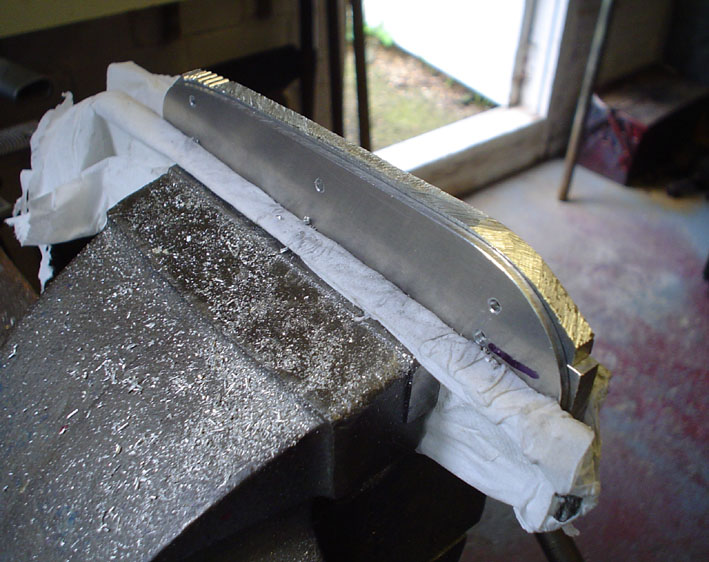
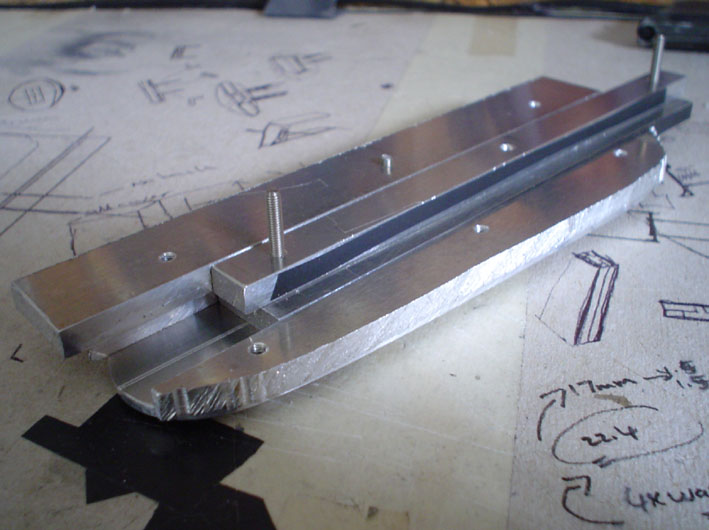
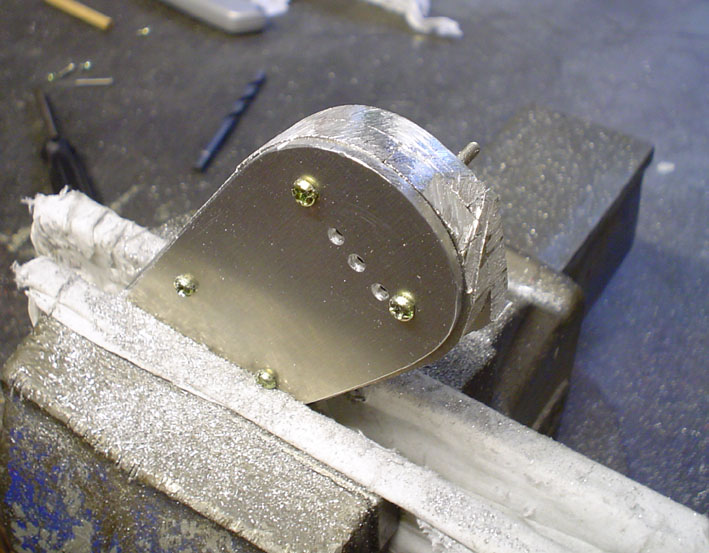
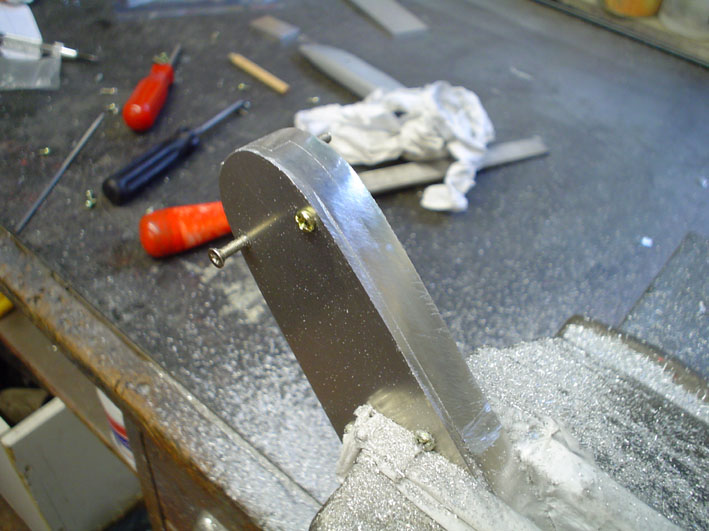
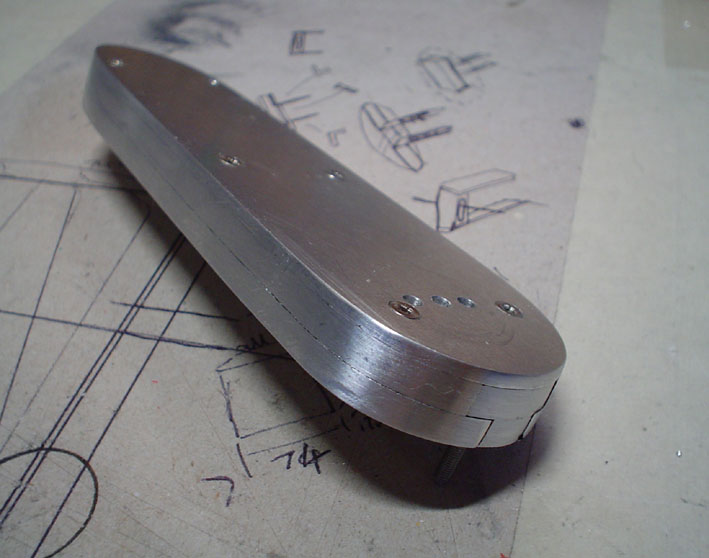
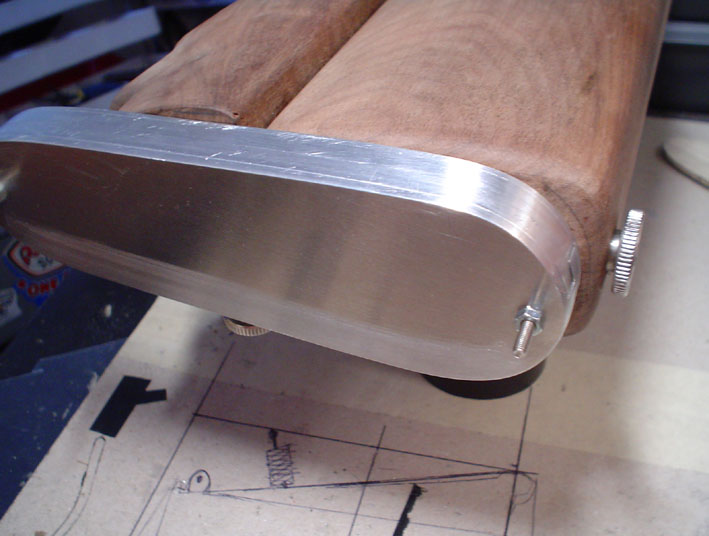
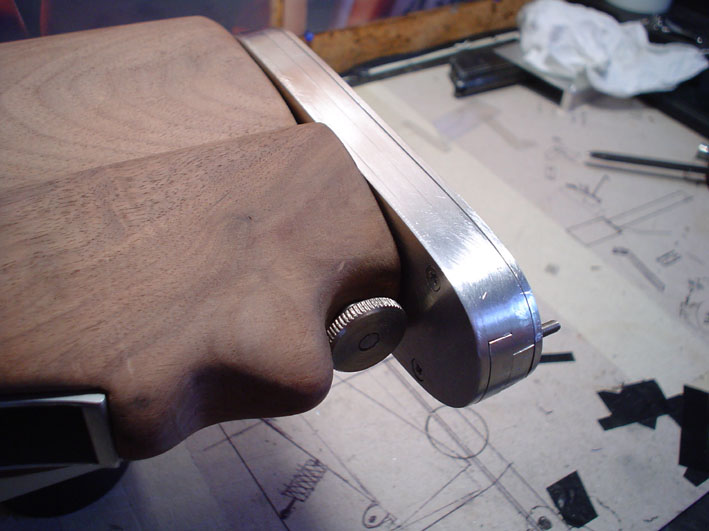
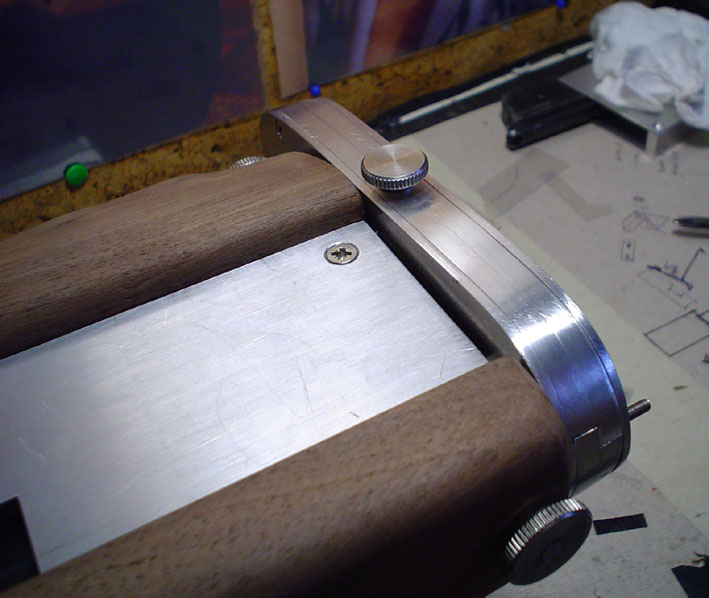
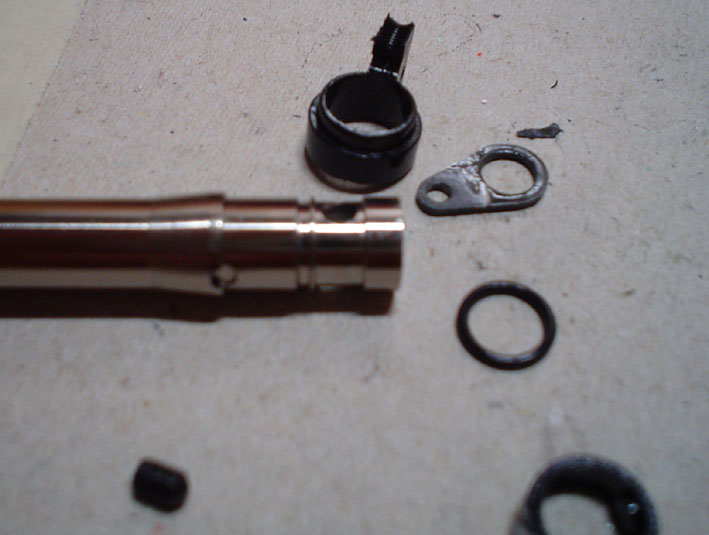
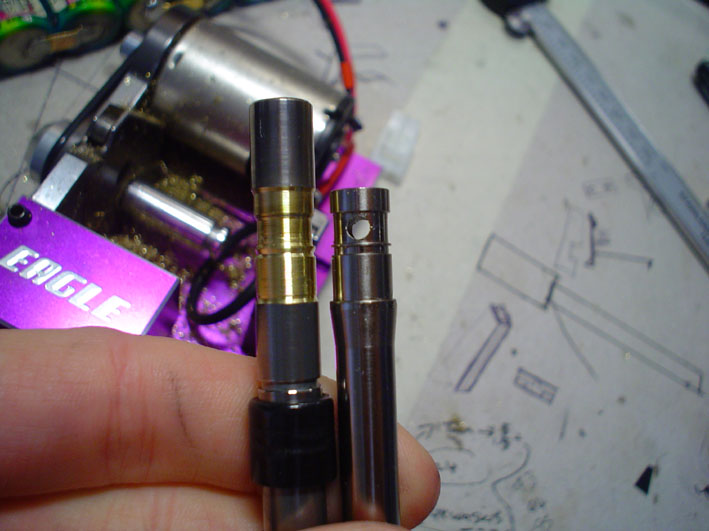
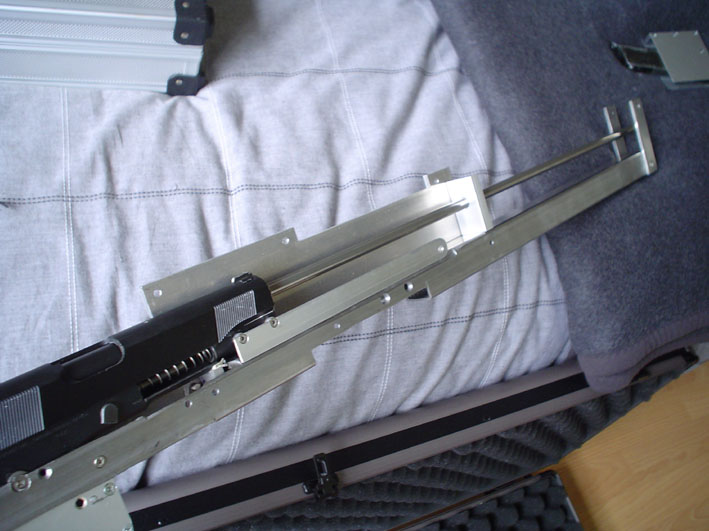
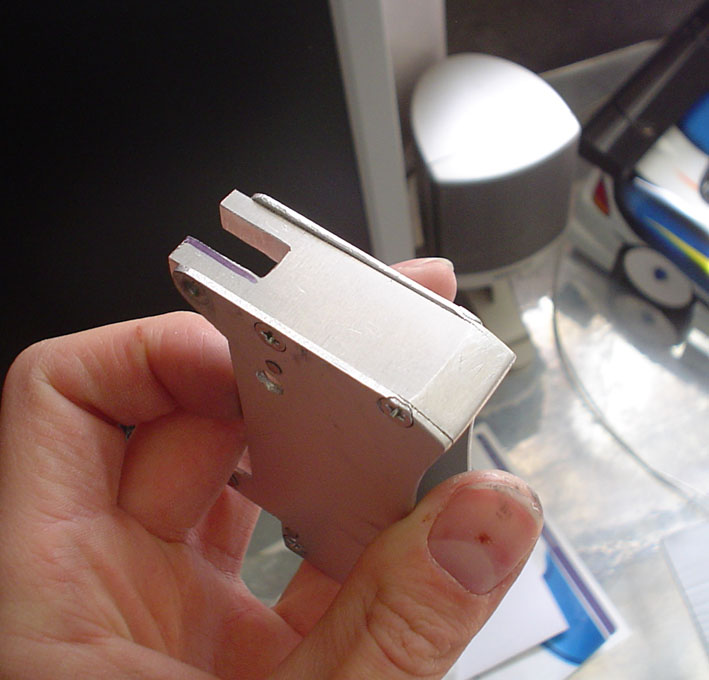
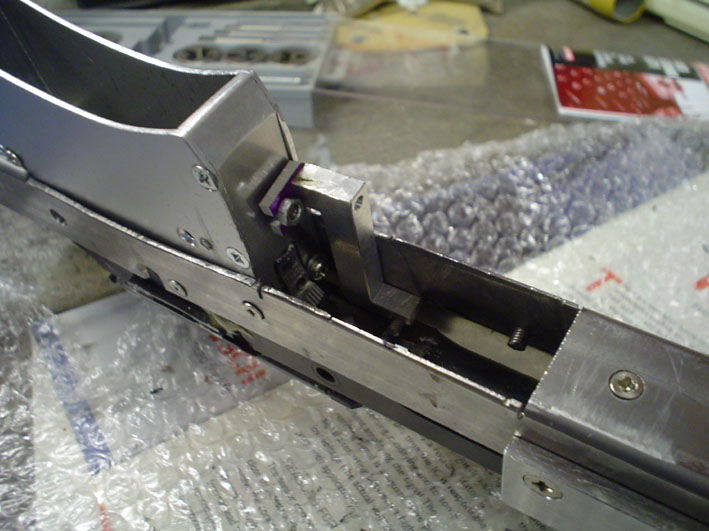
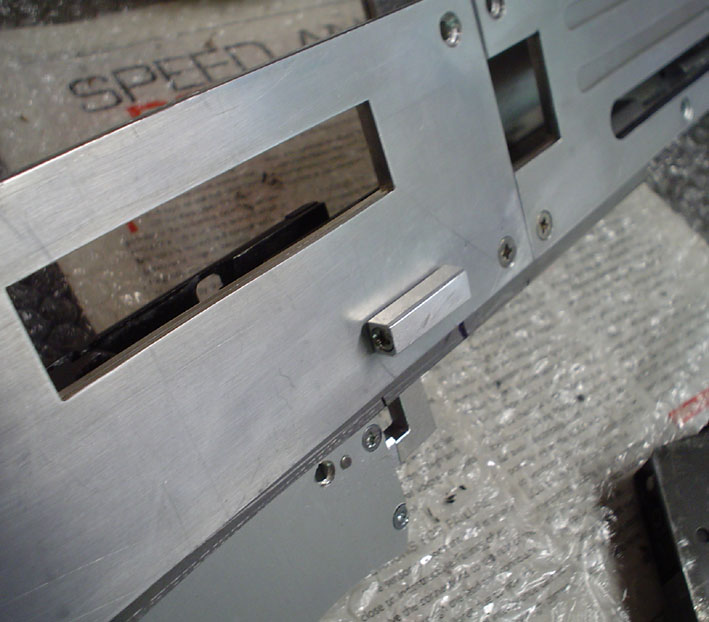
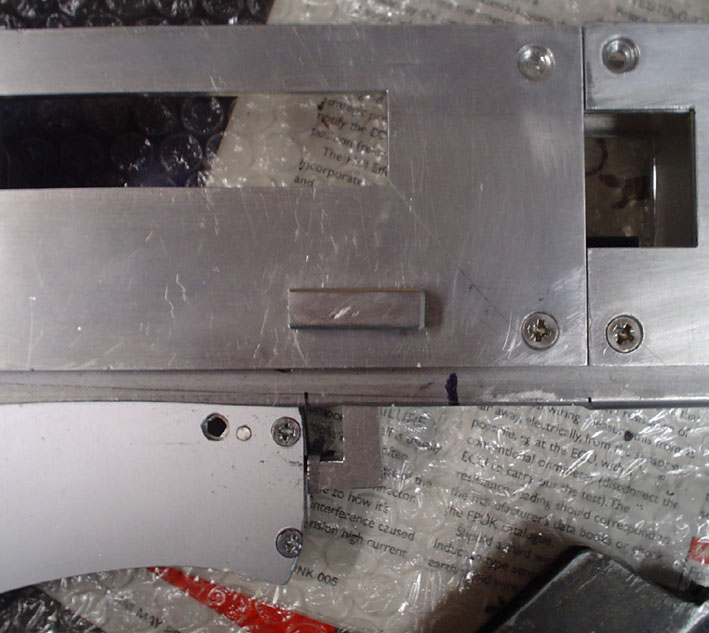
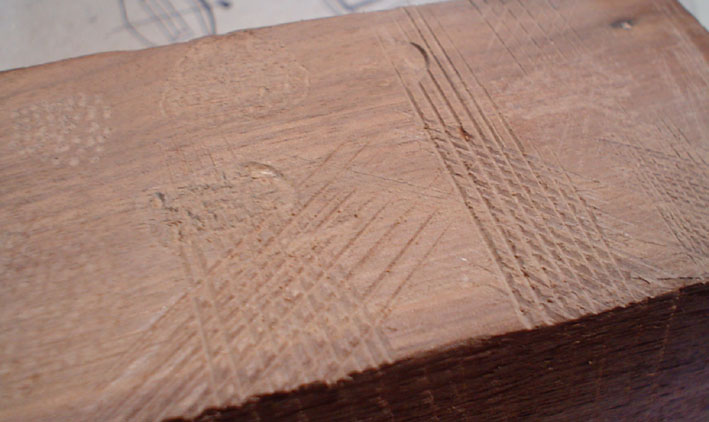
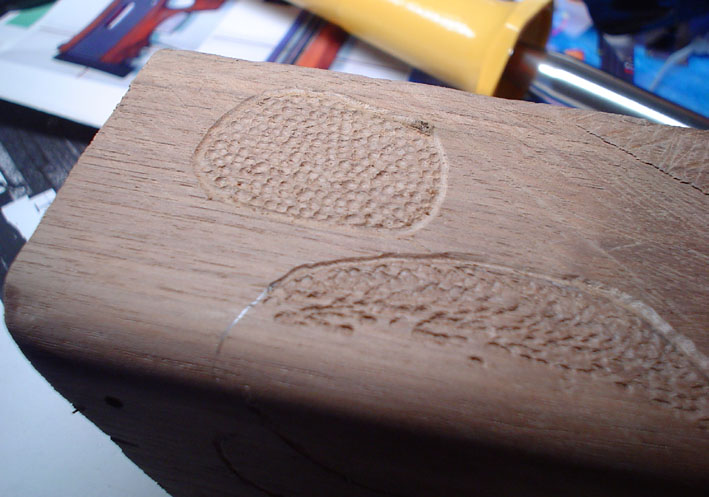
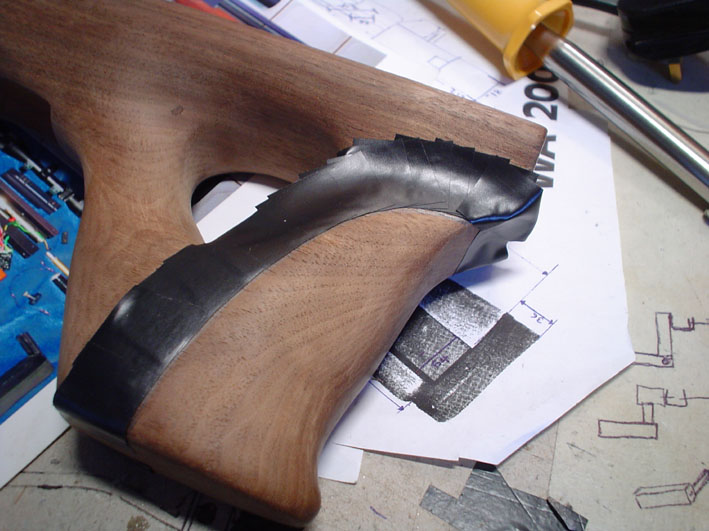
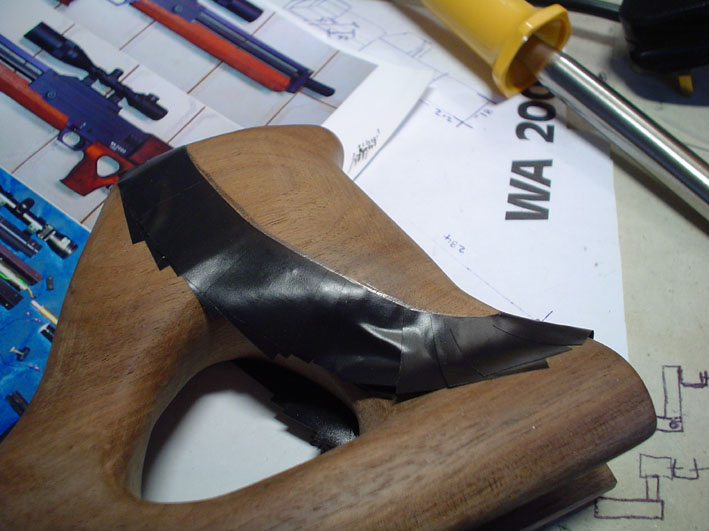
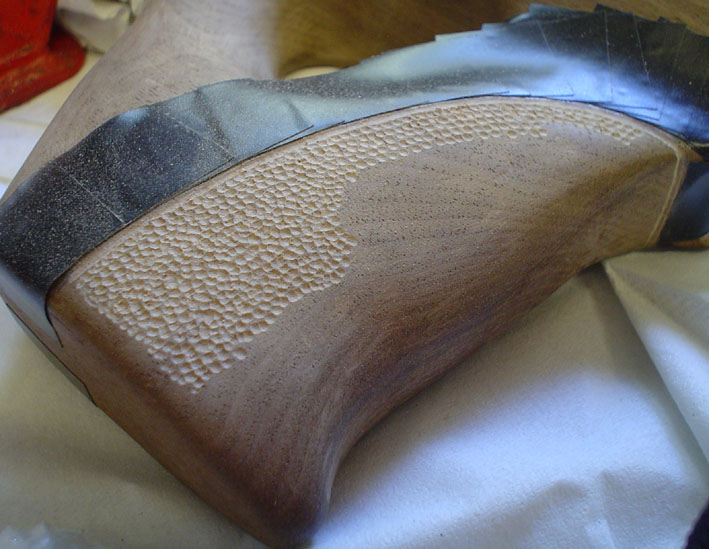
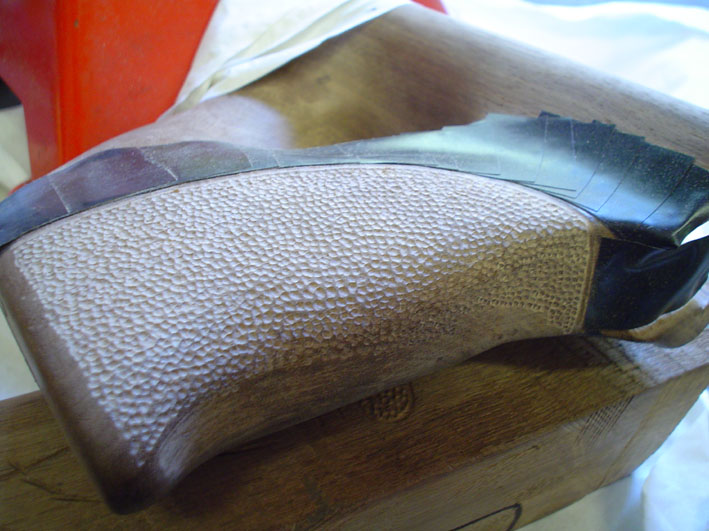
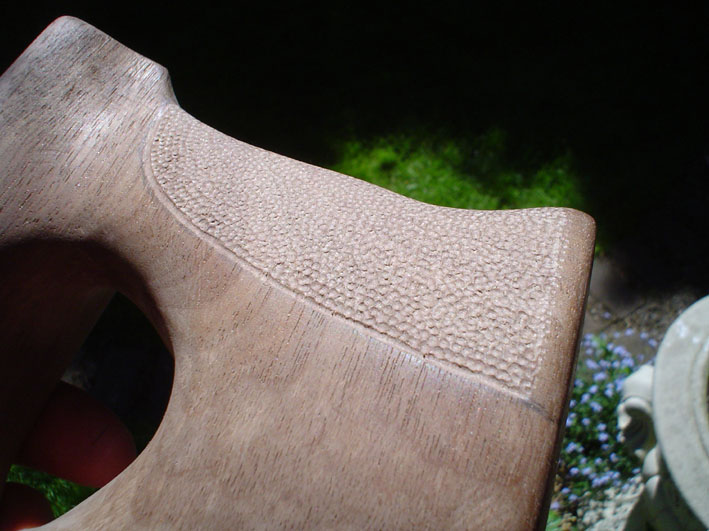
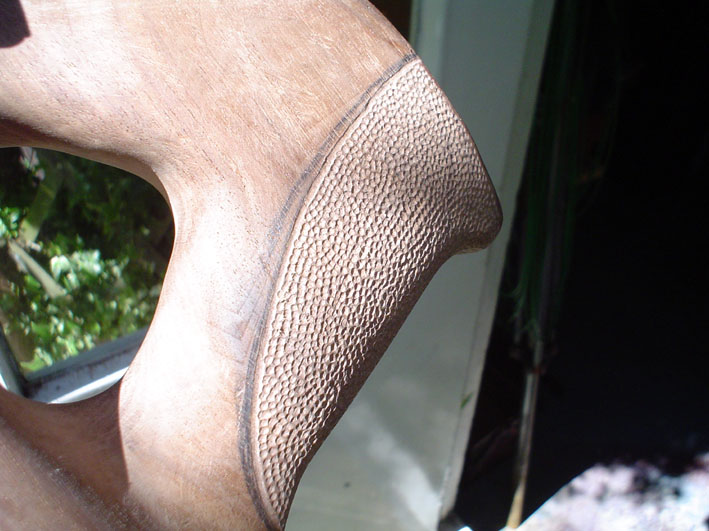
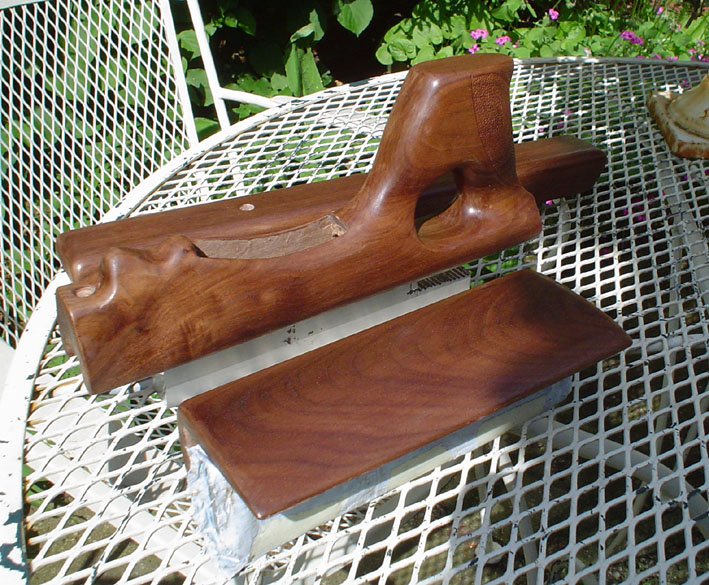
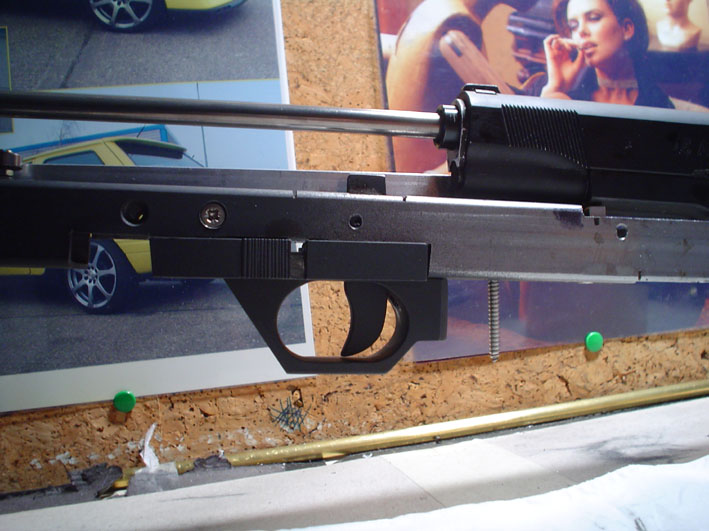
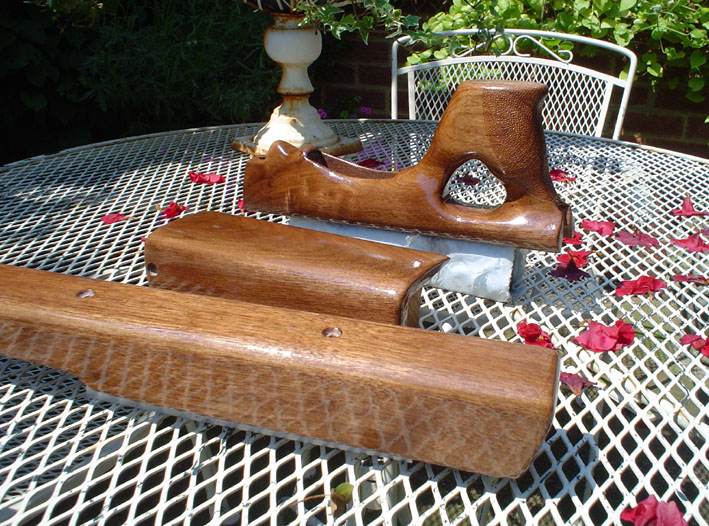
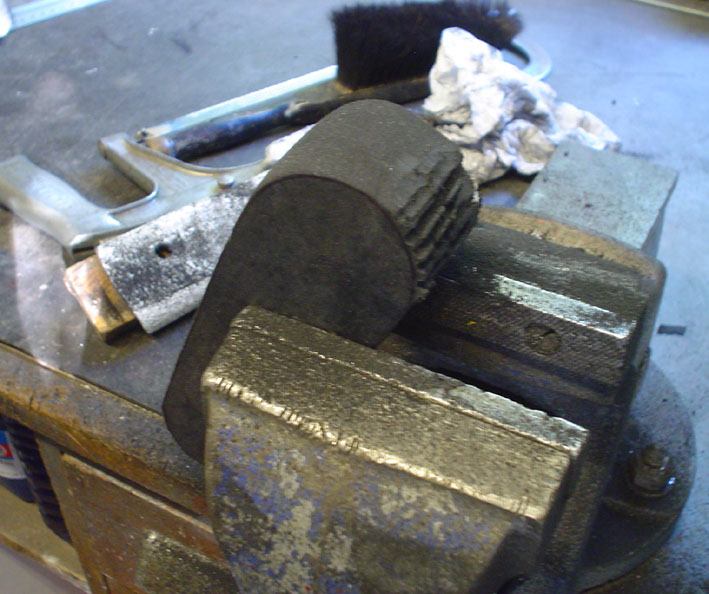
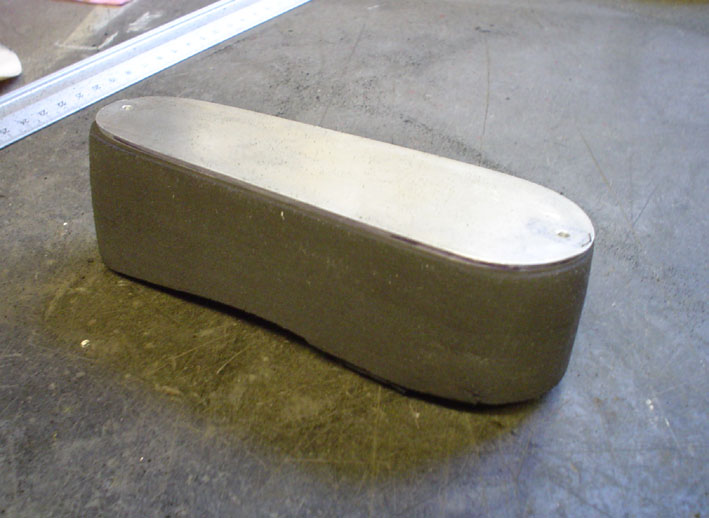
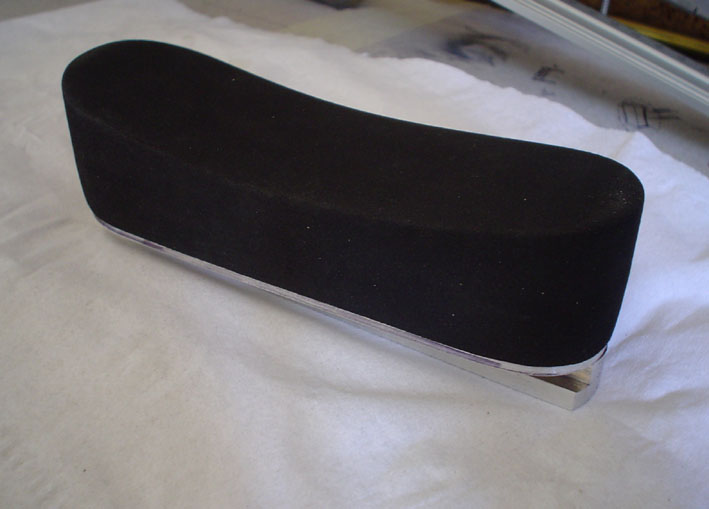
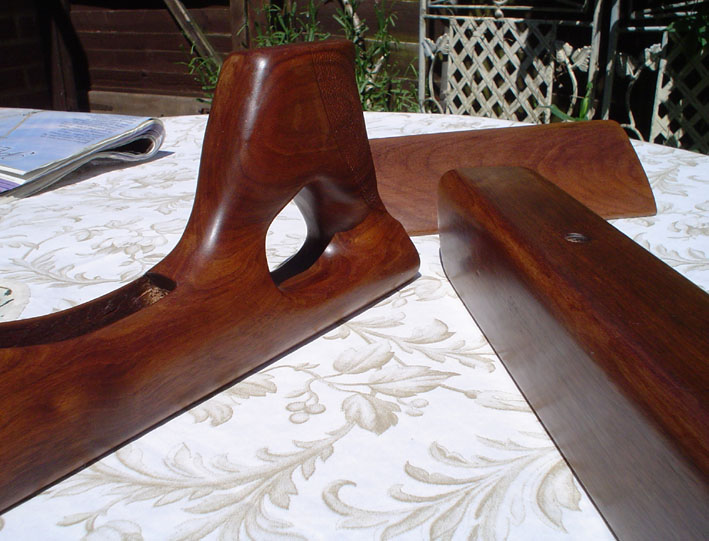
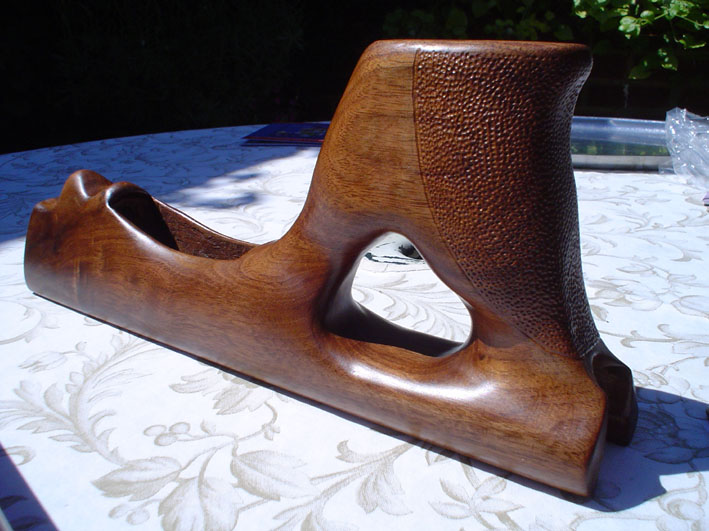
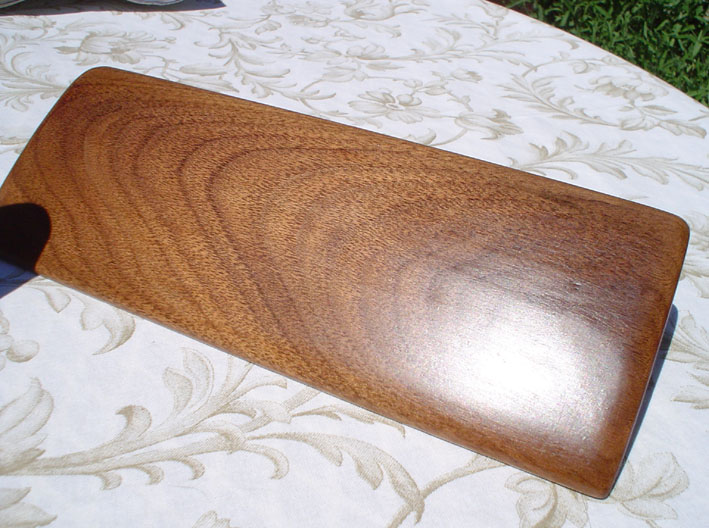
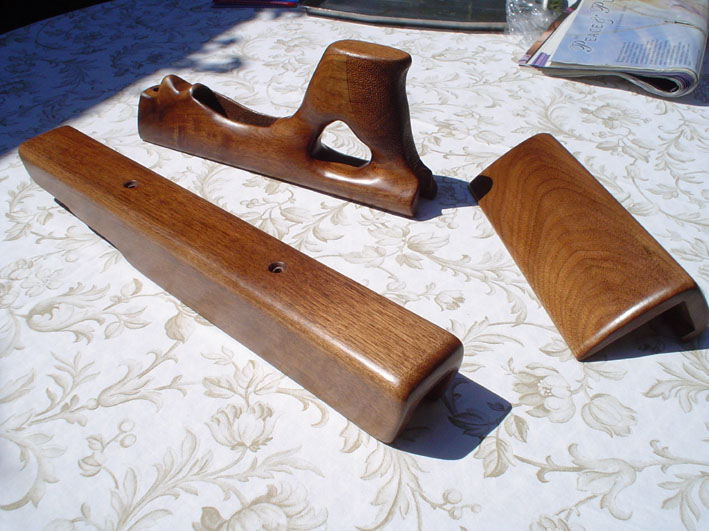
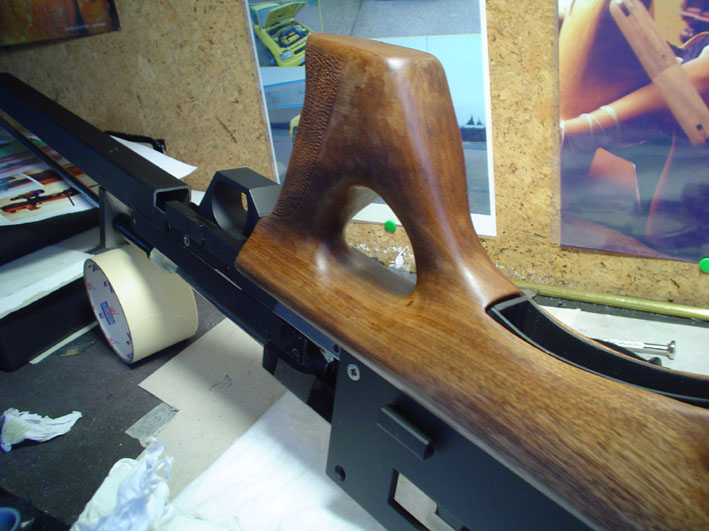
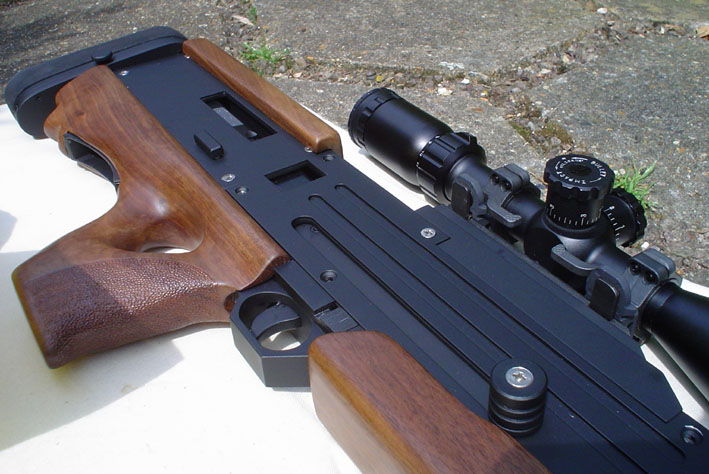
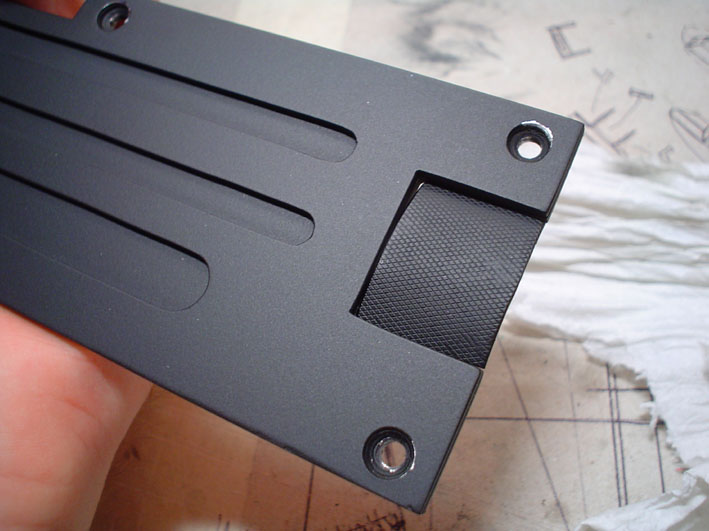
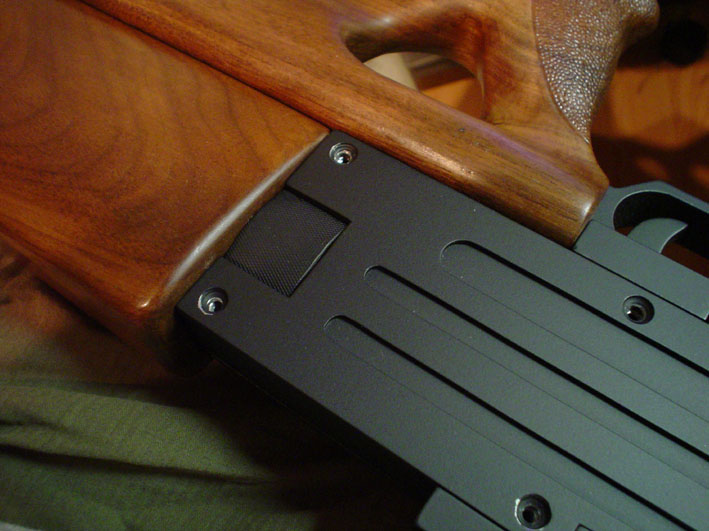
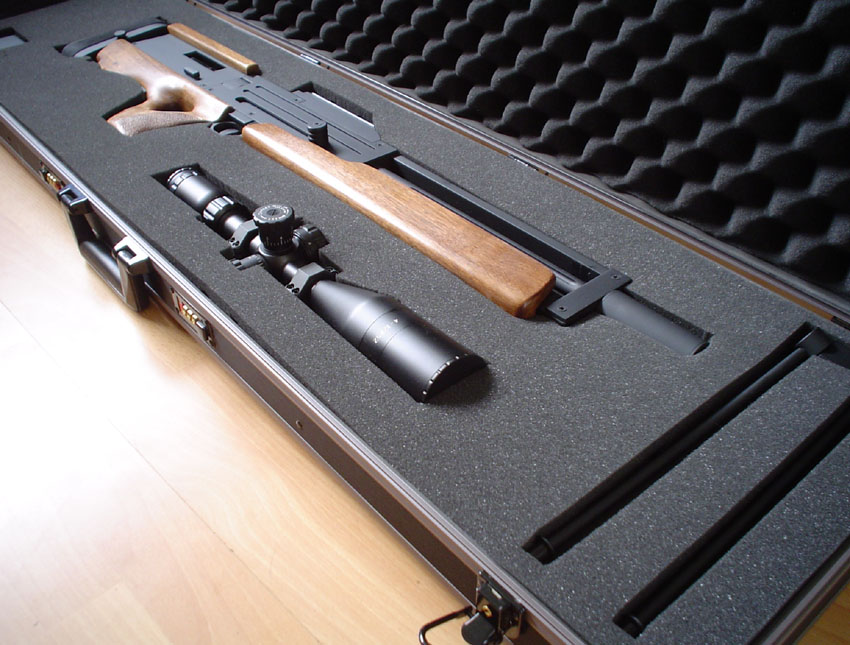
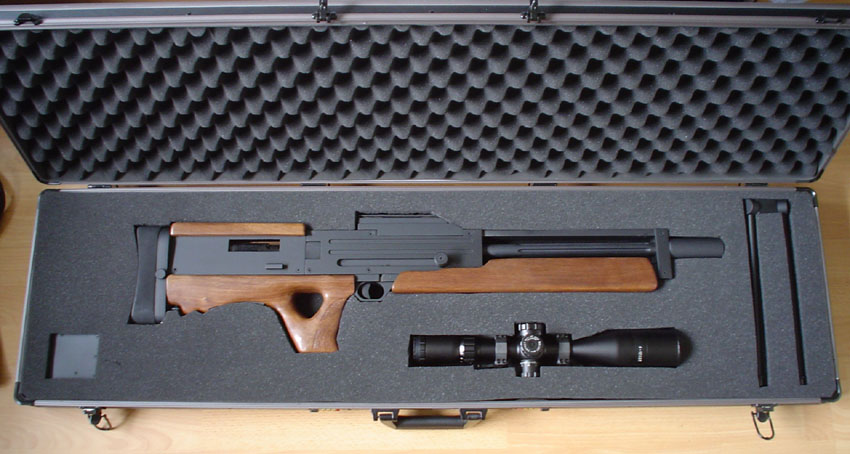
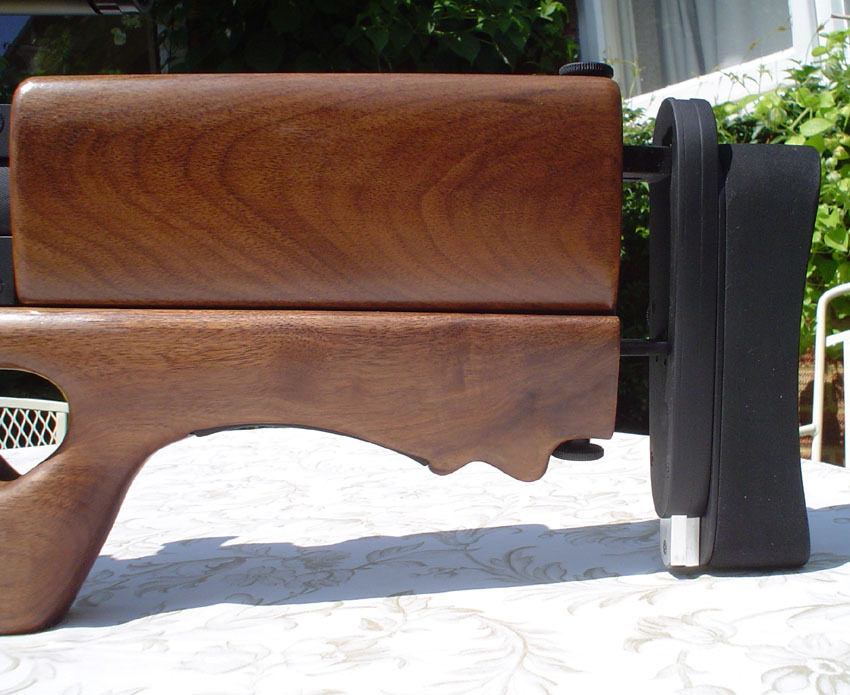
If this is in anyway copyrighted let me know and i'll take it down, I printed this out A4 size, then using the only measurement we know for sure, the length of 910mm we can scale all the other measurements. Just do 910mm divided by whatever the total length is on the printout, this will give you a golden number of about 3 point something. Any other dimension you need to know you just measure it on the printout and times by your golden number to give its real life dimension. I did this for about 40 measurements on the gun until i was happy I had enough to get on with. The joker is the width of the thing, you have to guess at this, this is where all the other pictures come into play, by careful study you can determine roughly what they are. Next I built a model out of cardboard of the metal parts of the gun just using the dimensions I had come up with to make sure it looks right and I wasn't massively out on anything. I cut the cardboard in sections as I would if I was making it in metal and this threw up some unforeseen problems, better now than after cutting the metal out! All being well I now looked round for materials that I would need, sheet aluminum I had already, some box section and bar stock I would need to get (ebay) along with the walnut (ebay) found a 20mm block of ally in the garage for the trigger guard......that'll do for now. You can see from the pictures the way the project went, they are all in order of progress. Some subtle areas of the gun I have changed, in my opinion for the better, you'll have to look bloody hard to see them as they are few and tiny but just thought I would mention it. First parts I made were the side plates, marked all these out in pen on the sheets and measured everything about 3 times before hacksawing anything out. The grooves on the side plates look as if they are milled out of a single piece. Next best thing is to use two sheets half as thick, the first with the grooves cut into it and the second as a backing plate. When stuck together it looks like a single piece and certainly will after paint. The grooves have to be 100% if not it will really show as this is a focal part of the gun. I used a big drill for the end curves to keep it consistent and then carefully filed everything smooth and flat. A lot of the outside parts of the gun need countersunk holes, you cant do this without a pillar drill really, you need to go to a consistent depth on all holes, keeping it the same gives that "factory finish" look. From the pics I decided M4 csk screws are the order of the day, I bought a bag of 50 or so, also picked up some M5 as well, you never know. Next up the trigger guard, this is another part of the gun that is very distinctive and the piece I was most worried about being able to make. As you can see from the pics I started with a slab of 20mm thick and started to hack away at it, one side at a time. Again without at least a pillar drill this is not possible to get perfect. In order to take a corner off, you cant just hacksaw it off and file it flat, it'll always be out because its just too thick, 2mm no problem, but 20mm forget it. I had to draw the line and then drill (chain drill) a series of very small holes (2mm or so) along the line, then hacksaw between them. This leaves you with the holes at exactly 90 degrees to the face of the slab, from here I filed flat between the holes until I had one flat surface thats near enough dead on 90 degrees. Hope I've explained that ok! This took about 9 hours until the basic shape was done, at this point I moved on to another part as I was getting bored with that bit. After a lot of pondering I decided the bottom part of the frame could be made out of 25x25mm box section. I drilled this in the right places and tapped the holes then started to attach the side plates. This measuring and drilling of the holes took hours, if the plates are not mm perfect then the plates will look pissed and were not spending all this time making a monkeys breakfast are we? The box section needs a few big slots cut in it to accommodate the trigger guard and where the mag well will be. Securing the trigger guard in place wasnt too tough, again drilled and tapped. The top rail of the frame is a solid bar, I measured and drilled half way into it for each side rather that just measuring one side and then going all the way through asuming the hole would be right for the other side too. As it was I measured both sides independantly and all the holes met perfectly in the middle, this is how it should/will be if you are very precise with your measurements and measure everything twice at least, its the only way to be sure thebuild is perfect. Its also important to me that everything is screwed together and so can be totally disassembled and then reassembled easily. During the build I found myself constantly taking it apart, adjusting it and putting back together, maybe 100 times so far in the build. I therefore wanted each hole to be exactly in the right place rather than a big elongated hole that needs to be "lined up" each time, this would make the taking apart and putting back together a much longer process, this way it only goes together one way. The safety catch was a long job, this could have been done in half the time with a milling machine. In this case I had to drill lots of holes close together at the same depth to remove as much material as possible and then file it flat, this is not an ewasy task the sides also had to be square and to do this all by hand with a file is a tough job. Getting the switch to slide smooth required a lot of polishing on the surfaces that touched, to get it to click into position required two dimples in the ally and then a ball with a spring behind it to locate in the dimples. Now onto the wood, cant tell you much about that really, the wood is walnut, I hear this is the wood of choice for gun stocks. This is the first time I have made anything or worked with wood since I made a little boat in middle school (age 10). It works like any other material, you get dust when sanding/dremeling which is bad so wear a mask and it comes off in slivers, its pretty soft and easy to get carried away and take too much off. Once the basic shape is cut out the shaping can be done with a dremel and a sanding drum. Takes a while but is fairly enjoyable, just the dust gets a bit much. One of the hardest things was getting it symetrical, you can make a cardboard shape and then hold it against both sides to see where you are, but its a lot to do with eye. A band saw would have saved me a lot of time here, to get the wood cut to a square block, 90 degree edges. As it was I had to level one side out to 90 degrees square, didnt matter too much but it felt sloppy to do it this way. Never the less it isnt on the wonk so it worked out ok in the end. The final finish needs to be sanded down with finer and finer sand paper as you go from 180 grit upto 1200, but this is personal preference and as i say I dont really know. I bought a gun stock finishing kit, i thought this would be best as my internet research resulted in not one good method to finish the wood but lots of different ways to do it depending on personal preference. The kit I bought contained some very fine (1200 gritt) paper to go over everything with, then a grain sealer that you dowse on to fill the big gaps in the grain. This hardens and then wire wool everything to get rid of any lumps, then its time to oil, let it soak in but dont put too much on, it needs to dry/harden/soak in. In total I put on about 5 coats of oil before deciding enough was enough. In between you need to wire wool to keep the surface smooth and get rid of anything thay may have settled on the oil when it was drying. A final buff with some rubbing oil and its pretty much there. The internals were
quite tough, mainly getting the magazine to line up and seat in the
right place, Im not going to go through all the ins and outs, the pictures
tell a better story. Basically I used a western arms pistol, they're
pretty tough guns and the model i used has a thin (single stack) magazine
which made it easier to fit in the gun. The barrel is a psg-1 650mm
item, i cut the end to shape and mated it to the WA internals without
too much of a problem. Due to the length of the barrel the gun will
benifit from higher flow valves to get more gas out per shot, this will
further accelerate the pellet down the long barrel. The other ball ache
was getting the trigger on the rifle to operate the pistol trigger,
I had to run a rod from one to the other, I struggled getting enough
movement in it to operate the pistol trigger, doing the gun again I
think I would do it differently. |
|||||||||||||||||||||||||||||||||||||||||||||||||||||||||||||||||||||||||||||||||||||||||||||||||||||||||||||||||||||||||||||||||||||||||||||||||||||||||||||||||||||||||||||||||||||||||||||||||||||||||||||||||||||||||||||||||||||||||||||||||||||||||||||||||||||||||||||||||||||||||||||||||||||||||||||||||||||||||||||